Steam is a gaming platform that users from different regions of the globe can use it. But sometimes the user faces various problems. One among them is “Steam error code 118 or 138”. This might be because of network issues, issues from the server side, a firewall might be blocking Steam, etc. In this article, let us see how to solve the error code 118 / 138 issues on Windows 10. Let us start!
Method 1: Check The Steam Server Status
Step 1: Open the browser [any browser which you prefer].
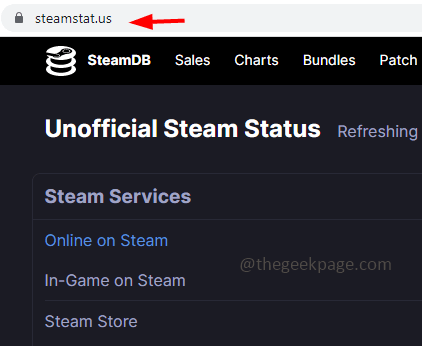
Step 2: Go to the Steam status website to check the server status
Step 3: Check if there are any issues reported from any regions of the world. If there are no issues, refresh the page and check again in a few minutes. If there are any issues reported on the website then it is the Steam server error and you do not have control over it. Wait for the issue to be solved and then check the issue to be solved. If there are no issues reported then continue with below solutions.
Method 2: Allow Steam App Through Windows Defender Firewall
Step 1: Open the run prompt using Windows + R keys together
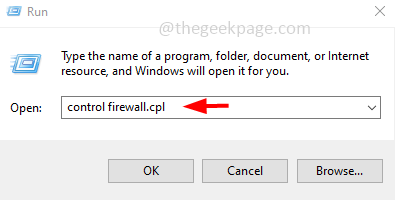
Step 2: Type control firewall.cpl in the run prompt and hit enter. This opens the Windows Defender Firewall
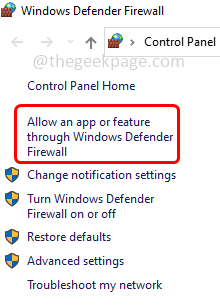
Step 3: On the left click on Allow an app or feature through Windows Defender Firewall
Step 4: Click on Change settings button
Step 5: Scroll down and find for Steam app then enable it by clicking on the checkbox beside it
Step 6: Also enable Private and Public access for Steam app
Step 7: To save the changes click on OK which is at the bottom
Step 8: Restart your computer and check if the issue is solved.
Method 3: Reset Network Settings
Step 1: Open Windows settings using Windows + I keys together
Step 2: Click on Network & Internet
Step 3: Scroll down and click on Network reset
Step 4: In the opened page click on reset now button
Step 5: Restart the system and check if the issue is solved
Method 4: Unplug And Re-plug The Power Cables
Step 1: Unplug the power cable connected to your computer and completely disconnect it from your power source
Step 2: Wait for five minutes and then again re-plug the cable
Step 3: Wait for the internet to be connected and then launch the Steam app. Now check if the issue is resolved.
Method 5: Reset Your Modem / Router
Step 1: Unplug all the power cable connected to your computer and also power cable of your router
Step 2: Wait for few seconds and then connect the router / modem to your computer
Step 3: Wait for the internet to be connected and then launch the Steam app. Now check if the issue is resolved.
Method 6: Disable All Third-party Applications
Step 1: Open the run prompt using Windows + R keys together
Step 2: Type msconfig in the run prompt and hit enter. This will open the system configuration window
Step 3: Go to the Services tab and at the bottom uncheck the Hide all Microsoft Services then click on Disable all button
Step 4: Now go to Startup tab and click on Open task manager
Step 5: Select each of the app from startup in the task manager. Then right click on them and then click on disable
Step 6: Once all the applications are disabled, restart the system
Step 7: Now run only the Steam client. Check if the issue is solved.
Method 7: Scan The Computer For Virus
If your computer is affected from malware or virus then this may be one of the reason for the app to not work as expected. Use a good anti-virus and scan your system to check if there are any virus and remove them. Then check if the issue is solved.
That’s it! I hope this article is helpful. Let us know which of the above method worked for you. Thank you!!


