Windows 10 and Windows 11 are great operating systems with tons of features but it is not the most stable one. It does have a lot of compatibility issues and errors that can be a pain for users to resolve. Scanner not working is one of the issues that many of users who update to Windows 10 faces.
If you have faced this issue and looking for a solution for frustrating error we have compiled solutions that will be helpful to fix Scanner not working in Windows 10 error.
Method 2 – Configure Scanner Services
Scanners and printers are complex hardware and need so many services to run smoothly on your computer. If one those services gets misconfigured or gets deleted scanner will not work on your system so it is necessary to check that all scanner services are configured properly.
These are the common services for any scanner, you have to check all of these service statuses are started by the following method.
- Remote Procedure Call RPC
- DCOM Server Process Launcher
- RPC Endpoint Mapper
- Shell Hardware Detection
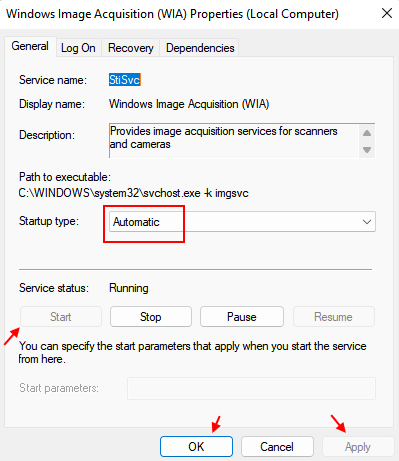
- Windows Image Acquisition (WIA)
I will show you process for Remote Procedure Call RPC service, you can follow the same process for all of these services.
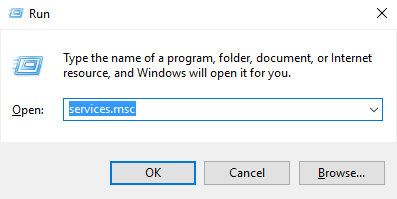
Step 1 – Open Run window by pressing Windows and R button simultaneously.
Step 2 – type services.msc in the text box and hit the enter.
Step 3 – A service window will open up with a long list of services. Locate Remote Procedure Call RPC in the list and choose properties from right click menu.
Step 4 – Check for service status, if it is stopped start the service and press the OK button.
Also, set the startup type to Automatic.

Repeat this process for all the above services to configure all the services properly for the scanner.
Method 2 – Use IrfanView
1 – Download IrfanView from here (Free and Popular Open source image Tool).
2 -Install it on your PC
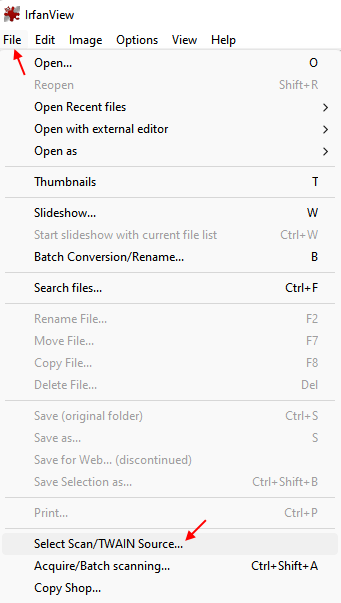
3 – Now, Open Irfan View.
4 – Click on File and then click on Select Scan/Twain source

Note: – Alternatively You can also Download and Use Vuescan although its not free completely
Method 3 – Repair Corrupted System Files
If your Scanner issue is due to the corrupted system files, repairing those files will definitely make your scanner work again on Windows 10. F0llow these steps to repair your corrupted system files.
Step 1 – Hit the Windows key and type Command prompt in the search box, right click on the first result and click on run as administrator (Make sure you are logged in with administrator account of your computer).
Step 2 – Click Yes on the prompt.
Step 2 – A Command Prompt windows will be open, type sfc/scannow and hit enter. It will start system scan and will take some time to complete.
The corrupted system files on your computer will get fixed by this process and most probably your scanner will start working. If not, try below method.

