Windows Terminal is one of the cool new apps that comes with the new Windows 11. The Windows Terminal comes with some new cool features such as grouping multiple tabs in a single terminal, using multiple terminals in a single terminal. But the most exciting feature of the Windows Terminal is hidden from the plain eyes, and can only be triggered with the JSON file modification. The transparent background feature makes the terminal background completely transparent irrespective of any background color you are using.
Modifications in the Windows Terminal
These are modifications you can perform in the Windows Terminal.
1. You can enable/disable the transparency effect in the terminal.
2. Adjusting the level of transparency effect.
3. Specifically enable/disable transparency effect for specific terminals.
Follow these instructions to adjust the level of transparency.
How to make the Windows Terminal background transparent in Windows 11
Just follow these easy instructions to enable the transparency effect in the Windows Terminal.
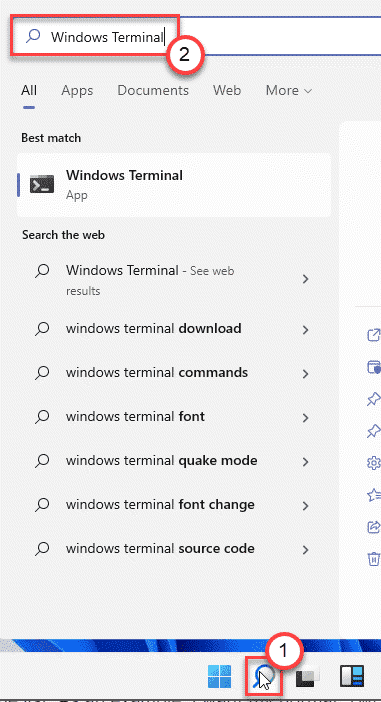
1. First of all, click on the search box. Then, type “Windows Terminal“.
2. Next, click on the “Windows Terminal” to access it.

3. When the Windows Terminal opens up, click on the drop-down and click on the “Settings“.

4. Then, on the right-hand corner, click on the “Open JSON File“.

5. Now, you will be asked how you want to open the JSON File.
6. Click on the “Show apps“.

7. Next, choose the “Notepad” from the list.
(You can even select any other text editor like – ‘Notepad++’)
8. Then, click on “OK“.

This will open up the JSON file in the text editor.
9. Now, scroll down through the code and get to the –
"profiles":
{
   "defaults:"
     {
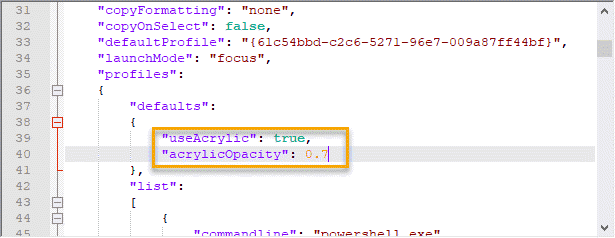
10. Here, paste these two lines in the code –
“useAcrylic”: true, “acrylicOpacity”: 0.7
The code should look like this –
"profiles":
{
"defaults":
{
"useAcryclic:": true
"acrylicOpacity": 0.70
},
"list":

11. Now, press the Ctrl+S keys together to save the modification.
Close the Notepad window. You don’t even have to close and relaunch the app. It will load the changes simultaneously.
Open a new tab and see the changes yourself.
How to alter the level of transparency feature of the Windows Terminal
Once you have successfully enabled the transparency feature of the Windows Terminal, you can alter the level of transparency according to your choice.
1. Open the Windows Terminal from the search box.
2. Again, click on the drop-down icon on the title bar and click on “Settings“.

3. Again, tap on the “Open JSON file” on the left-hand side to access it.

4. Then, scroll down through the lines to this location –
“profiles”:
{
“defaults”:
{
“useAcryclic:”: true
“acrylicOpacity”: 0.70
},
“list”:
5. Now, alter the value of “acrylicOpacity“.
This value varies from 0 to 1. You want to set a lower value set the value to 0.4. If you want a higher background blur set it to 0.8.
Example –
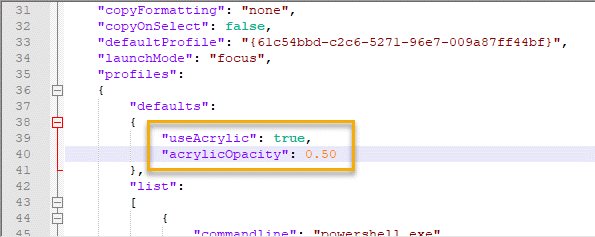
We have set the background blur to “0.50“. The code will look like this ~
"profiles":
{
"defaults":
   {
      "useAcryclic:": true
      "acrylicOpacity": 0.50
 },
"list":

6. Finally, press the Ctrl+S keys together.
Now, check the level of transparency in the Windows Terminal, again. You will definitely change the level of background blur.
How to enable transparency effect for a specific terminal
What if you don’t want the transparency effect for a specific terminal (like Command Prompt), follow these steps.
1. Open the Windows Terminal on your computer.
2. Then, press the “Ctrl” key and the “,” keys together.
3. This will open up the Settings window.
4. Then, scroll down and tap on the “Open JSON file“.

5. Now, scroll down through the source code to locate the “Lists” section.
Here you will find the list of terminals available that you can currently access from the Windows Terminal.
6.
