Whenever you are looking for any application or anything using windows search, it will show you the application or any run command or any related information. It also displays the search the web results which will lead to browser showing the results from search engine by Microsoft. Many windows users have expressed their opinion that they do not like to see the search the web results on their start menu and they are not able to disable it on their system. We have then analyzed this issue and came up with 2 ways by which anyone can disable search the web results on their windows system. This post will help you on how to do it.
How to Disable Search the web results in Windows 11 Using Registry Editor
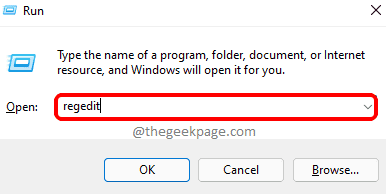
Step 1: Press Windows + R keys together on your keyboard to open Run dialog box.
Step 2: Type regedit in the run box and press the Enter key to open Registry Editor.
Step 3: Accept the UAC prompt by clicking Yes to continue.

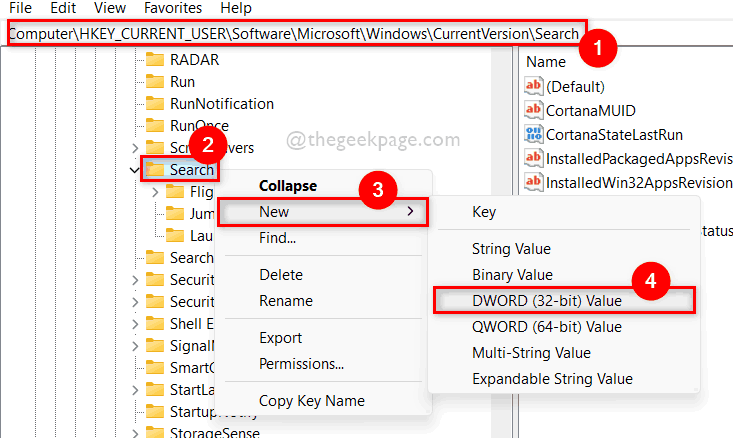
Step 4: Copy and Paste the below path in the empty address bar of the registry editor and press the Enter key.
Computer\HKEY_CURRENT_USER\Software\Microsoft\Windows\CurrentVersion\Search
Step 5: After reaching the Search registry key, Right click on Search and hover over New option from the context menu.
Step 6: Then, select DWORD (32-bit) Value from the list as shown in the below image.

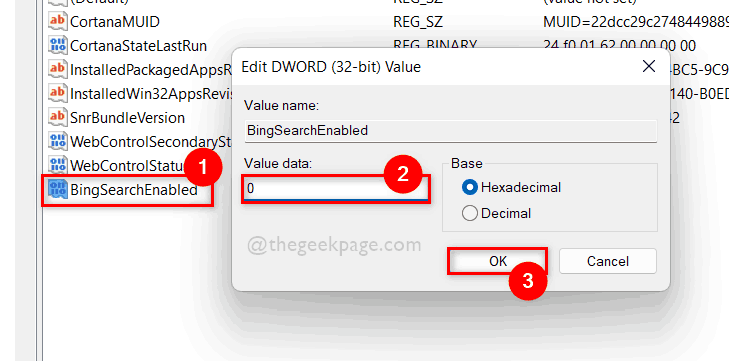
Step 7: Rename the newly created DWORD value to BingSearchEnabled.
Step 8: Double click on BingSearchEnabled DWORD value and enter the value 0 in the Value data field.
Step 9: Once done, Click OK to apply and close the DWORD Value window.

Step 10: Close the registry editor window and restart your system once.
That’s all… This way you can disable search the web results on your system using registry editor.
How to Disable Search the web results in Windows 11 Using Local Group Policy Editor
Step 1: Press Windows + R keys together on your keyboard to open Run dialog box.
Step 2: Type gpedit.msc in the run box and press the Enter key to open Local Group Policy editor.
Step 3: Browse till Windows Components using given path below.
Computer Configuration > Administrative Templates > Windows Components.

Step 4: Scroll the Windows Components list and click on Search option on the left side of the editor window as shown below.
Step 5: Then on the right side, look for Do not allow web search and double click on it to open it.

Step 6: In the Do not allow web search Window, Select Enabled option and then, Click Apply and OK to make changes as shown in the below image.

Step 7: After doing this, make sure you have selected Search on the left side of the editor window.
Step 8: Then, Double click Don’t search the web or display web results in Search option to open it.

Step 9: Click Enabled radio button on the Don’t search the web or display web results in Search window as shown below.
Step 10: At last, Click Apply and OK to make changes and close the window.

Step 11: Once done, Close the Local Group policy editor window.
Step 12: Reboot your system once and see the search the web is not displaying anymore.
That’s all. This is how you can disable the search web results in Search on your windows 11 system using local group policy editor.
Hope you liked this post and found it useful and informative.
Please let us know in the comments section if you have any doubts or queries.
Thank you for reading!