Many times you might have faced trouble when dealing with tables in Microsoft Word. The difficulty in moving them around, creating multiple tables side by side, having the flexibility to neatly arrange the tables once they are created, everything adds up to the list. The solution lies in text boxes. Wondering what’s the connection between text boxes and tables? Don’t cook your brains anymore, we are right here to help!
Read on, to learn how you can easily create multiple movable tables and easily place them side by side. Everything is possible with the help of a simple hack. Can’t wait to figure out what it is? Dive straight into the article then!
Solution
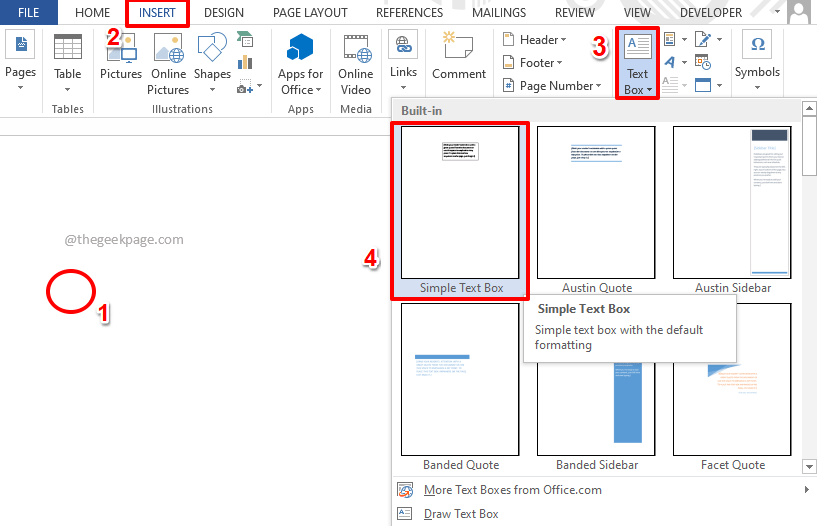
Step 1: Click on the point where you want to insert the table at.
Now, click on the INSERT tab from the top ribbon.
As next, click on the Text Box dropdown button located under the INSERT options.
From the list of text box options available, click on the one that says Simple Text Box.
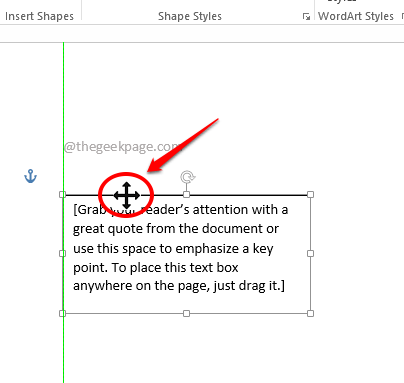
Step 2: Move the mouse cursor closer to the borders of the text box. Now your mouse cursor will turn to a cross.
Click and drag on this cross icon to move the text box around.
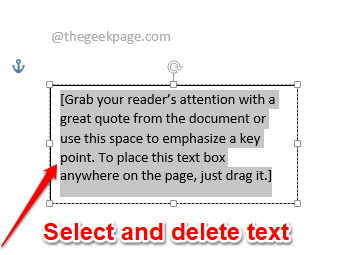
Step 3: Once the text box is placed properly, simply click anywhere inside the text box to select the entire text.
Once the text is selected, hit the Delete button to delete the whole content.
Step 4: As next, click on the INSERT tab at the top ribbon once again. This time, click on the dropdown button named Table and then choose the number of rows and columns for your table.
Step 5: You can now see that your table is inserted inside your text box. But the borders of the text box are visible, let’s get rid of that.
Click and drag the small square hollow resize icon on the bottom border of the text box to decrease or increase the size of the text box.
I have used the resize icon to match the height of the text box with that of the table inside.
Step 6: Now click anywhere on the table or on the text box to view the contextual tab DRAWING TOOLS at the top. You will also see the FORMAT contextual sub-tab under it.
Click on the FORMAT tab first and then click on the Shape Outline dropdown button available under it.
Step 7: From the list of options available, click on the No Outline option.
Step 8: The borders of the text box are now gone, making your table look like it’s all there by itself.
Step 9: Similarly, you can insert as many tables as you want, all side by side! You can move them using the invisible text box container. Enjoy!
Please tell us in the comments section whether you could successfully insert tables side by side in your Word document, following the steps in our article.
Please do come back for more amazing tricks, tips, how-tos, and hacks!


