If you have 2 Word documents, and you have to compare them, what you normally would do is open one, read it, minimize it, open the other, read it, minimize it, and so on. Well, this indeed is painful, even thinking about the process kills me. But it doesn’t have to be a torture anymore. What if we say you can open both the documents at once and have them perfectly aligned side by side so that you can compare them both at the same time without any headache? Sounds too good to be true? Well, be ready to be surprised then!
In this article, we detail about the View Side by Side feature of Word, using which you can easily compare 2 documents at once. Read on, to learn how you can master this amazing Word hack.
How to View and Compare Word Documents
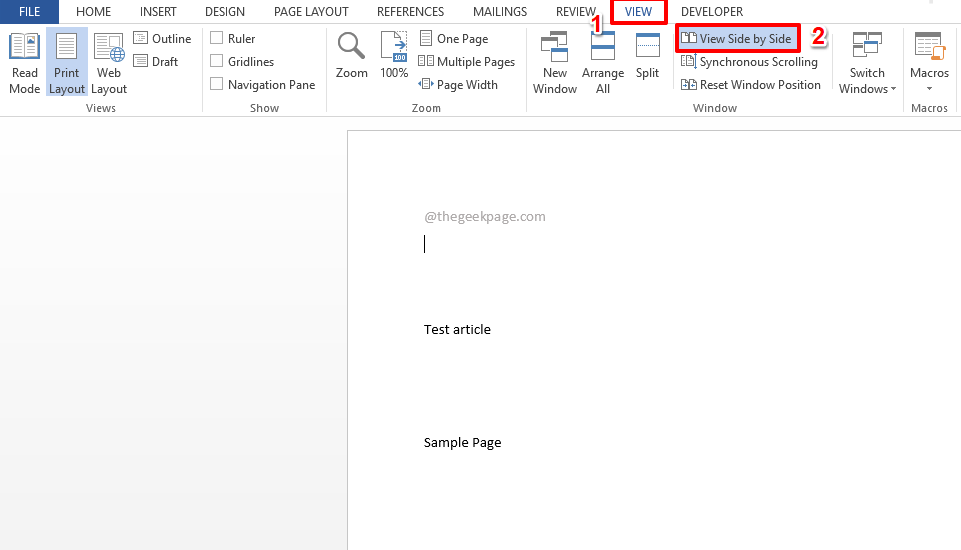
Step 1: Once you have opened the Word document, click on the VIEW tab from the top ribbon.
If you have more than one Word document open, then under the VIEW tab, the button View Side by Side will not be greyed out. Click on it.
Note: If only one Word document is open, then this button will be greyed out.
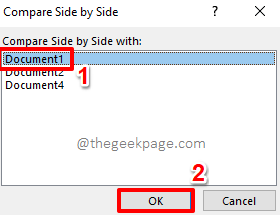
Step 2: If only 2 Word documents are open, then both of them will be instantly shown side by side so that you can start comparing them. But if more than 2 Word documents are open, then you will get a window named Compare Side by Side, where you have to choose the document that you want to compare with the document that you have already selected.
Click on the document that you want to compare and then hit the OK button.
Step 3: That’s it. Your documents are now perfectly aligned side by side for you to compare them with ease. Now is the time to relax!
Please tell us in the comments section how much your life has changed after you discovered this super cool Word hack.
Stay tuned for more amazing tips, tricks, and how-to articles.


