MS Outlook is a very popular email client that can be used to browse through different email accounts. By default, when an account is configured in the outlook for the first time, a profile is created automatically. Most people use only one profile in Outlook. One mail profile can hold up to 10 email accounts. At times, having more than one profile helps. For example, if you want to segregate the personal email accounts and the email accounts related to work, you can create a profile for each. Also in cases where a single PC is used by many users, the account data and settings can be kept separated by using different mail profiles.
This article will help if you are planning to create a new Outlook profile for any of the following reasons,
- You are new to outlook and want to create a New Profile
- The existing Outlook profile is corrupted.
- The existing Outlook profile is not working
In this article let us see how to create a new profile in outlook ad also discuss how to import the existing Outlook pst file in detail.
Creating a New Outlook Profile
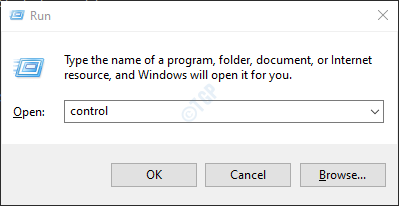
1. Open the Run Dialog holding Win Key+r simultaneously
2. In Run Dialog, type control and hit Enter

3. In the search bar located at the top right corner of the Control Panel window, type Mail. Click on the Mail option as shown below

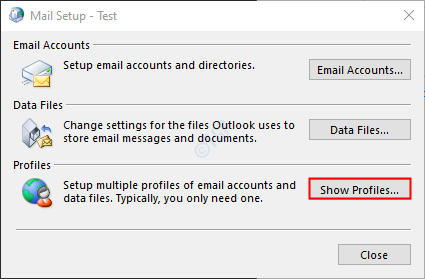
4. In the Mail Setup window that opens, click on the Show Profiles button as shown below

5. Click on the Add button

6. A window pops-up, give the required name, and press Enter

6. Add Account window shows up, Fill in your details as shown below and click on Next
NOTE: You can even opt to set up the Account later.

7. Complete the wizard following the instructions shown.
8. Select the newly created Profile

NOTE: You can choose Prompt for a profile to be used if you are configuring the secondary profile.
9. If you have not yet set up your email account in Outlook. You can do it by Opening the MS Outlook application.
10.Click on File Menu Option

11. In the window that shows up, from the Info tab, click on Add account.

10. Enter your Email id and press on Connect. Follow the instructions shown to add the account.

This simple and new profile can be created.
Importing an Existing PST file
By default, a new pst file will be created and linked to an email account associated with the newly created profile. For some reason, if you want to link it with the previous pst file from your system you can do so.
Important points about pst files:
- The .pst file is stored with the following names
- Outlook.pst in the old Outlook versions ( up to 2010 versions)
- mail_id.pst in the newer Outlook versions(2013 and beyond versions) Eg: [email protected]
- The default location of the .pst file is different from one version to another
- Older Outlook versions(up to 2010 versions) store the .pst file in C:\Users\%username%\AppData\Local\Microsoft\Outlook\Outlook.pst
- Newer Outlook versions( 2013 and beyond) store the .pst file in C:\Users\%username%\Documents\Outlook Files\mail_id.pst
Steps to be followed to import an existing pst file
1. Open the MS Outlook Application
2. Click on File from the top menu options

3. Click on Open & Export located on the left-hand side.
4. Click on Outlook Data File

5. Browse to the required pst file location
6. Select the required pst file and click OK

That’s All.
We hope this article has been informative. Thank you for Reading.