Large applications, sometimes end up using more CPU in windows operating system. The more CPU used by the applications, the slower will be the system performance. But when the applications which are not necessarily need to be open on the system, is consuming more CPU then the best solution is to close that application and you can see that the system has improved its performance. So if you are wondering how to know which application is using more CPU on your system, this post will help you on knowing how to do.
How to Check which Process is Consuming More CPU in Windows 11
Step 1: Right click on the Start button on the taskbar.
Step 2: Select Task Manager from the context menu.

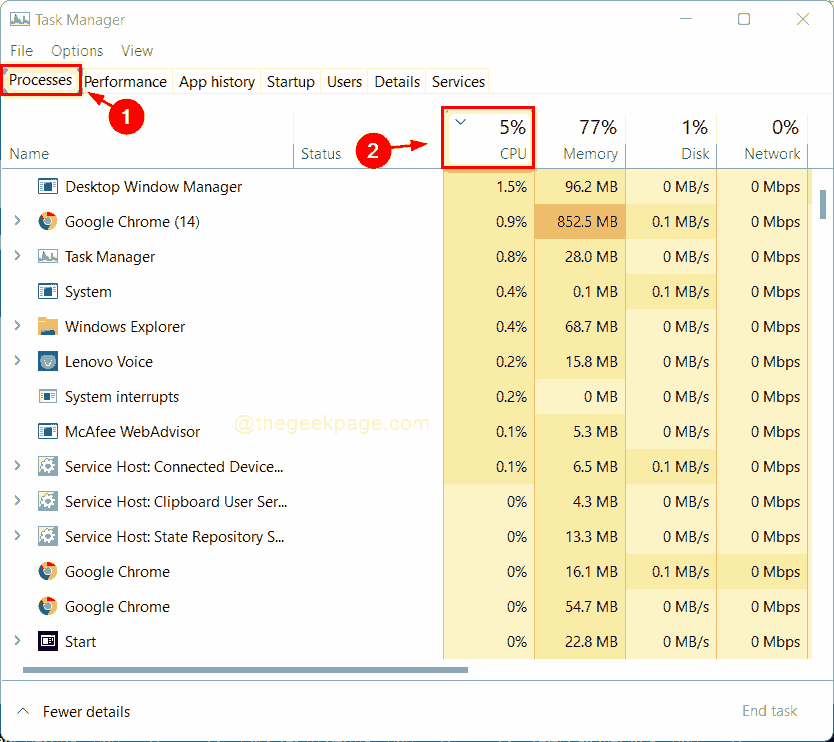
Step 3: Select Processes tab and Click CPU column header once so that all the applications that are using CPU are listed in descending order.
So the highest CPU consuming application will be at the top of list.

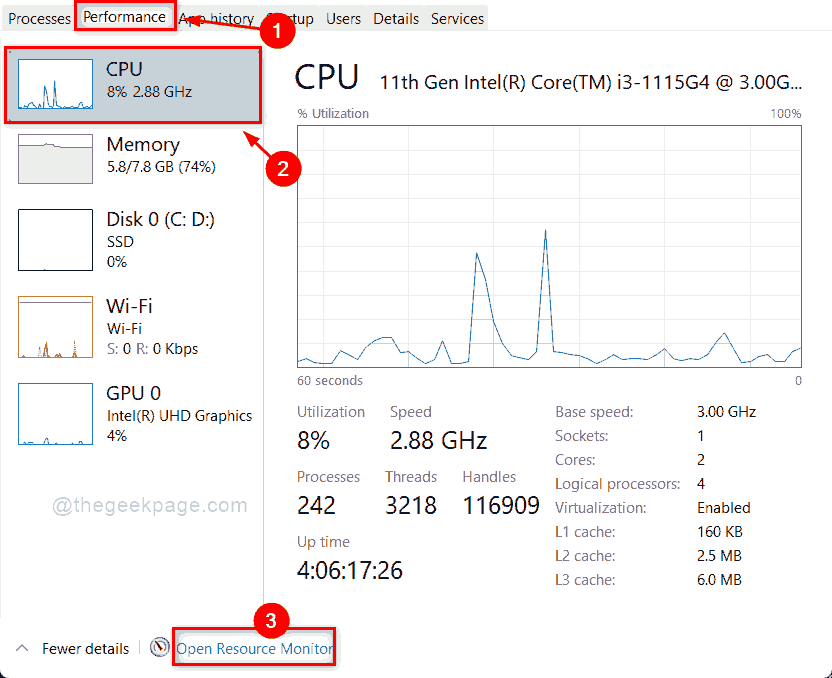
Step 4: Then, go to Performance tab and click CPU on the left side of the window.
Step 5: Click Open Resource monitor link at the bottom of the window as shown in the below screenshot.

Step 6: Select CPU tab and click CPU column header once and you will get to see the application using more CPU at the top of list.

Step 7: If you want to check Average CPU, then click on Average CPU column header as shown below.

Step 8: Close the resource monitor and Task manager windows.
That’s it.
This is how you can check which processes are using more CPU on your system.
Please let us know if this post was helpful in comments sections below.
Thank you for reading!