Changing Date & Time of your PC/Laptop on your Windows 10 is a simple task. In this article, we’ll know how to change Date and Time on Windows 10.
Also see: – Enable Multiple clocks of different timezones to show together
Method 1: Modify through PC Settings
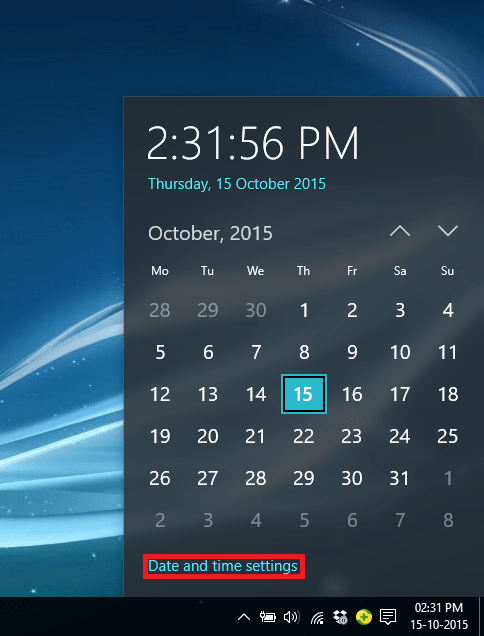
Click on the current “Date & Time” on the lower right corner of the screen. It will result in the formation of a large monthly calendar displaying the current month. Click on “Date & Time Settings”.

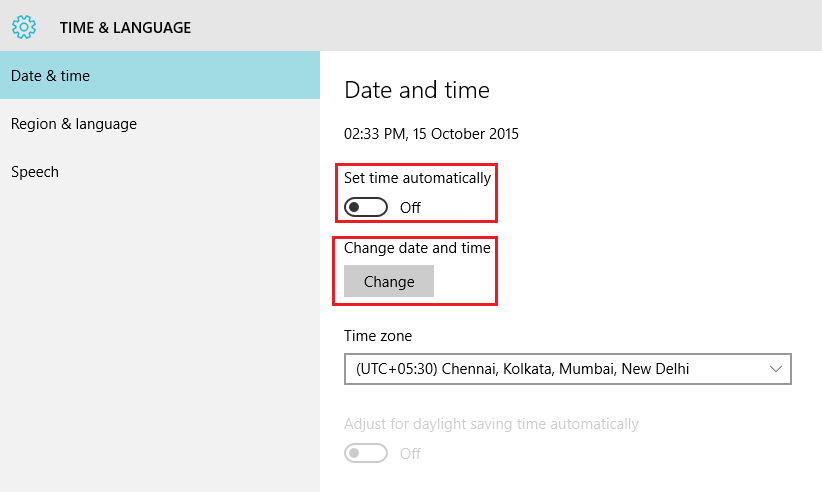
This will open the “Settings” App. The settings app contains all the primary settings of Windows 10 & it is likely to replace Control Panel in near future.

In “Date & Time settings”, Date and Time can be configured only when “Set time automatically” is “OFF” and then you can click on “Change” under the heading “Change Date & Time”.

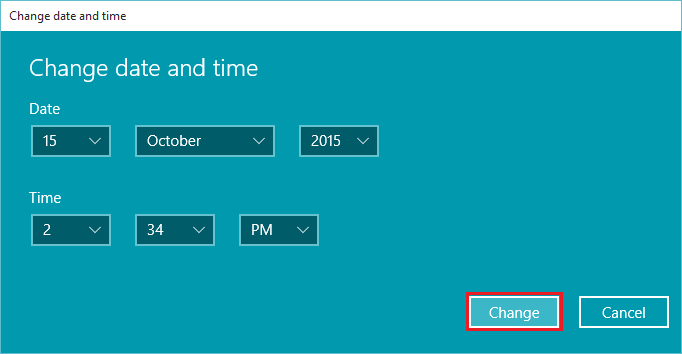
Changing any of the dates, month and year or time will result in the change of the current Date and time on your PC/Laptop. After inserting your desired date and time, click on “Change”. The “Date and Time” will be changed accordingly.
Method 2: Modify them in Control Panel
Go to Control Panel, click on “Clock, Language, and Region”.

In “Clock, Language, and Region”, click on “Date and Time”. It will open the “Date and Time” configuration window.
In the Date & Time configuration windows, click on “Change Date & Time”

This will open the “Date & Time Settings” window. Click on the Desired Date and Time and Click on “OK”. It will change the current Date and Time on your PC/Laptop.

You can any of the methods above, as both of the methods exhibit the same function. The “Settings” app provides a clear mechanism in detail, so it can be preferred over the control panel settings.