Windows provides some pre-defined toolbars which can be accessed through the Windows Taskbar. One of these toolbars is the Links Toolbar. The Link Toolbar allows us to access the “Favourite” or “Bookmark” pages in the web browsers. Currently in Windows 10, the Link Toolbar supports the “Favourite Bar” section in the Internet Explorer only, Edge is not supported.
In this article, we’ll follow certain steps on how to add the Links Toolbar in Windows 10:
Step 1:
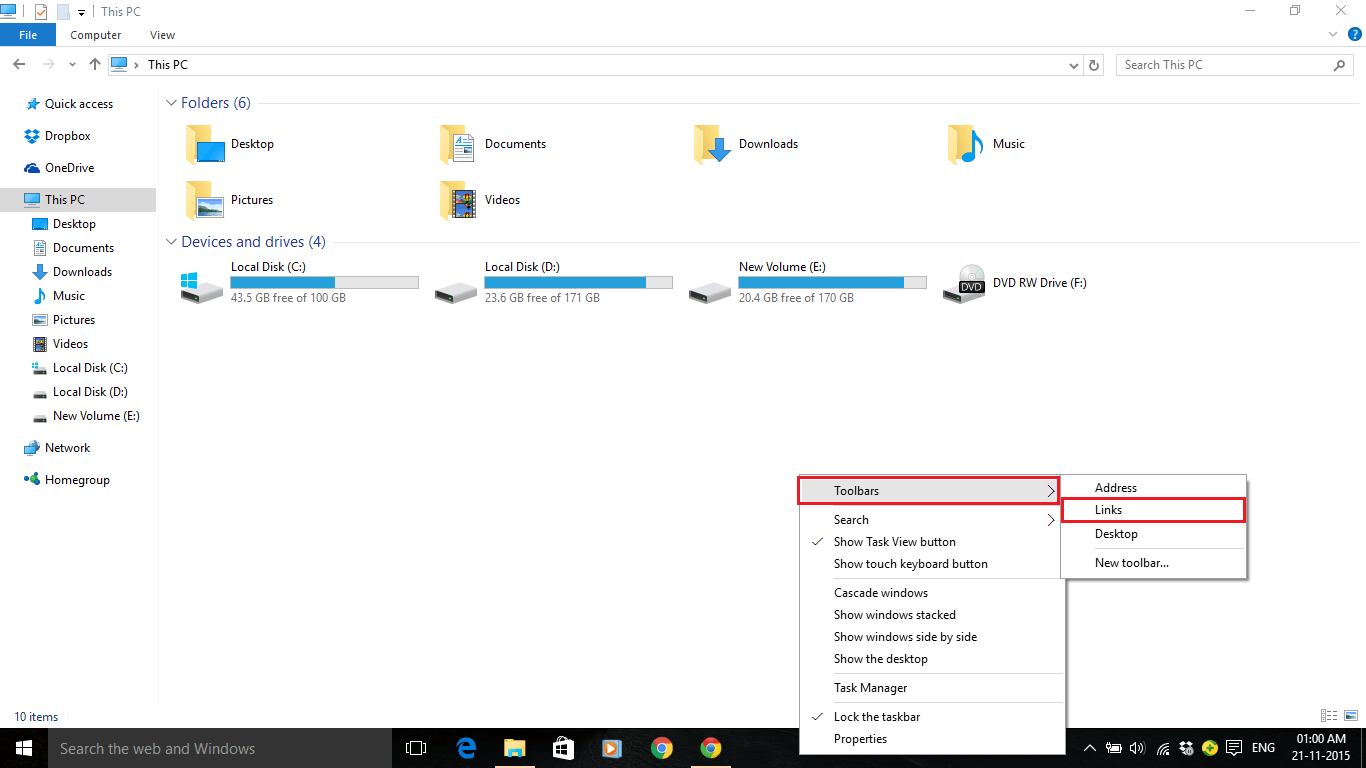
Right click on the Windows Taskbar. Go to “Toolbars” & click on “Links” Toolbar.

Step 2:
The Links Toolbar will arrive on the Windows Taskbar but the icons will not be displayed on the Windows Taskbar. Hence, it can be only accessed with the help of “»” icon.
![]()
Step 3:
To display some of the icons, you need to check whether your Windows Taskbar is locked or not.
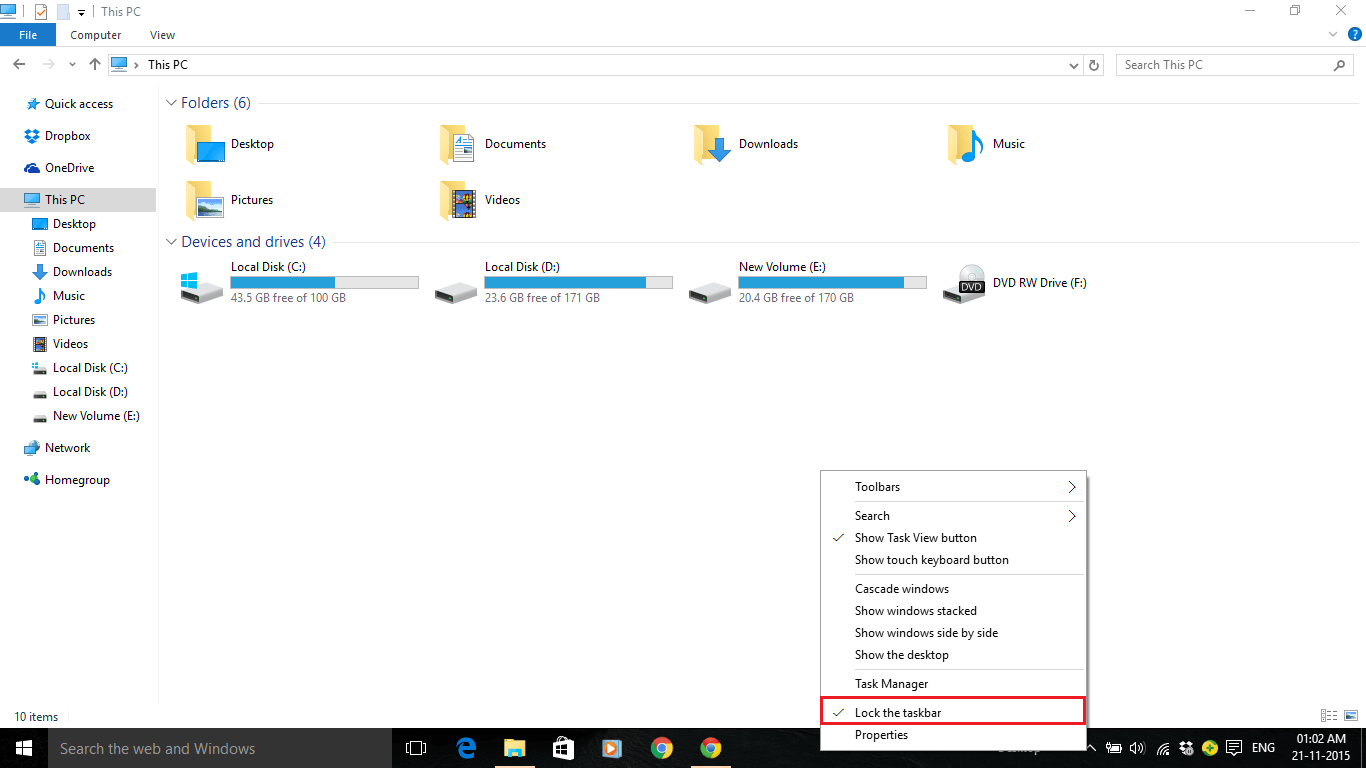
If your Taskbar is locked, you can remove it by right-clicking on the Windows Taskbar & clicking on “Lock the Taskbar”.

Hence, your Windows Taskbar will be unlocked.
Step 4:
Now, you can drag the Toolbar towards the pinned icons on the Windows Taskbar. The toolbar items will now display on the taskbar as well. You can just click on these items to access the applications.

Step 5:
Clicking on any of the links will guide you to the web page with the help of the default browser. For instance, we’ve clicked on “Google” link. This link will prompt the default web browser to open the given web page.

Note: You can use the Desktop toolbar more effectively if you use minimum number of Favourite Links or Bookmark links on your web browser.