Windows Registry is a database in the system where all the information regarding settings, values or locations of installed programs are being stored. Initially when Microsoft launched windows operating system, it used to store all the installed programs information in .ini files. But now most of the programs’ details are saved in the registry which is very crucial so you should be extra careful while editing the registry file. If something goes wrong while editing the registry, then it can totally destroy the system. A new key is added to the registry after you have installed a program on your system which stores its version, location value. In this article, we will guide you on how to add a new key in the registry editor on your Windows 11 PC
How to Add New Key in Registry Editor in Windows 11
Step 1: Open the Registry Editor
Press Win + R keys together on your keyboard.
Type regedit and press Enter key.
Then, Click Yes on the UAC prompt to proceed.

Step 2: In the Registry Editor
You can observe that there are many root keys in the left pane of the window.
To navigate through the keys, you need to double click on the key to expand.
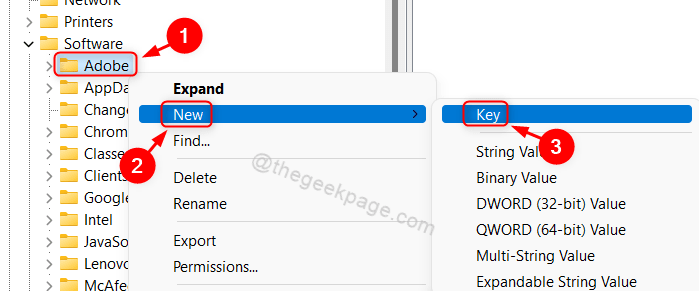
When you reach the registry key where you want to add a new key, right click on it and select New from the context menu.
Then, Click Key from the list as shown below.

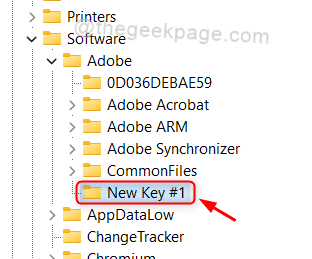
Step 3: Now, a new key is added in the selected registry key.
You can further rename it if you want.

That’s all guys.
We have shown in this article how to add a new key in any registry key using registry editor.
Hope this article was informative and please leave us comments below for any questions.
Thank you.