Windows Defender is Microsoft’s in-built security software to safeguard your Windows PC from external malicious threats that can infect your system making it inoperable. Many users have reported that they are seeing an error code 577 when they try to start the Windows Defender Service from the Services app. Once you see this error you are not able to open Windows Defender. The error message displayed is as below:
“Windows could not start the Windows Defender antivirus service on local computer.
Error 577: Windows cannot verify the digital signature for this file. A recent hardware or software change might have installed a file that is signed incorrectly or damaged, or that might be malicious software from an unknown source.”
Possible causes for this particular error:
- Third-party antivirus software interfering with Defender Service
- Bad Registry entries
Read this article to find the fixes that can help you overcome this error on your PC.
Fix 1 – Modify the Registry Entries for Windows Defender
To make changes to some of the protected keys you need to open the Registry using the PsExec process which is a part of the Microsoft Sysinternals.
1. Click on this link to download PsExec from the Downloads page of Microsoft Sysinternals.
2. On this downloads page, click on the link Download PsTools.
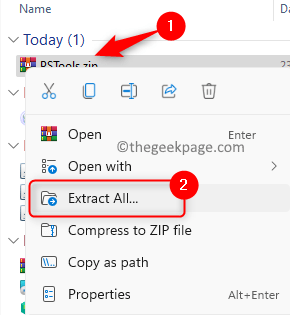
3. Once the download completes, right-click on the zip file and click on Extract all.
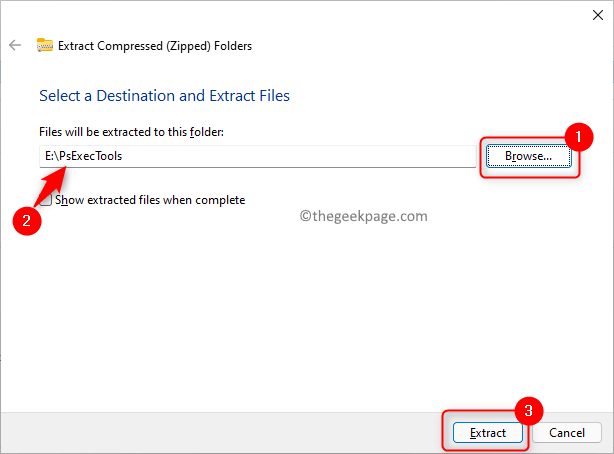
4. Click on Browse and choose any location for saving this, like E:\PsExecTools. Then, click on Extract.
5. Now open the Run dialog using Windows and R keys.
6. Type cmd and press Ctrl + Shift + Enter to open Command Prompt as administrator.
7. In the Command prompt, execute the command below.
E:\PsExecTools\PsExec.exe -sid C:\Windows\regedit.exe
Note: The first part of the command, that is (E:\PsExecTools\PsExec.exe) is the location where you have extracted the downloaded zip file.
please replace it with your path of PsExec.exe
8. Click on Agree when you see the PsExec Licence Agreement window.
8. This opens the Registry Editor under the local system so that the entries can be modified.
9. Navigate to the location mentioned below or copy and paste it in the Registry’s navigation bar.
HKEY_LOCAL_MACHINE\SOFTWARE\Policies\Microsoft\Windows Defender
10. Now on the right side, Locate DisableAntiVirus and DisableAntiSpyware.
11. Delete Both of them.

13. Exit the Registry.
14. Restart your PC and check if the issue is resolved.
Fix 2 – Edit the Group Policy
1. Press Windows + R to open Run.
2. Type gpedit.msc to open the Local Group Policy Editor.
3. Navigate through the folders mentioned below:
Computer Configuration –> Administrative Templates –> Windows Components
4. Locate and select the folder Microsoft Defender Antivirus in Windows Components.
5. On the right side, double-click on the setting named Turn off Microsoft Defender Antivirus.
6. In the window that opens, select the option Disabled.
7. Click on Apply and then on OK to save the changes.
8. Exit the editor and check if the problem is fixed.
Fix 3 – Uninstall Third-Party Antivirus Software
Many users have found that the presence of a third-party antivirus in their system can cause this issue with Windows Defender. It is suggested to either disable the antivirus or uninstall it completely from your system.
1. Just hold the Windows and R keys to open Run.
2. Type ms-settings:appsfeatures to open Apps & features.
3. In the App list, locate the third-party antivirus application.
4. Click on the three vertical dots associated with the application and choose Uninstall.
5. Confirm the uninstallation process by clicking on the Uninstall button.
6. Wait for the process to complete.
7. Restart your system and check if Windows Defender is working.
That’s it!!
We hope you have been able to resolve the error 577 faced while opening Windows Defender. Comment and let us know the fix that worked for you.


