Some users have reported a problem stating that their Windows 10 PC is unable to go to sleep mode. You do not need to worry as there is a Quick and easy fix for this.
Solution 1 – Change Power Options
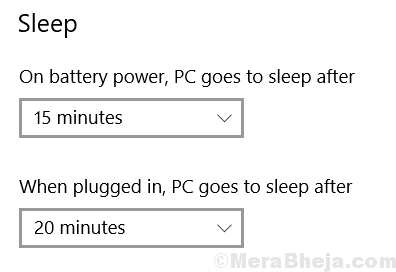
1] Go to Settings -> System -> Power & Sleep
2] Make sure That Sleep settings are set to a Desired Value.

3] Now, Click on Additional Power settings
4] Now, Click on Change Plan settings
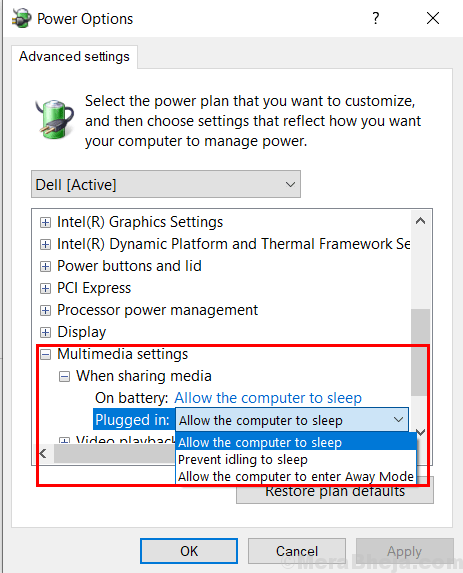
5] Now, Click on Change Advanced Power Settings
6] Now, expand Multimedia settings
7] Expand When sharing media.
8] Now, select Allow the computer to sleep in both On battery and Plugged in Option.

Solution 2 – Alter Mouse settings
1] Search Device manager in Windows 10 Taskbar Search.
2] Now, Go on and Expand Mice and Other Pointing Device
3] Select the Mouse which is being used.
4] Do a Right click and choose Properties.
5] Now, Click on Power Management tab.
6] Now, Uncheck the option saying “Allow this device to wake the computer”.

Note: – If you can’t find Power management Tab here, do not worry as in some laptops made by manufacturers such as dell , you have to go to a different way.
You will have to Go to BIOS settings.
1. Reboot your laptop and start pressing F2 key on Your Keyboard till you enter BIOS.
2. On the left side of the screen, select “Power Management“.
3. Select “USB Wake Support“.
5. UnCheck the box “Enable USB Wake Support“
6. Apply/save the changes and exit
7. Now, start your Laptop again Normally.
Solution 3 – Network adapters
1] Search Device manager from the Taskbar Search of Windows 10.
2] Now, Expand Network adapters.
3] Now, Go to your WiFi router and do a right click and choose properties.
4] Repeat the steps Given in Solution 2 to Uncheck the option saying “Allow this device to wake the computer”.
