Many windows 10 users who have updated their windows 10 OS to 1903 are facing problem while connecting to VPN. While trying to connect to VPN connection, users are stuck with connecting to vpn message and not going further. If you are also unable to connect to VPN after a recent update, here are the fixes given to solve the problem.
Preliminary fix
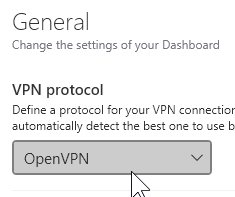
1 – Set your VPN Protocol from “Recommended” to OpenVPN (TCP) or NordLynx in your VPN software

2 – Connect to a different Server.

3 – Check your login credentials
4 – Turn it Off and Turn it On again
Fix 1 – Reinstall WAN miniports from Driver manager
1. Right click on the start menu and then click on Device manager to open Device manager.

2. Now, right click and uninstall One by one WAN Miniport (IP), WAN Miniport(IPv6) and WAN Miniport (PPTP).

3. Now, choose Action > Scan for Hardware changes from the top tabs in Device manager.

This will reinstall your driver uninstalled by you. Now, go and try to connect to VPN again.
Fix 2 – Try an Older workaround rasphone
rasphone is the older tool with which you can still connect to VPN easily in windows 10 PC. To use it do as followed:-
1. Right click anywhere on the desktop and click on new and then choose shortcut.

2. Now, copy and paste the path given below in the text box provided and click Next.
C:\Windows\System32\rasphone.exe

3. Give any suitable name to your shortcut as per your wish and click on finish.

4. Now, click on the shortcut created.
5. Click on OK when the prompt appears.

5. Click on the workplace network (3rd option) saying connect to your workplace using a Virtual private network .

6. Enter the VPN credentials to connect to a VPN network.

In this way you can easily create and connect to a VPN connection on your windows 10 PC without using the conventional method.
Fix 3 – Restart DHCP Client
Before proceeding just close all the browsers.
1. Search services in windows 10 search box and click on the services icon to open service manager.

2. Now, in service manager window, Locate DHCP client.
3. Right click on DHCP client and Choose restart.

Fix 4 – Stop Xbox Live Networking Service
1. Search services in windows 10 search box and then click on Services to open service manager.

2. Now, Locate Xbox Live Networking Service from the list.
3. Double click on Xbox Live Networking Service.
4. If it is running click on stop and then select startup type to disabled.

Fix 5 – Network settings
1. Press Windows key + R together to open run.
2. Write ncpa.cpl in it and click OK.
3. Right click on the adapter associated with VPN and select properties.
4. Uncheck TCP/IPv6

5. Now, Go to Security Tab
6. select Allow these protocols
7.check the option saying Challenge Handshake Authentication Protocol (CHAP)
8. Check Microsoft CHAP Version 2 (MS-CHAP V2)
9. click ok and close the window.
10. Now,right click on Wi-Fi and select Properties.
11. Uncheck Internet Protocol Version 6 (TCP/IPv6)
Repeat same steps for your Ethernet also.
Fix 6 – Editing Registry
1. Press Windows key + r together and open run.
2. Write regedit in it and click OK to open registry editor.

First of all , before doing anything click on File , then click on export and create a backup of registry settings.
3. Now, go to the following path in the registry editor.
HKEY_LOCAL_MACHINE\SYSTEM\CurrentControlSet\Services\PolicyAgent
4. Now, in the right side , just do a right click and choose New > Dword (32) bit value.
5. Name it AssumeUDPEncapsulationContextOnSendRule.
6. Double click on it and set value data to 2.

7 Click on OK and close the registry editor and reboot PC.