Fix “The print spooler service is not running” Error In Windows:- When you tried to install a printer, at some point in time, you might have faced the The print spooler service is not running error in Windows. This is a common error and can be solved pretty easily by making a simple change in the Services Management Console. Dive into the article to learn how to hack this simple trick.
STEP 1
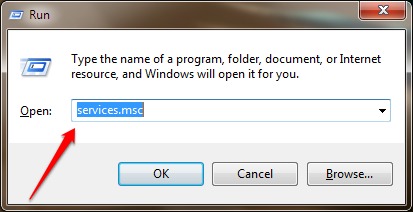
- First of all, you need to launch the Services Management Console in Window. For that, press WIN+R keys together. This will open the Run dialog box. Now type in services.msc and hit enter key.
STEP 2
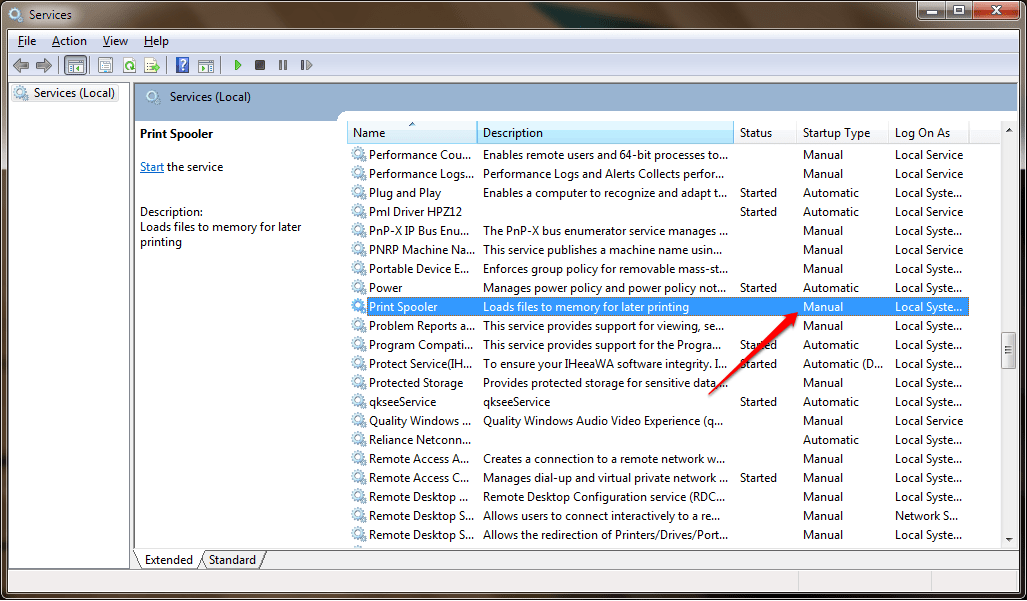
- When the Services Management Console opens up, scroll down and find the entry for Print Spooler. Now if you look at its Startup Type, you will be able to see that it is set as Manual. You need to change it to Automatic to fix the The print spooler service is not running issue. For that, follow the steps given below:
STEP 3
- Right click on the Print Spooler entry. Click on the Properties option from the context menu that appears.
STEP 4
- This will open a separate window by the name Print Spooler Properties. Find the drop down assocaited with the option Startup type:. Choose Automatic from the drop down menu.
STEP 5
- As next, find and click on the Start button. Wait while the Windows attempt to start the Print Spooler service.
STEP 6
- Now if you have a look at the Print Spooler entry, you will be able to see that its Status has turned to Started and Startup Type to Automatic. That’s it. Kindly restart the PC and try to install the printer again.
Hope your issue is resolved. You could also try uninstalling and reinstalling the printer drivers if the issue persists. Even after that if you still find any difficulties regarding the installation of the printer, please feel free to leave comments. We would be happy to help. Stay tuned for more tricks, tips, and hacks.


