Many Blue Screen of Death errors are caused due to hardware failure or other hardware related problems. One such case is with:
Memory Management error 0x0000001A on Windows 11
This error usually occurs when the user tries to upgrade or update Windows 11
Cause
The statement of the error points towards a severe memory management error. The causes could be hardware failure or a certain hardware being unable to interact with the system.
Preliminary steps
- 1] Restart the system and try updating Windows again. In case the error occurred while trying to install a cumulative update, it won’t reoccur if the update is successfully installed. Furthermore, it might help update the drivers.
- 2] Run a full anti-virus and anti-malware scan in the system.
- 3] Uninstall recently installed suspicious programs.
- 4] Disconnect the hardware peripherals and reconnect them one by one to isolate which one of them is problematic.
- Thereafter, proceed with the following troubleshooting steps:
- 1] Update device drivers
- 2] Use the Window Memory Diagnostics Tool
- 3] Run Disk Cleanup
- 4] Run the DISM tool and SFC scan
- 5] Run the CHKDSK scan to check for bad sectors in the hard drive
Solution 1] Update device drivers
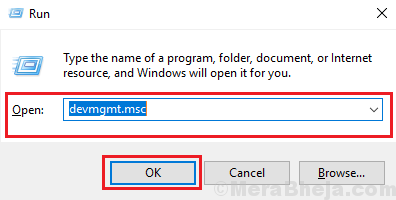
1] Press Win + R to open the Run window and type the command devmgmt.msc. Hit Enter to open the Device Manager window.
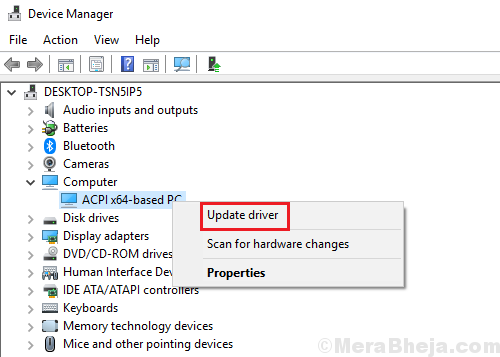
2] In the Device Manager window, right-click and select Update driver for whichever driver you wish to update.
3] Restart the system.
Solution 2] Use the Window Memory Diagnostics Tool
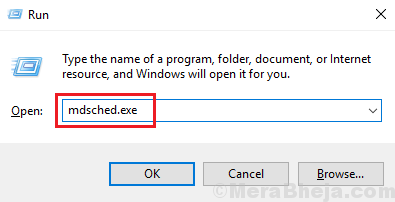
1] Press Win + R to open the Run window and type the command mdsched.exe. Press Enter to open the Windows Memory Diagnostics tool.
2] Select Restart now and check for problems (recommended).
Solution 3] Run Disk Cleanup
1] Search for Disk Cleanup in the Windows search bar and click to open the option.
2] Select the drive to cleanup (I would suggest cleaning all the drives one by one) and then click OK to run the procedure.
3] Restart the system and check if it helps.
Solution 4] Run the DISM tool and SFC scan
An SFC scan would help check for missing or corrupt files in the system and replace them.
1] Search for Command Prompt in the Windows search bar and right-click on the option. Select Run as administrator.

2] Type the following command and press Enter to execute it:
DISM.exe /Online /Cleanup-image /Restorehealth
3] Thereafter, type the following command and press Enter to run the SFC scan:
sfc /scannow
4] Restart the system once the commands have executed.
Solution 5] Run the CHKDSK scan to check for bad sectors in the hard drive
1- Click on the Search Bar, and search for Command Prompt.

2- Right click and choose run as admin.
3- Once Command Prompt is open, type in the following command:
CHKDSK C:/F
where C: is the drive to be checked for errors, i have used C: as an example, you can replace it with the designated letter of the hard drive, that you want to check for errors.
Note: This command fixes errors on the disk.


