Why would a VM that ran fine for two years suddenly lose its network every few minutes? A Windows patch. The July 2026 update tightened how the Hyper-V virtual switch checks traffic, and a lot of older setups fail the new checks. Your VM boots, grabs an address, then drops. Sometimes the host goes offline with it. These solutions may help you get out of this mess.
Where This Comes From
Basically? The virtual switch got stricter, and nothing else got the memo.
Three things trip it. An Azure filter extension that ships turned on (even though you’re not running Azure) now clashes with local switches. Offloading features on your physical network card, like VMQ and Large Send Offload, hand the switch packets in a shape it no longer accepts. So it drops them. Silently, of course.
And VMs created on older Windows builds carry an old configuration version. The new switch asks them for features they can’t answer for, and the connection dies mid-handshake. Wondering why nobody warned you? Same.
The good news: none of this needs a rebuild. Six settings, maybe seven, and the VMs come back.
Fix 1 – Turn Off the Azure VFP Switch Extension
Start here. This one fixes the sudden drops for most people, and it takes about a minute.
VFP stands for Virtual Filtering Platform. It’s the traffic filter Microsoft uses in Azure data centers, and for some reason it’s enabled on every local Hyper-V switch too. After the July patch it conflicts with normal bridged traffic.
1 – At first, open Hyper-V Manager. Press the Windows key, type “Hyper-V”, and press Enter.
2 – Look at the Actions pane on the right side and click Virtual Switch Manager.
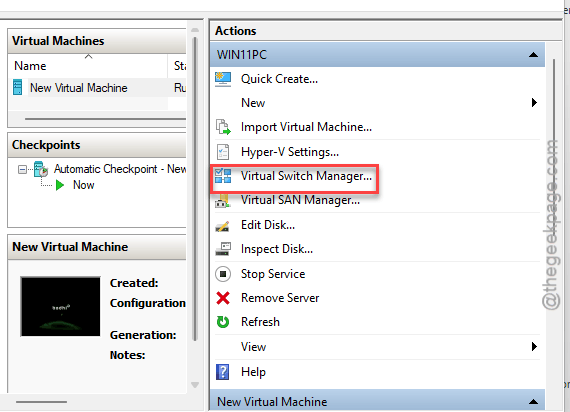
3 – In the left pane, click the switch your VM uses (usually your External switch).
4 – Click the small arrow next to the switch name to expand it, then click Extensions.
5 – Uncheck Microsoft Azure VFP Switch Filter Extension.
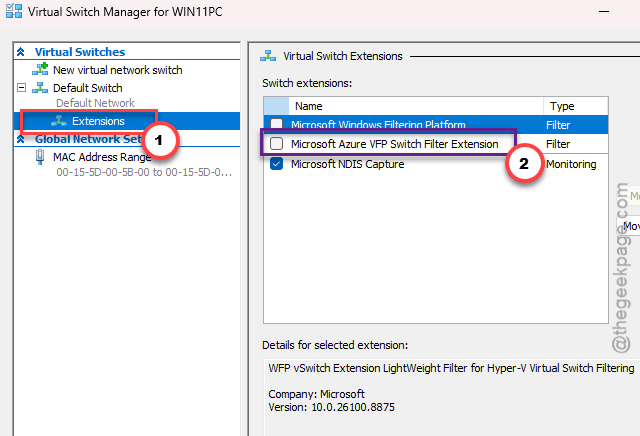
6 – Click Apply, then OK. If Windows warns about a brief network interruption, click Yes. That’s expected.
7 – Restart the VM.
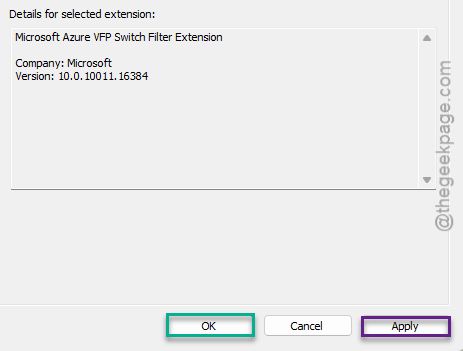
Your host connection may blink for a couple of seconds while the switch reloads. So give it a moment before you panic. And a tip for later: new switches get this extension turned on again, so check the box every time you create one.
Fix 2 – Disable Virtual Machine Queues on the Network Card
VMQ is a speed trick. Your physical network card sorts packets into per-VM queues so the host CPU doesn’t have to. Great on server hardware.
1 – At first, right-click the Start button and choose Device Manager.
2 – Expand Network adapters.
3 – Then, Right-click your physical adapter, and choose Properties.
4 – Click the Advanced tab.
5 – Scroll the Property list and click Virtual Machine Queues.
6 – Change the Value dropdown on the right to Disabled.
7 – Leave this window open. The next fix uses it too.
Don’t see the option at all? Your card never supported it. Skip ahead.
Fix 3 – Disable Large Send Offload
Same window, two more settings. Large Send Offload (LSO) lets the card chop big chunks of data into packets itself. The patched switch treats those oversized chunks as suspicious and tosses them.
1 – In the same Advanced tab, click Large Send Offload V2 (IPv4).
2 – Set the Value to Disabled.
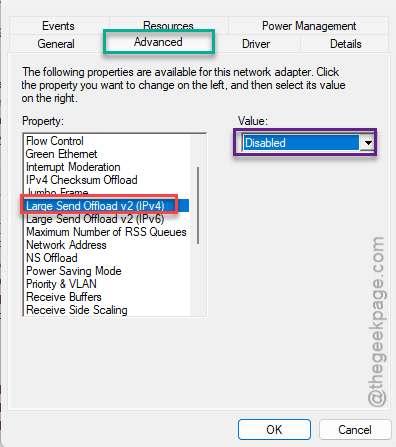
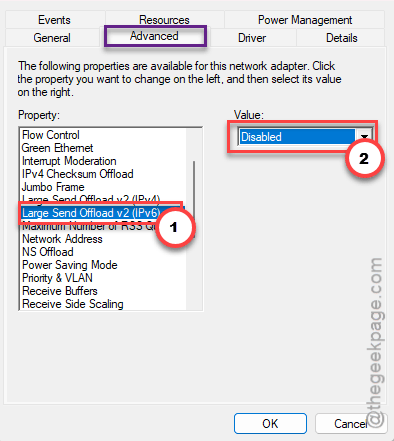
3 – Click Large Send Offload V2 (IPv6) and set it to Disabled as well.
4 – Click OK. Your network drops for a second or two while the driver reloads.
Will this slow your downloads? Not that you’d notice. And the CPU picks up the slack. On anything built in the last decade that’s a rounding error.
Now test the VM for ten minutes or so. Still dropping? The switch itself is probably the problem.
Fix 4 – Delete and Recreate the External Switch With PowerShell
Switches built on older Windows builds carry settings that fail the new validation. And here’s the twist: recreating the switch in the Hyper-V Manager window often corrupts the adapter binding all over again (the GUI has a long history of this). But PowerShell does the same job cleanly.
Fair warning: your host loses network for a minute while the old switch is gone. Save your work first.
1 – In Hyper-V Manager, open Virtual Switch Manager, click your External switch, and click Remove. Click Apply.
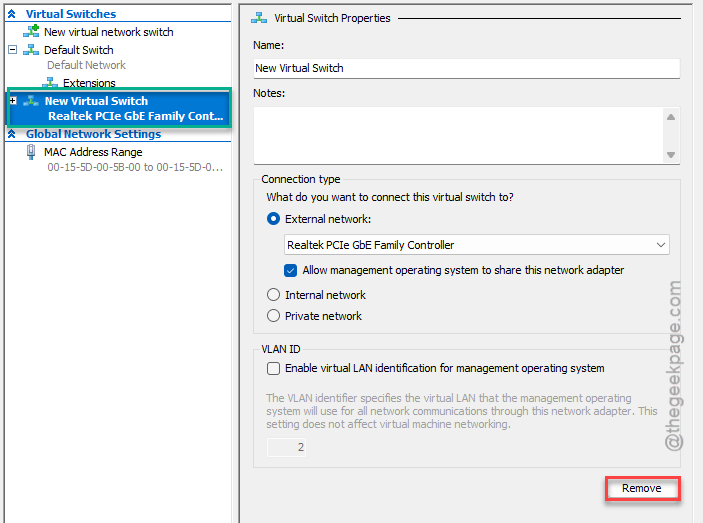
2 – Wait until the host’s network comes back.
3 – Right-click the Start button and choose Terminal (Admin). On older builds it says Windows PowerShell (Admin).
4 – Type this simple code, and press Enter.
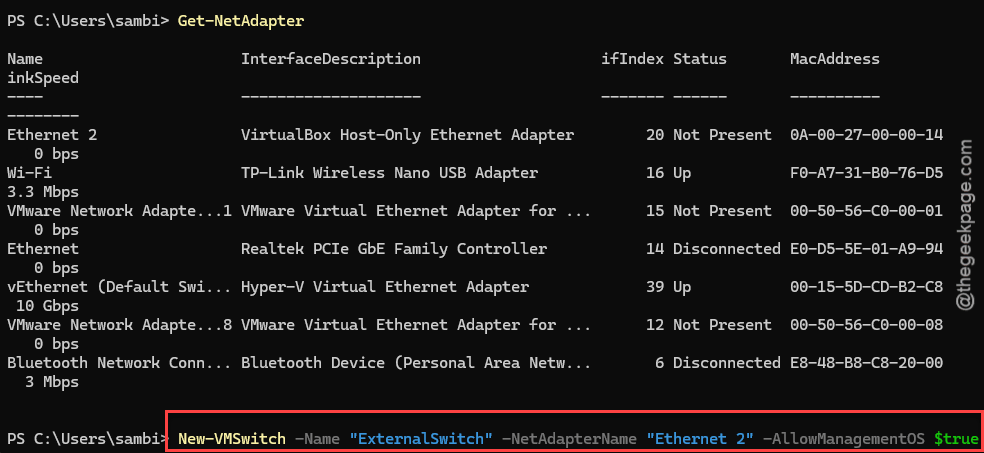
Get-NetAdapter
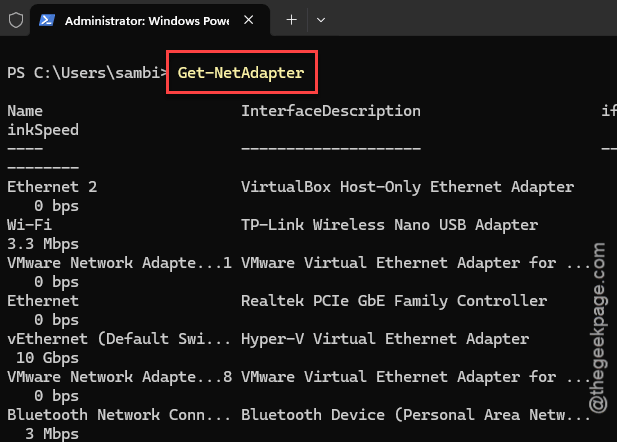
Your next task is to find your physical adapter in the list. Do note down it’s name from there.
5 – Type this line, swapping in your adapter’s name, and press Enter:
New-VMSwitch -Name "ExternalSwitch" -NetAdapterName "Ethernet" -AllowManagementOS $true
6 – Wait for the prompt to come back. The screen may flicker as the network reconnects.
7 – Back in Hyper-V Manager,
8 – Right-click your VM, choose Settings.
9 – Then, tap the Network Adapter in the left menu. Pick the new switch from the Virtual Switch dropdown.
10 – Click OK and start the VM.
The -AllowManagementOS $true part matters. It lets the host keep using the adapter too. Leave it out and your host goes dark until you fix it (ask me how I know).
Fix 5 – Update the VM Configuration Version
Every VM has a version number for its virtual hardware. VMs made on an older Windows build keep the old number until you bump it, and the updated switch doesn’t play nicely with old versions.
One important thing: this change is one-way. You can’t roll a VM back to an older version afterward. So if you ever move VMs to an older host, export a copy first.
1 – Shut down the VM completely. Not saved, not paused. Shut down.
2 – Open Terminal (Admin) like in Fix 4.
3 – Type this code and press Enter. You’ll see each VM with its version number.
Get-VM | Select Name, Version
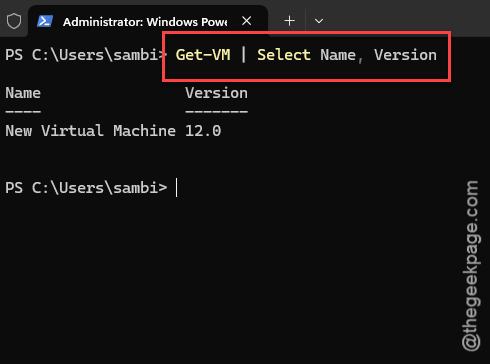
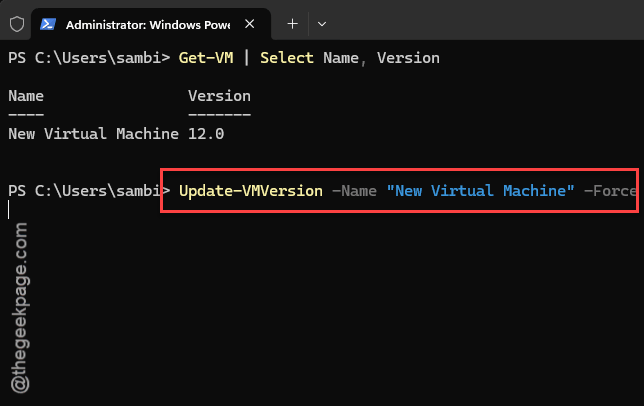
4 – For any VM with an old version, type this (with your VM’s real name) and press Enter:
Update-VMVersion -Name "YourVMName" -Force
5 – Start the VM.
The network adapter inside the VM should connect within a few seconds of the desktop appearing. Watch the little network icon in the VM’s taskbar.
Fix 6 – Check the Host Adapter’s Switch Binding
Sometimes the switch looks fine but the physical adapter quietly lost its link to Hyper-V. Easy to check.
1 – Open Control Panel. Press the Windows key, type “control”, and press Enter.
2 – Click Network and Internet, then Network and Sharing Center.
3 – Click Change adapter settings in the left sidebar.
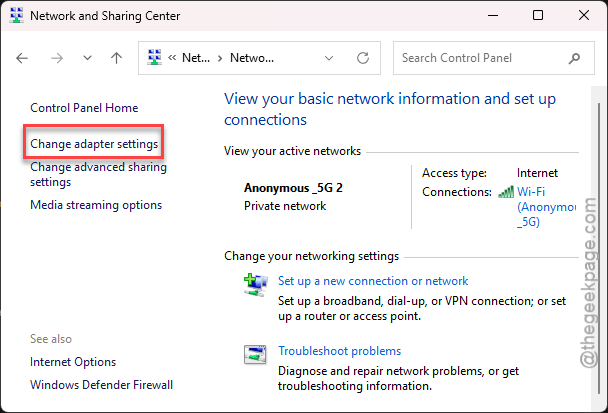
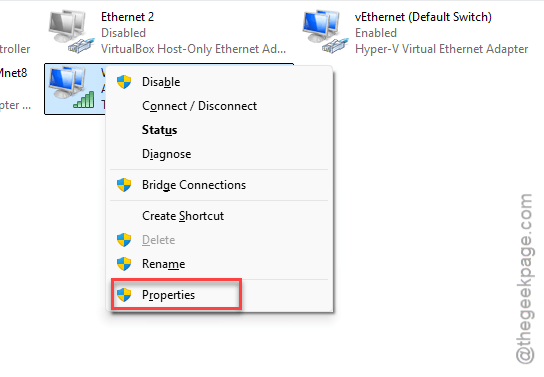
4 – Right-click your physical adapter and choose Properties.
5 – In the list of items, find Hyper-V Extensible Virtual Switch and make sure its box is checked.
6 – Click OK.
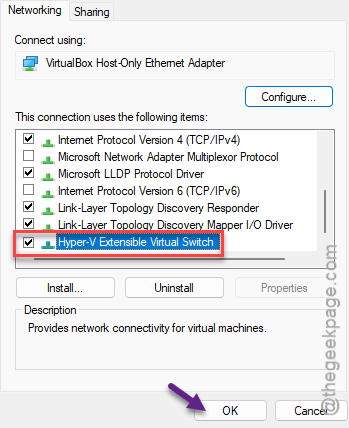
While you’re there, glance at the other checkboxes. If some driver update unchecked the Hyper-V item, it may have unchecked others too.
Fix 7 – Fix the Network Settings Inside the VM
Last stop. If the host side is healthy and the VM still shows “No internet”, the guest’s own adapter may have a stale address.
1 – Inside the VM, open Control Panel, then Network and Internet, then Network and Sharing Center.
2 – Click Change adapter settings.
3 – If the adapter shows as disabled (grayed out), right-click it and choose Enable.
4 – Right-click the adapter and choose Properties.
5 – Double-click Internet Protocol Version 4 (TCP/IPv4).
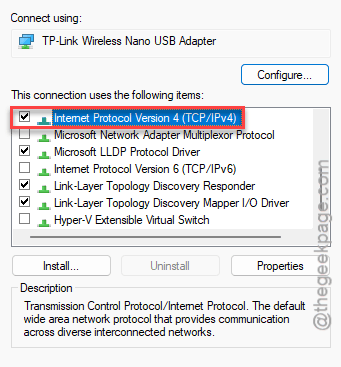
6 – Select Obtain an IP address automatically and Obtain DNS server address automatically.
7 – Click OK twice.
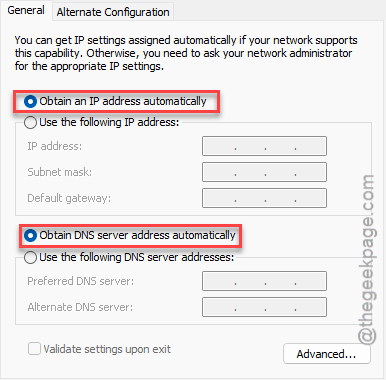
A static address that was fine on the old switch can point at the wrong subnet on the new one. So automatic is safer unless you have a specific reason to pin it.
People Also Ask
Why is Hyper-V not working after the July 2026 update?
The update changed the virtual switch’s security checks. The Azure VFP filter extension, network card offloading features, and old VM configuration versions all fail those checks now, so VMs drop their connection or the switch crashes. Turning off the VFP extension in Virtual Switch Manager fixes most cases in about a minute.
Should I disable Hyper-V to stop the network drops?
No. The drops come from a few settings, not from Hyper-V itself. Uncheck the Azure VFP extension, disable VMQ and Large Send Offload on your physical adapter, and recreate the external switch with PowerShell if needed. Disabling Hyper-V would also break WSL2, Windows Sandbox, and some security features.
How do I fix “External Ethernet adapter is already bound to the Microsoft Virtual Switch Protocol”?
That error means a leftover switch still owns your adapter. Open Virtual Switch Manager and remove any old External switches, then check the adapter’s Properties in Network Connections and uncheck Hyper-V Extensible Virtual Switch. Reboot, then create the new switch with the PowerShell command from Fix 4.