OGG file is used by most of the audio players for holding the audio data. Applications like VLC, Windows Media Player, etc can open and play audio from the OGG file. Many users have reported they see that their system crashes when they try to rename or delete an OGG File. In certain cases, the users weren’t even able to move the file. This issue is seen because of Windows Media Extension
If you have come across this issue and wondering how to fix it, don’t panic. In this article, we have compiled some fixes that can help you solve this problem.
Fix 1: Uninstall Windows Media Extension from Settings
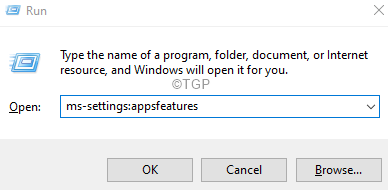
Step 1: Open the Run Dialog using holding the keys Windows and R at the same time.
Step 2: Type the below command and hit Enter.
ms-settings:appsfeatures
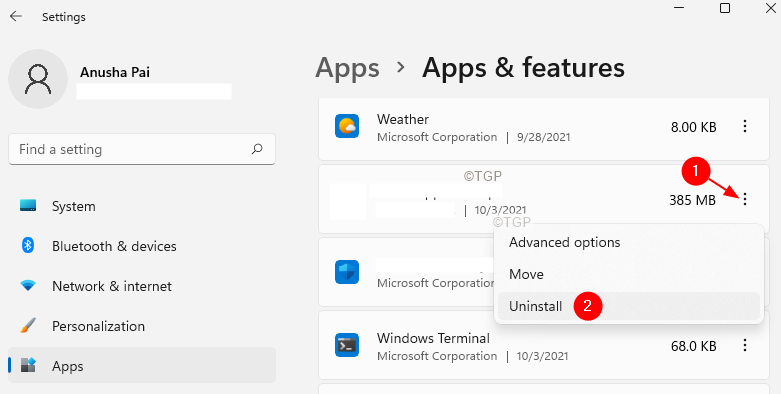
Step 3: In the opening window, scroll down and locate Web Media Extensions, and click on it.
Step 4: On the right-hand side, click on the three dots and then select Uninstall
Step 5: Try to rename or delete the file and check if the issue has been resolved.
Fix 2: Uninstall Windows Media Extension from PowerShell
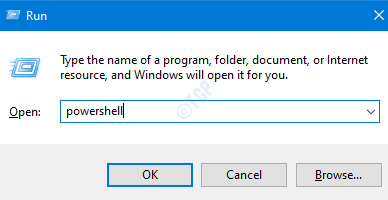
Step 1: Open the Run Terminal. Use the shortcut Windows+R.
Step 2: Type powershell and hold the keys Ctrl+Shift+Enter to open PowerShell in Admin mode.
Step 3: If you see a User Acess window showing up seeking permission, click on Yes.
Step 4: Type the below commands and hit Enter
Get-AppxPackage Microsoft.WebMediaExtensions | Remove-AppxPackage
Step 5: Now, try deleting or renaming the OGG Files.
Fix 3: Run a DISM and SFC scan to repair the corrupt system files
Step 1: Open the Run Terminal. Use the shortcut Windows+R.
Step 2: Type cmd and hold the keys Ctrl+Shift+Enter to open the Command Prompt in Admin mode.

Step 3: If you see a User Acess window showing up seeking permission, click on Yes.
Step 4: Type the below commands one after the other. Make it a point to hit Enter after every command
chkdsk /f
sfc /scannow
Note that the scan might take some time to finish. So please be patient.
Step 4: Once, the scan finishes, check if the error resolves.
That’s All
We hope this article has been informative. Thank you for Reading.
Kindly comment and let us know the fix that helped you solve the issue.


