Sometimes when you try accessing a few files or folders, you may come across the error “File cannot be accessed by the system” which prevents you from accessing the files. This can occur for different reasons including file permissions, not enough space in the disk, pending updates, etc. Below are a few methods from which you can get rid of the issue. Choose the relevant method for your issue and fix it.
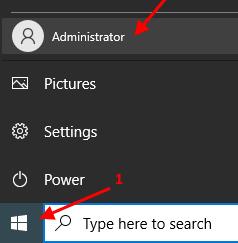
Method 1 – Login your PC as admin
If you are facing this error, then make sure you are loggin in your Computer with admin account.

Method 2: Use Disk Cleanup
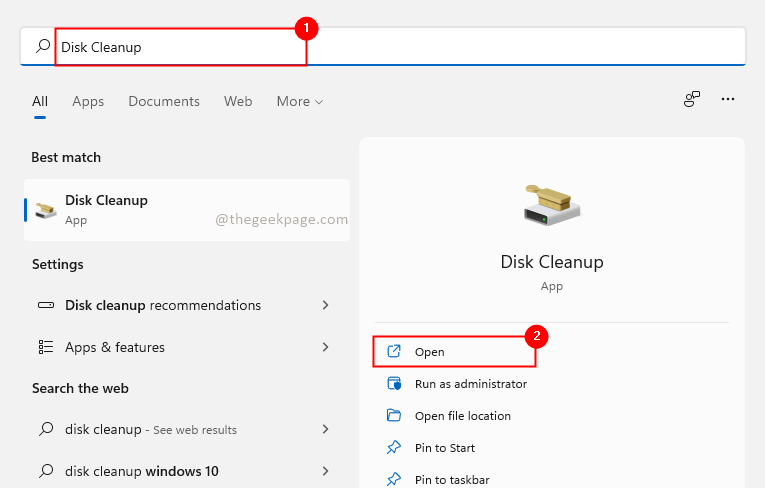
Step 1: In the windows search box, type Disk Cleanup and Open it.

Step 2: A dialog box will open, select C drive if you have more than one drive, and click on OK
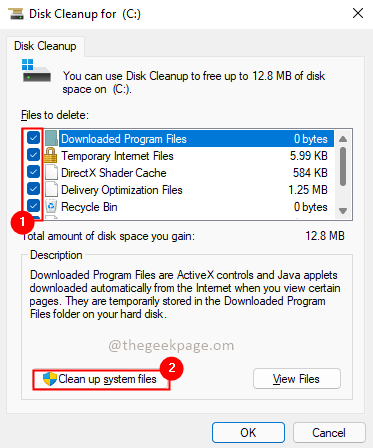
Step 2: There appears another dialog box that contains all the temporary files. Select all the checkboxes and click on Clean up system files.

Step 3: If the dialog box appears again just select all the checkboxes, click OK and click on Delete Files in the confirmation popup message. This process will take a few minutes.


Step 4: Once done with the clean up Restart your computer and check whether you can access files and folders.
Method 3: Execute SFC and DISM command
Step 1: Search cmd in search box and then right click and run as admin

Step 2: In the PowerShell, terminal execute the below command and hit Enter. Wait for the process to complete.
SFC /SCANNOW
Once the command given above gets completed , run the command given below
DISM.exe /Online /Cleanup-image /Scanhealth

Step 3: Same way execute the below command in a new terminal and hit enter. This will also take a few minutes to complete.
DISM.exe /Online /Cleanup-image /Restorehealth

Step 4: Once done with the above execution, copy and paste the command given below
chkdsk C: /f /r /x
Once done, Restart your computer.
Method 4 – Disable real time protection
1 – Search windows security in the search box and then click on windows security to open it
2 – Click on Virus & threat protection
3 – Click on Virus & Threat protection settings
4 – Turn off Real-time protection, Cloud-delivered protection and Automatic sample submission, all three of them

Now, try again
Method 5: Run as Administrator
If your account doesn’t have Administrator rights, sometimes you will be denied to access files and folders. You can change the account type and make it an administrator account and try to resolve the issue. Let us see how to change the account to an administrator account.
Step 1: In the search, window type Control Panel and click on Open.

Step 2: Click on Change account type under User Accounts.

Step 3: Select the account you want to change as Administrator.

Step 4: Click on the Change the account type.

Step 5: Once you are in the Change account type section, select the Administrator option and click on the Change Account Type.

Step 6: Restart your System. Now you are logged in as an Administrator and reverify whether the issue is resolved.
Method 6: Disable Services
Step 1: In the windows search box type System Configuration and Open it.

Step 2: Go to the Services tab and select the checkbox Hide all Microsoft services present at the bottom left corner and click on Disable all. Click on OK.

Step 3: Restart your System. Check whether the issue is resolved.
Method 7: Update Windows
Step 1: Press Win + R keys, type ms-settings:windowsupdate, and click OK.

Step 2: Click on Install now to install the latest windows updates.

Step 3: When the update completes Restart your computer.
I hope one of the above methods worked for you and your issue is now been resolved. Please comment and let us know.