Windows 11 gives the Low Disk Space warning at the bottom right corner of your screen when you don’t have much space left in one of your drives. When you get this warning, you are supposed to free up some space. But how important it is to take an action upon seeing this warning? Well, if you are getting the warning for the system drive, where your Windows is installed, generally the C drive, then you shouldn’t ignore this warning as your system could crash if there is not enough space in your C drive. But if you are getting the Low Disk Space warning in any other drive, then it is relatively safe to ignore this warning.
Once the Low Disk Space warning starts to show up, it can be pretty annoying as it keeps popping up every few minutes and reminds you that you are running out of space. Read on, to learn how you can easily put this warning away with some very simple steps.
Note: Before making any changes to the registry settings, it is always recommended to take a backup of your settings so that if anything goes wrong, you can always restore your previous settings using the backup. Click here, to learn how you can take the Registry Editor backup.
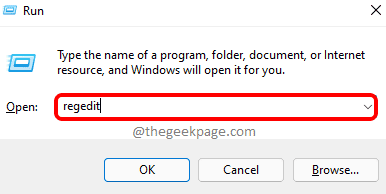
Step 1: Launch the Run window by pressing the Win and R keys simultaneously.
Once the Run window launches, type in regedit and hit OK button.
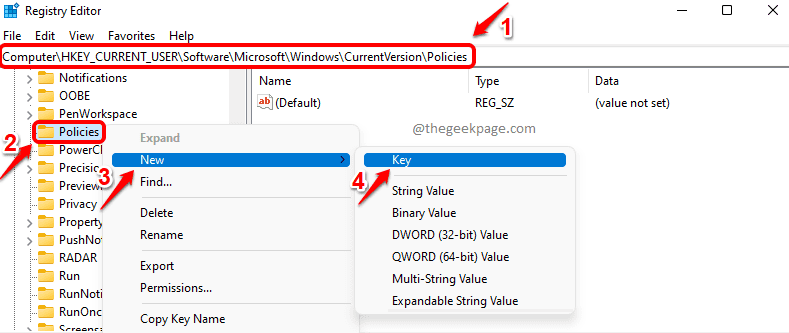
Step 2: As next, copy the following path and paste it on the Registry Editor navigation bar. Hit Enter key once you are done.
Computer\HKEY_CURRENT_USER\Software\Microsoft\Windows\CurrentVersion\Policies
Make sure you are on the Policies folder.
Now, right click on the Policies folder and then click on New and then on Key.
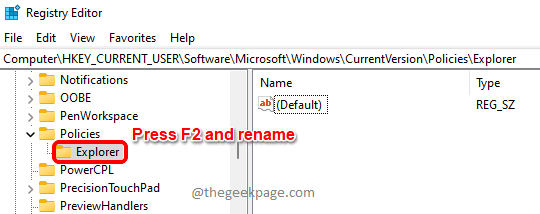
Step 3: Click on the newly created key folder inside the Policies folder. Press F2 and rename it to Explorer.
Step 4: As next, right click on the newly created Explorer folder, then click on the New option and then click on DWORD (32-bit) Value.
Step 5: Click on the newly created DWORD value and press the F2 key to rename it. Give the new name as NoLowDiskSpaceChecks.
Step 6: To disable the low disk space warning, double click on the NoLowDiskSpaceChecks key and give 1 in the Value data field. Hit OK button once you are done.
Step 7: If you want to enable the low disk space warning, then you have to double click on the NoLowDiskSpaceChecks key and then set the value inside Value data field as 0(Zero). Press the OK button when you are done.
That’s it. With your next restart, changes will be saved. You should no longer be getting the low disk space warning.
Hope you found the article useful.


