If your keyboard stops working in a middle of something and you do not have a spare USB keyboard, then you can make use of virtual keyboard which comes with the Windows operating system called as On-Screen keyboard. The On Screen keyboard helps the users to enter the input using a mouse. Now let us in this article, how you can open On-Screen keyboard on Windows 11 PC
Method 1: Using Keyboard Shortcut
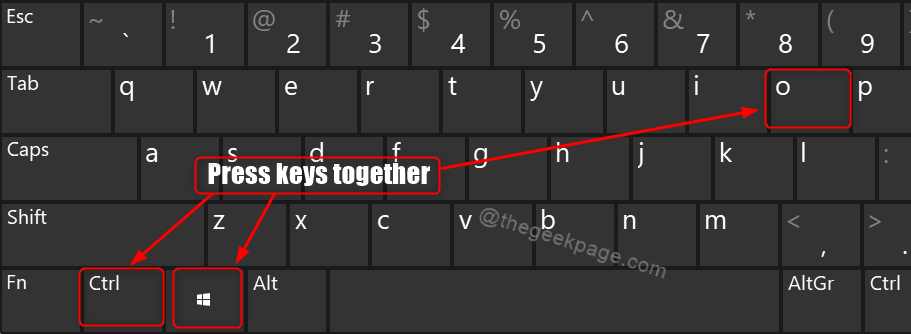
The Keyboard Shortcut is the easiest way to get things done and we are guiding you to open on-screen keyboard using keyboard shortcut as shown below.
Press CTRL + WIN + O keys together on your keyboard.

Method 2: Using Run Dialog Box
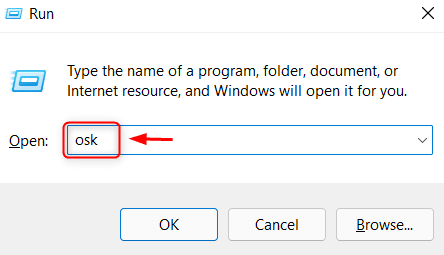
1 – To Open Run dialog box, Press Win + R keys together on your keyboard.
2 – Then, type osk in the run box.
3 – Hit Enter key.
This will launch On-Screen keyboard on your system.

Method 3: From Windows Search
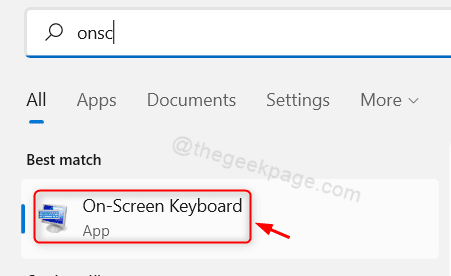
1 – Firstly, Open Windows Search.
2 – Press Win key on your keyboard and type on-screen keyboard.
3 – Then, hit Enter key.

Method 4: Using On-Screen Keyboard Icon from Taskbar
Step 1: Open Taskbar settings
Right click on the taskbar and select Taskbar settings.

Step 2: In the Taskbar settings page
Click on Touch keyboard toggle button to turn it ON.

Step 3: Now you can notice that there is virtual keyboard sign in the system tray on taskbar
To launch the On-screen keyboard, please click on the keyboard icon as shown in the below image.

Method 5: From Settings app
Step 1: Open Settings app
Press Win + I keys together on your keyboard.
Step 2: In the Settings page
Click on Accessibility in the left pane.
Then, Scroll down the accessibility page and click on Keyboard.
Click on the toggle button of On-screen keyboard to turn it ON.

As soon as you turn it on, the On-screen keyboard opens up and you can continue using it.
Method 6: Using Control Panel
Step 1: Open Control Panel
Press Win + R keys together on your keyboard and type control.
Hit Enter key.

Step 2: In the Control Panel
Navigate through Ease of Access > Ease of Access Center.
Then, Click on Start On-Screen Keyboard inside the Quick access to common tools section.

On-screen keyboard will launch immediately after clicking Start On-Screen Keyboard.
Hope you liked this method.
Method 7: From Start Menu
Step 1: Open Start menu
Click on Start button on the taskbar.
Then, Click All apps in the start menu.

Step 2: In the All apps list
Scroll down the list and Click on Windows Easy of Access.
Then, Click On-Screen Keyboard from the dropdown list as shown below.

This opens up the On-Screen Keyboard on your laptop.
Method 8: Using any Command Line tool
Step 1: Open any command line tool like Command prompt.
Press Win + R keys together on your keyboard and type cmd.
Hit Enter key.

Step 2: In the Command Prompt window
Type osk and hit Enter key.
This will launch the On-Screen Keyboard immediately.

NOTE:- The above command osk works in PowerShell also.
Method 9: From Login screen
Press Win + L keys together on your keyboard to go to Lock Screen.
Then, Click on Accessibility icon on the bottom right corner of the screen.
Select On-Screen Keyboard from the list.
This will launch the On-Screen Keyboard on your laptop.

That’s all guys!
Hope you found this article informative and helpful.
Please leave us comments below to tell us which method you liked.
Thank you for reading!