How to Create a Contact List on Microsoft Outlook
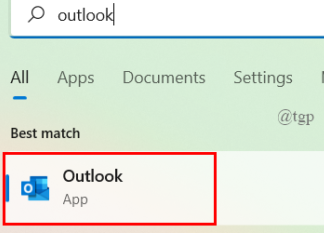
Step 1: Open the Microsoft Outlook desktop app.

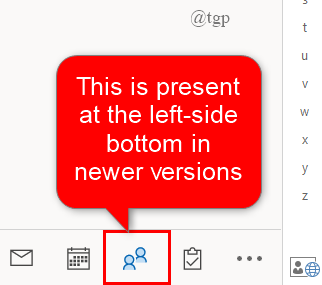
Step 2: Click on People on the Navigation bar.

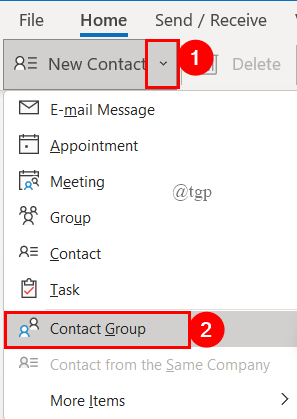
Step 3: Now, under the Home tab, click the drop-down button on the New Contact and select Contact Group.

Step 4: Give a name to your contact group.

Step 5: After that, Click on Add Member and select from the three options. (Here, I am using Address Book to create the group).

- When you want to add a member from Outlook Contacts, select it. The window opens as shown below.

- When you want to add a member from Address Book, Select it. The Window opens as shown below.

- When you want to add a new member, select New Email Contact. The window opens as shown below.

Step 6: Double-click on the contact that you wish to add. To add multiple contacts, press “Cltr” and select the contacts.

NOTE: You can also add an Existing Group to the New Group or can use different address books also.
Step 7: Once the contacts are added, they will be seen in the Members Icon. Finally, click on OK.

Step 8: Once you click OK, the new group is created. Click on Save & Close.

Send an email to Contact Group in Outlook on Desktop
Step 1: The new group created is seen under My Contacts> Contacts. You can click on the list to see your contacts.

Step 2: Simply click on Send email to send a mail to the contact group people.

Step 3: You can attach your documents, Add Cc if required and click on Send button. This is done in a similar way of sending Normal email.

Editing the Contact Group in Outlook on Desktop
Step 1: Open your contacts lists in Outlook and right-click on the contact group you like to edit and click on Edit Contact.

Step 2: A pop-up window opens, where you can change your group name, you can also add and remove members from the contact group. Once you have done the required changes, Click Save & Close.

You can also do other things like updating the group, deleting the group, and many more. This is all about the desktop Outlook app you use on your PC.
Online Microsoft Outlook Website
If you are someone who uses the web version of Microsoft Outlook for your business or work, you can also create a contact list using the Outlook website. Follow the steps below to create one.
Step 1: Open the browser and sign in to the Microsoft Outlook using Outlook
Step 2: Click on the People present on the left side Navigation, click the drop-down menu of New Contact and select New Contact List.

Step 3: Give the Contact List a name, and add names/emails.( you can add both Group and Induvidual ). Once done, click on Create.

Step 4: This will create the contact list and you can find under People > Contacts > Your Contact Lists.

Send an email in Microsoft Outlook Website
Step 1: Click on the Contact group you wish to send an email from People> Contacts > Your Contact List.

Step 2: Now, click on the Contact List and Select Send email. Here, it is Microsoft Teams> Send email.

Step 3: The basic email tab opens, where you can attach your documents and Send the email.

Editing the Contact List in Microsoft Outlook Website
Step 1: In Your Contact Lists when you select the Contact list you will get an edit option on the top of the List as shown below. You can click on that to Edit your Contact list.
( or ) Simply right-click on the List and select Edit.

Step 2: Youe contact list will appear, You can simply add or remove a member. Once done, click on Save. ( Here, I have added another email). You can also change the name of the Contact List.
