How To Disable Windows 10 Automatic Activation Feature: – If you have installed your Windows 10 version from a USB drive, an ISO image or a DVD without using a valid product key, you might be aware that you are using a trial version which is valid only for thirty days. If that’s the case, you will be required to uninstall the version once the trial period expires. Or you can always opt to activate your windows 10 using a valid product key. As long as you don’t activate your windows 10 and is currently running the windows 10 trial version, windows will remind you that you need to activate the version by entering the product key in order to keep using it.
The automatic activation popups are shown to trial version users at regular intervals of time. This can be helpful for some users who are quite forgetful about events. But this constant nagging can irritate some others who are well aware that they should activate their windows version before the trial period expires. So as you might have guessed, this article is about how to turn off the automatic activation feature in windows 10 such that it will not pester you with automatic activation popups again. Read on, to learn how to hack this simple trick. But before all that, creating a system restore point is highly recommended, as a precaution.
Also Read: What happens to windows License once you upgrade to windows 10
STEP 1
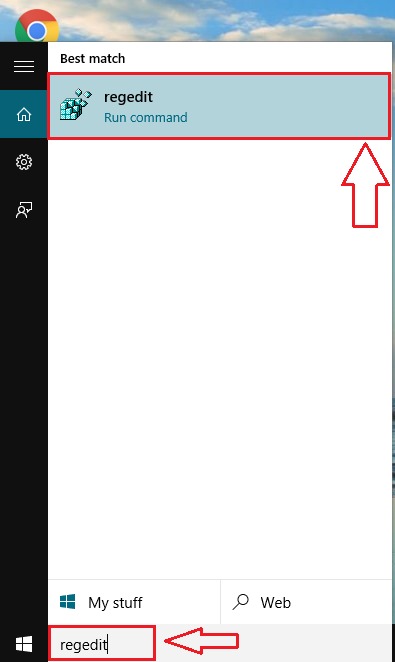
- Since changes are to be made to the registry editors, we need to launch the regedit program. For that, simply start typing regedit into your search box. From the search results that appear, click on the regedit program.
STEP 2
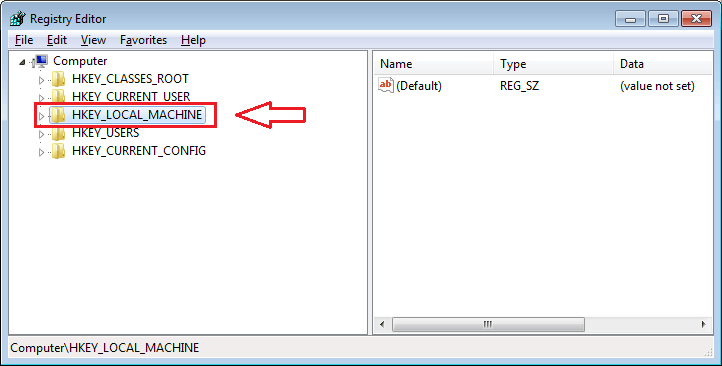
- A new window for Registry Editor opens up. You need to navigate to the following path to make the changes.
HKEY_LOCAL_MACHINE\SOFTWARE\Microsoft\Windows NT \CurrentVersion\SoftwareProtectionPlatform\Activation
- For that, first click on HKEY_LOCAL_MACHINE.
STEP 3
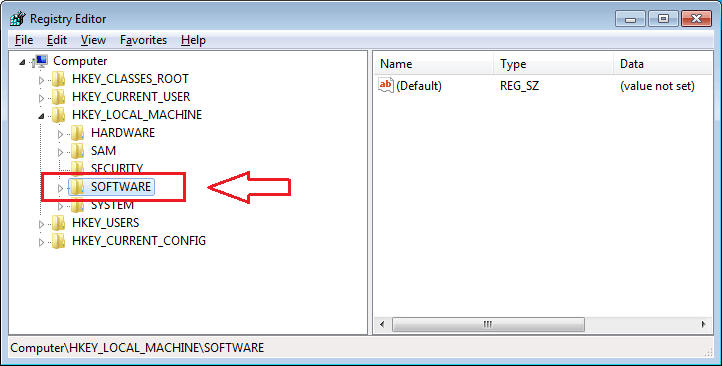
- As next, click on Software under HKEY_LOCAL_MACHINE.
STEP 4
- Under Software key, scroll through the keys to find the entry named Microsoft. Click on it.
STEP 5
- Click on Windows NT and then on CurrentVersion as shown in the screenshot.
STEP 6
- Scroll down to find SoftwareProtectionPlatform. Under SoftwareProtectionPlatform, click on Activation.
STEP 7
- In the right window pane, you will now be able to find an entry named Manual. This is the registry editor that needs to be changed to disable the Automatice activation feature in Windows 10. So, double click on the entry named Manual to edit its value data. By default, the value in the value data field will be 0. Change the value data to 1 and hit OK button once you are done.
That’s it. If you still get automatic activation alerts from windows, just reboot your system so that the changes will take over. Hope you found the article useful.


