Windows drivers make sure that all your Windows features continue to run smoothly on your system. Therefore, Microsoft keeps releasing driver updates at regular intervals via Windows Updates. Most of the drivers get updated automatically thereby, ensuring that all drivers are up-to-date and you do not face any unexpected errors or crashes in future.
However, there are some users who do not want any changes to their current settings of the drivers and rather like the things to stay as it is. They do not want to change the previous set up of the drivers and hence want to disable the automatic driver updates on their Windows 10 PC. Let’s see how to disable the driver updates.
Method 1: Through System Properties
Prior to making any changes to the Registry Editor, make sure that you create a backup of the registry data, so that in case of any data loss, you can recover the data.
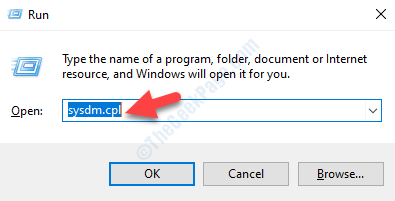
Step 1: Press Win + R hotkey on your keyboard to open the Run command.
Step 2: In the Run command search box, type sysdm.cpl and hit Enter.

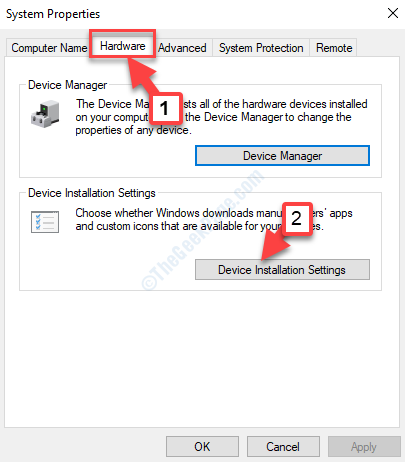
Step 3: It opens the System Properties window. Now, go to the Hardware tab and then press the Device Installation Settings button.

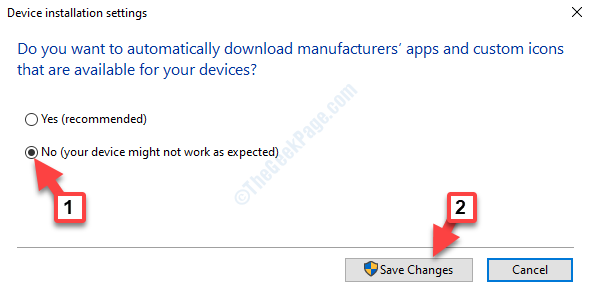
Step 4: In the Device Installations Settings pop-up, select the radio button next to No (Your device may not work as expected) option.
Click on Save Changes to save the action and exit.

Now, the automatic driver update is disabled and your drivers should get updated automatically.
If this does nor work, try the below method.
Method 2: By Editing the Registry Editor
Step 1: Go to Start and type regedit in the Windows search field.

Step 2: Click on the result to open the Registry Editor window.

Step 3: In the Registry Editor window, type the below path in the address bar:
HKEY_LOCAL_MACHINE\SOFTWARE\Policies\Microsoft\Windows
Right-click on the Windows folder on the left, select new from the right-click menu and then select Key.

Step 4: Rename the new Key as WindowsUpdate.

Step 5: Now, go to the right side of the pane and right-click on an empty space. Select New from the context menu and then select DWORD (32-bit) Value.

Step 6: Rename the new DWORD Value as ExcludeWUDriversInQualityUpdate.

Step 7: Double-click on ExcludeWUDriversInQualityUpdate to open the Edit DWORD (32-bit) Value.
Now, go to Value Data and set it to 1. Press OK to save the changes and exit.

*Note – You can reverse the change by setting the Value data back to 0 whenever you want to enable it again.
Now, exit the Registry Editor and restart your PC for the changes to be effective. The Automatic driver update function is disabled now and the drivers on your PC should not get updated automatically anymore.