When the system has to load certain fonts that are to be used by the Applications and other programs frequently, these fonts are stored in a Cache file called Font Cache. With this file, accessing the fonts becomes easier and fast. However, this file gets corrupted often when installing new fonts or updating the existing ones. When the Font Cache gets corrupted you can some issues like :
- Some fonts will be displayed in the Font Menu
- You type one letter and some other letter gets displayed
- The fonts do not appear at all
- Some weird character shows up
In such cases, it is better to delete an existing font cache from the system. There is nothing to worry about as Windows rebuilds a new font Cache when you reboot your system.
In his article, let us see how to Delete or Disable the Font Cache in Windows 10 easily with clear and concise steps.
Steps to be followed to delete Font Cache:
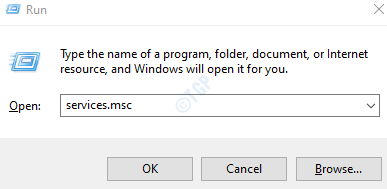
Step 1: Press the keys Windows+r from your keyboard at the same time. This opens the Run Dialog in your System.
Step 2: In the Run dialog that opens, type services.msc and Press OK

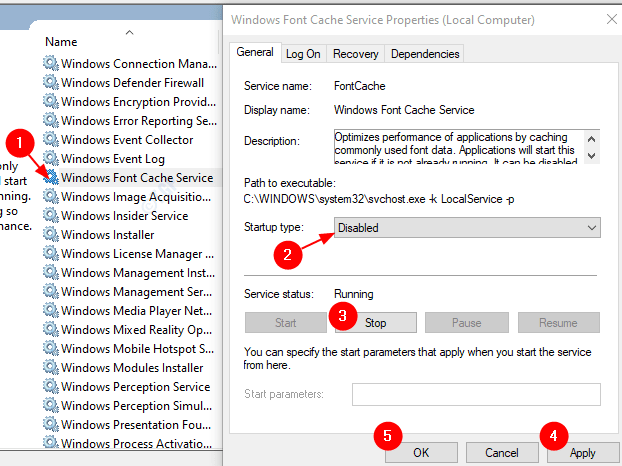
Step 3: In the Services window that opens, Search and locate Windows Font Cache Service from the list. To disable this service,
- Double Click on the service Windows Font Cache Service
- In the Properties window, From the Startup type drop-down, choose Disabled
- Under the Service status, click on Stop Button
- Click on Apply
- Finally, Press on OK
Repeat the same process for the service, Windows Presentation Foundation Font Cache 3.0.0.0

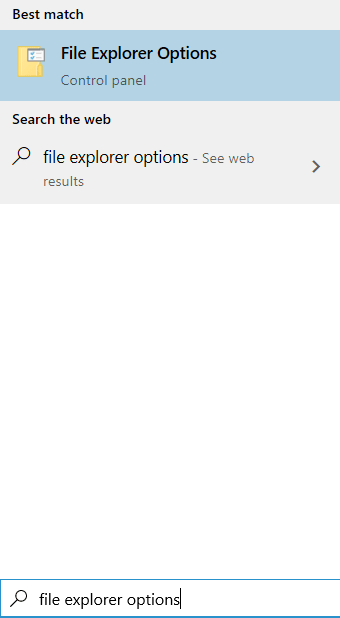
Note: – Before proceeding make sure all hidden items are visible in your PC.
For this Search File explorer options in search box.

Now, Click on View tab and then make sure Show hidden files, Folders and drives is selected

Step 4: Open the Windows Explorer. Press the Keys Windows+e simultaneously from your keyboard.
Step 5: Now navigate to the following location
- C:
- Windows
- ServiceProfiles
- LocalService
- AppData
- Local
You might see a window that says “You don’t have the permission to access this folder”, just click on Continue
NOTE: Copy-pasting the location in the address bar doesn’t help. So, one has to manually open the location.
Step 6: Delete all the files that start with FontCache
NOTE: No Folders should be deleted even if they are empty

Step 7: Now, Open the FontCache Folder, Delete all the Files starting with the names ~FontCache-
NOTE: No Folders should be deleted even if they are empty

Step 8: Restart your System.
That’s All. With these changes, the Font Cache will be disabled in Windows 10. We hope this article has been helpful. Kindly comment and let us know if you face any issues. Thank you for Reading.