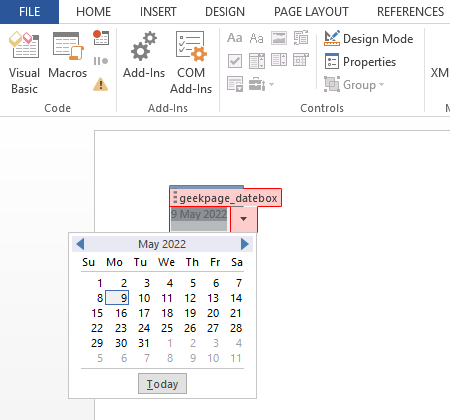
Sometimes when you create a Word document that needs to be filled in with data, including dates, and share it with someone else to fill it in, you might want to make sure that the date format is strictly followed to maintain the uniformity of the document. However, even if you write explicitly that this specific date format is to be followed, people are people, and rules are seldom respected. In such cases, if you can enforce dates to be entered in only the specific format you want, using a date picker, it would be great, don’t you think?
Well, read on then, that’s exactly what we are here to talk about today.
Insert a Date Picker in Microsoft Word
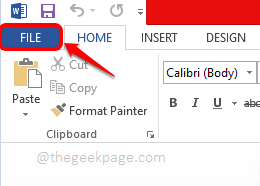
Step 1: Firstly, we need to enable the Developer tab in your Microsoft Word. If you already have this tab enabled, you can straight away jump to Step 4. Else click on the FILE tab at the top.
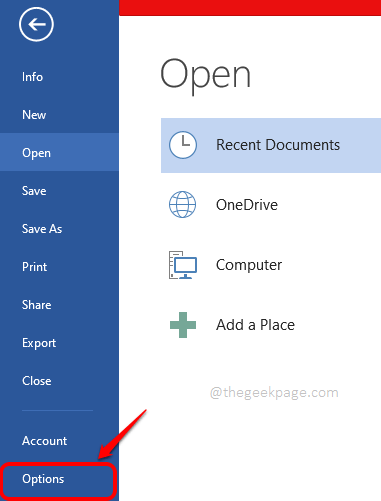
Step 2: On the left side of the window, click on the Options tile next.
Step 3: On the Word Options window, click on Customize Ribbon on the left side. Now on the right side, check the checkbox corresponding to the option named Developer. Click on the OK button once done.
This will enable the Developer tab in your Microsoft Word.
Step 4: Once the DEVELOPER tab is enabled, click on it and then click on the Date Picker Content Control icon as shown in the screenshot below.
Step 5: You will now see that the date picker is successfully inserted into your Word document. Now let’s customize it. For that, click on the Design Mode icon under the Developer tab itself.
Step 6: As next, select the text on the date picket first. Then click on the INSERT tab at the top. Finally, click on the Insert Date & Time icon.
Step 7: When the Date and Time window opens up, choose a date format of your choice from the Available formats.
Then check the checkbox corresponding to the option Update automatically. After that, click on the OK button.
Step 8: As next, let’s turn off the Design Mode. For that, click on the Design Mode button once again. This is under the DEVELOPER tab, as detailed in Step 5.
Step 9: Now click on the date picker once again and click on the Properties button at the top.
Step 10: In the Content Control Properties window, you can give a title to your Date Picker. You can also choose a color of your choice.
You also have the option to choose a date format.
There are many other options as well, that you can customize, in this window. For reference, please have a look at the screenshot below.
Once you are all done, hit the OK button.
Step 11: That’s it. Your date picker is all ready and customized. By default, the date picker would show the current date. You can choose any date from the date picker later just by clicking on it.
Please tell us in the comments section whether you found the article useful.


