When your favorite strategic game which is quite heavy in size gets finally downloaded and you install it successfully but when you try to launch the game, it will throw an error “CONCRT140.dll is missing” and stops the code execution which can be really annoying. CONCRT140.dll is one of the important files which is necessary to run the components which are built using MS Visual C++ studio. The other similar error messages are
- CONCRT140.dll is not found
- CONCRT140.dll is crashed
- CONCRT140.dll cannot be located
In this article, we have listed few possible ways to fix this issue.
Fix 1 : Repair Microsoft Visual C++ Redistributable
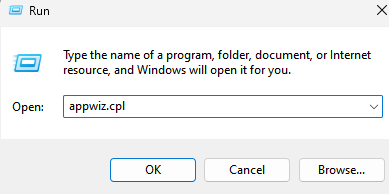
Step 1 – Press Windows key and R key together from keyboard to open RUN command box
Type appwiz.cpl in it and click OK

Step 2 – Search Microsoft Visual C++ from the search box.
Step 3 – Scroll down and Go to the latest Visual C++ based on the most recent date.
Now, Right click on 3 vertical dots and Click on Modify.

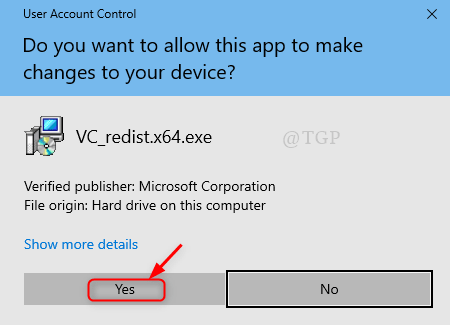
Please confirm it by clicking Yes.

Step 4: Now the MS Visual C++ Setup window opens.
Click on Repair as shown below.

Step 5: After the repair process is done successfully.
Close the Setup successful window as shown below.
Please restart your system and check if the problem still occurs.

Note:- While doing this step, please make sure your MS Visual C++ Redistributable is of latest version.
Hope this fixes this issue.
Fix 2: Register the CONCRT140.dll file using Command Prompt
Step 1: To Launch the Command prompt as an Administrator.
Press win logo key and type cmd.
Then, Right Click on the Command Prompt App from results.
Click Run as administrator from the context menu.

Step 2: Once the Command Prompt opens
Type the following to register the dll file. (Note:- replace filename with concrt140.dll)
regsvr32 [filename].dll
OR
To Register all the dll files at once.
for %1 in (*.dll) do regsvr32 /s %1
Note:- Registering all the dll files at once will take several minutes, please wait until its done.

After the dll file is registered, Please relaunch your game application to check if the problem still persists.
Fix 3: The Application should be Re-Installed
Sometimes, the installation process of the application was not done properly and some of the files might have been corrupted. Therefore, its better to re-install the application on your laptop.
Step 1: To Uninstall the application:
Launch Settings app by pressing win logo key + I together.
Then, Click Installed Apps on the right.
Step 2 – Now, Search Your Microsoft Office version name in the search box.
Step 3: Now, Right click on 3 vertical dots and Click on Uninstall.

After the uninstallation process is done, you need to re-install the application.
Fix 4: Revert your laptop using System Restore
Whenever you face any critical situation like this, then there is an option to revert your laptop back to the safe point you had created earlier when system was good and free from problems. Let us see how to use System restore in this fix.
Step 1: Open Run Dialog Box
- Open the Run Dialog box by pressing Win Logo Key +R together on your keyboard.
- Type rstrui.exe and Press Enter key.

Step 2: This opens the System Restore window.
Click Next to continue.

Step 3: Select the system restore point that you had created earlier.
Click on the point as shown in the below picture and Click Next to proceed.

Step 4: To confirm the System Restore.
At last, Click Finish as shown.

This will restore your system to the last saved point.
Now try restarting your application and check if any of the fix mentioned above was helpful.
Please leave us a comment below to let us know which one helped.
Thank you!