In the busy world, we would like to automate a few things you want to get triggered regularly or on a timely basis. Automation helps to gain control over tasks and reduce your efforts to perform the task. One such task can be shutting down your computer. You might want your computer to shut down regularly, or you want it shut down at a particular time of the day, or shut down on particular days in a week, or you want to shut down for onetime. Let us see how we can set the timer so that system shuts down automatically.
Method 1: Using Run Dialog Box
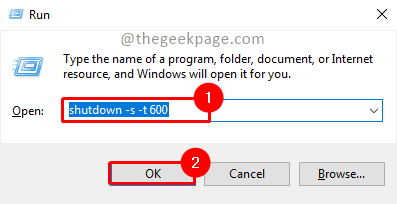
Step 1: Press Win+R, type shutdown -s -t 600 and click OK.

Note: In the above command 600 represents time in seconds. You can change it as per your need. It should be always in seconds not in minutes or hours.
Step 2: There will be a popup intimating, that the computer will shut down at a particular time. Once the condition is met, the system will shut down.

Method 2: Using Command Prompt or Windows Powershell
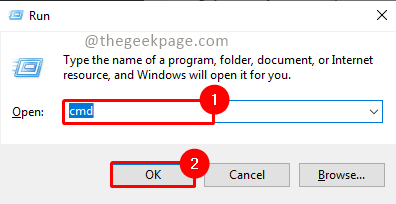
Step 1: Press Win+R, type cmd and click OK.

Step 2: Type the below command and press Enter.
shutdown -s -t 600

Note: In the above command 600 represents time in seconds. You can change it as per your need.
Step 3: Once the command is executed, the auto-shutdown task will be scheduled and will shut down once the condition is met.
Note: You can execute the above command using PowerShell also. To open PowerShell press Win+R, type PowerShell, and click OK.


Method 3: Using Task Scheduler
Step 1: Press Win+R, type taskschd.msc and click OK.

Note: Click Yes on the UAC(User Account Control) popup to open the task scheduler.
Step 2: Click Create Basic Task in the task scheduler window.

Step 3: Give Name and Description and click on Next.

Step 4: Select the task trigger point as per your need and click Next. Here I have selected Weekly.

Step 5: Select the time and days on which you want to shut down the system and click Next.

Step 6: Select Start a program in task action and click Next.

Step 7: Click on the Browse button and go to the below folder and look for shutdown.exe.
C:\Windows\System32

Select Shutdown.exe and click on Open.

Step 8: Now add the argument -s -t 600 and click Next.

Step 9: Now it will show the Summary of the task going to schedule. Once you verify the details, click on Finish.

Step 10: Now your task is scheduled. If you want to see the scheduled task click on Task Scheduler Library and you will see your task in the list.

Step 11: You can right-click on it you can disable or delete the task.

That’s it!! Isn’t it simple to automate the shutdown of the system? Hope the article was useful and informative. Comment and let us know which method you prefer. Thank you for reading!!