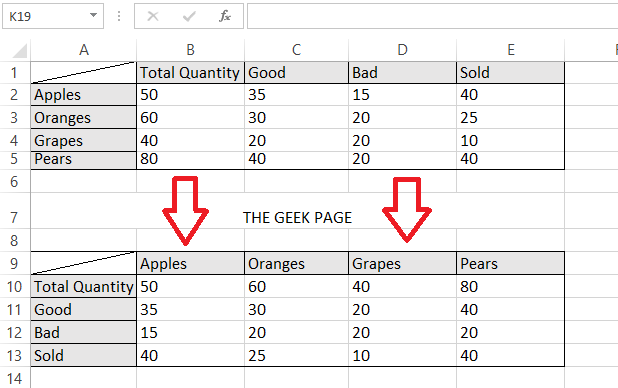
Sometimes, after creating a pretty large table in Microsoft Excel, you might change your mind about the columns and rows arrangements and might want to rotate them. You might want rows in the place of columns and vice versa. But changing everything manually without any mistakes in a large excel file is not a feasible option and it is sure to drive you nuts. So in such cases, is there any way how you can rotate rows and columns, also known as transposing the data, in an Excel sheet? Well, if there was no way, we wouldn’t be here of course.
In this article, we explain through a very simple trick how you can easily transpose the data in your Excel sheet. Read on, to learn how you can master this pretty simple trick.
Note: If you are wondering how I inserted the diagonal line inside the very first cell of the Excel sheet, you can read our article here to find out how.
Solution
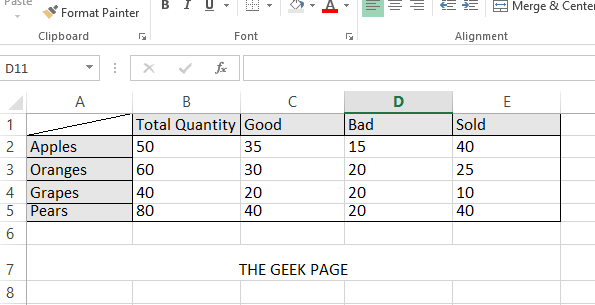
Step 1: Open the Excel sheet first, which has the data that you want to be transposed. In the following example, I have opened my Excel file whose data I will transpose in the coming steps.
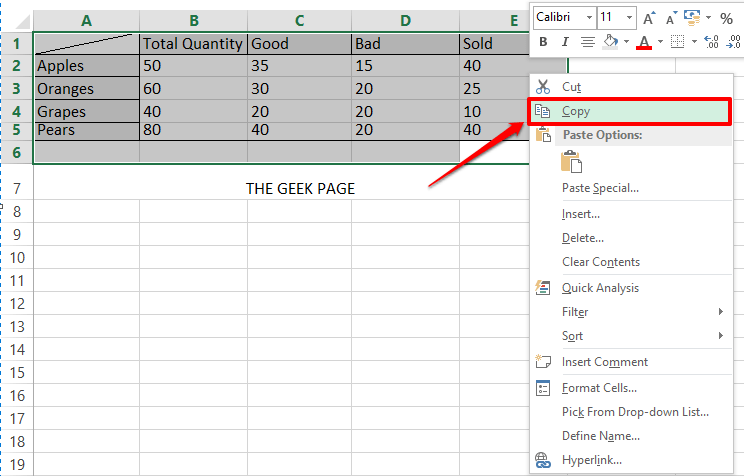
Step 2: Select all of the data that you want to transpose, including column and row labels, and then right click somewhere on the selected data to view the right click context menu. Choose Copy from the options available.
Note: Alternatively you can press the keys CTRL + C keys together for the copy operation. But please note that no other operations like CTRL + X would work for our solution here.
Step 3: As next, click on the cell where your transposed table is to be copied onto. It is from this cell that the transposed table will begin.
Step 4: As next, right click on the selected cell and then click on the option Paste Special.
Step 5: Once the Paste Special options open up, check the checkbox corresponding to the option Transpose and then click on the OK button.
Step 6: There you are! If you now look at the excel sheet, you can see that the table is transposed. If you prefer, you can delete the old table now.
Please tell us in the comments section whether you found the article helpful.


