If you frequently use the web camera of your device, you would often need to change the camera brightness on your Windows 10/11 PC to tune the quality of the image. Windows features a built-in camera that’s easy to use and comes with a Pro mode and additional features like Framing grid, option to adjust the Photo and the video quality, set the Flicker reduction and access other Related settings, straight from the Camera app. It also allows you to set a timer and enable the HDR quality directly from the app.
However, it does not allow you to adjust the brightness, unless you make certain changes to the camera settings, such as, enabling the Pro mode. While there is a rather easy method to adjust the brightness directly from the Camera app settings and while clicking images, you can also change the Camera brightness from the Settings app. This post will guide you on how to change the camera brightness on your Windows 10/11 PC. Here’s how:
Method 1: By Enabling the Pro Mode
This method will help you to adjust the web camera brightness, directly from the camera app settings, by enabling the pro mode. It’s quite easy. Let’s see how:
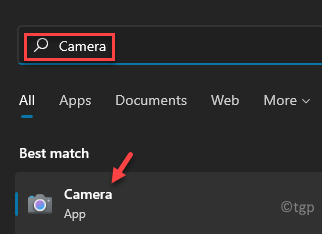
Step 1: Go to Windows search and type Camera in the search field.
Step 2: Click on the result below the Best match section to open the camera.
Step 3: In the Camera app, click on the gear icon (Settings) at the top left of the app screen.
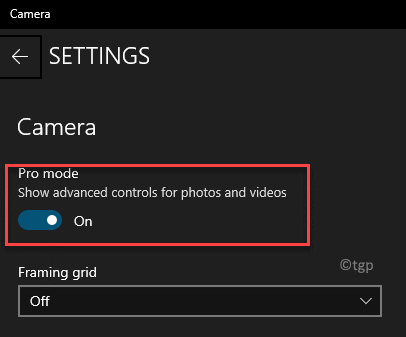
Step 4: Now, in the Settings pane, under the Camera section, go to Pro mode and move the slider to the right to turn it on.
Step 5: Now, return to the Camera and on the left side, under the Photo timer icon, you will see stop like icon (Brightness).
Click on this and you will now see a Brightness slider on the right.
Move the slider up or down to adjust the brightness.
You can now adjust the brightness according to your requirement.
Method 2: Through the Settings App
Alternatively, you can also change the Camera brightness of your Windows 10/11 PC through the Settings app. While the Method 1 is the quickest way, however, if you are not so comfortable with the app or if it’s not working for some reason, you can adjust the camera brightness from the Settings app as well. Follow the instructions below to make the changes:
Step 1: Press the Win + I keys together on your keyboard to open the Settings app.
Step 2: In the Settings window, click on Bluetooth & devices on the left side.
Step 3: Now, navigate to the right side and click on Cameras.
Step 4: On the right side, scroll down a bit and under the Connected cameras section, click on Integrated Webcam.
Step 5: Now, navigate to the right side, scroll down and under the Default image settings section, adjust the Brightness levels by moving the slider to the left or right.
Here, you can also adjust the Contrast.
Moreover, you can also Reset default Camera settings from this location, if any issues arise in adjusting the brightness.
Now, you have successfully adjusted the camera brightness on your Windows 10/11 PC.


