With the launch of Windows 10, Microsoft put an end to the automatic registry backup process. The Windows versions – 1803, 1809, and 1903 do not come with the feature to automatically backup registry. So, if you want to back up the registry to the RegBack folder customarily, you would need to manually activate the Registry backup function in Windows 10.
The entire purpose of removing the feature was to cut down the general disk space or storage footprint of the operating system. While the RegBack folder in the registry is all blank with no content whatsoever and can use the system restore point strategy, you can still force your PC to run an automatic registry backup with the following method.
How to Enable Automatic Registry Backup in Windows 10 PC
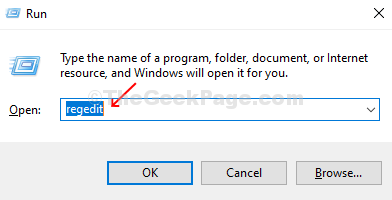
Step 1: Press the Windows key + R to open the Run box, type Regedit in the box, and hit Enter to open the Registry Editor.

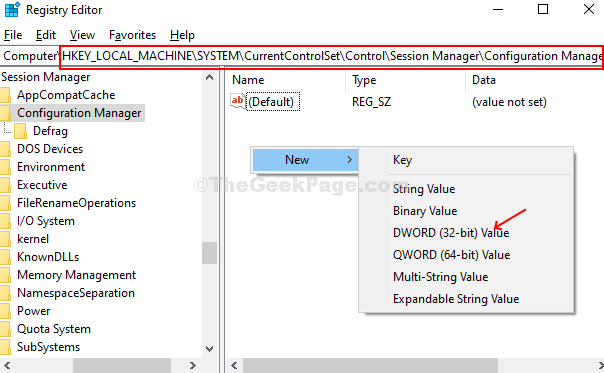
Step 2: In the Registry Editor window, navigate to the below path:
HKLM\System\CurrentControlSet\Control\Session Manager\Configuration Manager\
Right-click on the empty pane on the right side of the window > New >DWORD (32-bit) Value.

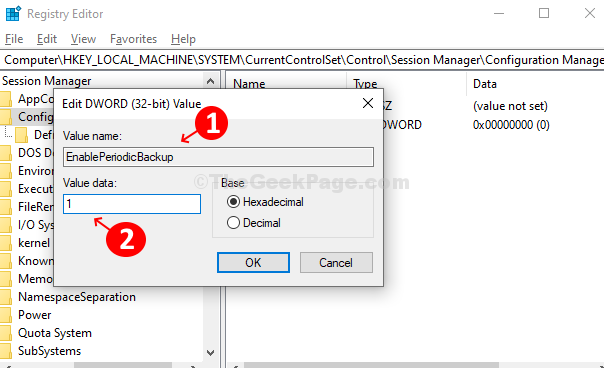
Step 3: Name the DWORD Value as EnablePeriodicBackup and set the Value Data as 1. Press OK to save the changes.

Once you are done modifying the Registry Editor, you can reboot the system for the changes to be effective.