If you downloaded the free version of Windows without activating it, you must now have the Activate Windows watermark at the bottom right corner of your screen. This little thing can be very annoying and can be very invasive. Fortunately, we have some perfectly working solutions lined up for you to try and remove the Activate Windows watermark from your machine. Read on, to learn how.
Method 1: By Running Batch File
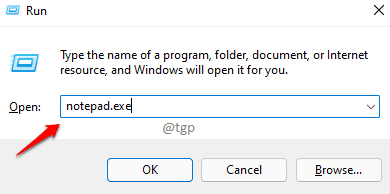
Step 1: Launch the Run window by pressing the keys WIN + R together.
Type in notepad.exe to Run window and hit Enter key.
Step 2: Copy paste the following code snippet on to the opened notepad file.
@echo off
taskkill /F /IM explorer.exe
explorer.exe
exit
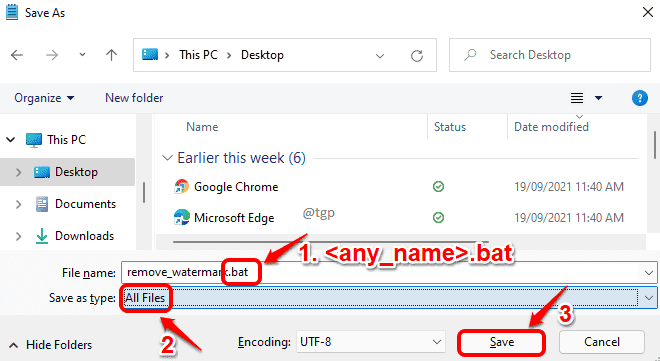
Step 3: As next, press CTRL + S keys together to open the Save As window.
Give the file any name. But make sure to give .bat extension.
Choose All Files from the Save as type drop down menu. Once done, hit the Save button.
Saving at any location is fine.
Step 4: Now navigate to the location where you have saved the file. Right click on the file and click on Run as administrator option.
Step 5: You will see a command prompt flash with the following message.
Step 6: That’s it, restart your machine and check if the watermark is gone.
For restarting, click on Windows icon, then on Power option and then on Restart.
Method 2: Through Registry Editor
Step 1: Press the keys WIN + R keys together to launch Run window.
Type in regedit and hit the OK button.
Step 2: As next, copy paste the following path in the Registry Editor navigation bar.
Computer\HKEY_CURRENT_USER\Control Panel\Desktop
You also need to scroll down and find the key named PaintDesktopVersion.
Step 3: Right click on the PaintDesktopVersion key and click on the Modify option.
Step 4: In the Value data field of the Edit window, type in 0 (zero) and hit the Enter key.
Step 5: Restart your machine. To restart, click on Windows icon first, then on Power icon and finally on Restart option.
That’s it. Once your system restarts, check if your Activate Windows watermark is removed.


