No doubt, Microsoft Word / Excel is by far the most frequently used applications for creating documents / excel sheets. This allows users to create a document with variety of templates and other features such as WordArt. But many windows users have reported that there is a yellow triangle with exclamation point on their word/excel icon. We say this might be something related to your microsoft account sign-in issue with MS Word/Excel. Therefore, no need to panic, we have come up with various methods by which you can resolve this in this post.
Fix 1 – Sign into your Microsoft Account in Word / Excel
Step 1: Press Windows key on your keyboard and type ms word.
Step 2: Then, Hit Enter key.

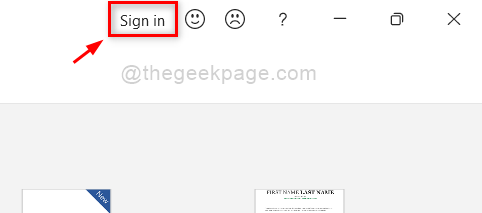
Step 3: Click Sign in button on the title /top bar of MS Word / Excel application.

Step 4: Then, Sign in with your Microsoft account email address and password in the pop up window that appears.

Step 5: Once you are signed in, please check if the yellow triangle with exclamation point.
Hope this resolved your issue.
Fix 2 – Sign Out and again Sign in to your Microsoft Account in Word / Excel
Step 1: Press Windows key on your keyboard and type ms word.
Step 2: Hit the Enter key.

Step 3: Click Account option at the bottom of MS Word application as shown below.

Step 4: Click Sign out button under User Information as shown below.

Step 5: Click Sign in button at the bottom of the User Information section to sign in.

Step 6: Then, Sign in into Microsoft Account with credentials as shown in the below screenshot.

Step 7: Check now if the problem still appears.
I hope this fixed your issue.
Fix 3 – Try to Sign with Different Microsoft Account
Step 1: Press Windows key on your keyboard and type ms word.
Step 2: Hit the Enter key.

Step 3: Click Account option at the bottom of MS Word application as shown below.

Step 4: Click Switch account button under User Information as shown in the below screenshot.

Step 5: Then, Click Sign in with a different account as shown below.

Step 6: Enter the details of Different microsoft account in the sign-in pop up window to Login.

Step 7: Now try and check if the yellow triangle with exclamation point is removed or not.
Hope this solved the issue. If not, then try our last fix explained below.
Fix 4 – Microsoft Support and Recovery Assistant Tool
Step 1: Click the below link to open Microsoft Support and Recovery Assistant tool download page directly on the browser.
https://www.microsoft.com/en-us/download/100607
Step 2: In this page, Click Download button to start downloading the SaRA_17.00.513_7.zip file as shown below.

Step 3: Open the zip file just downloaded and search for SaraSetup.exe file and double click on it.

Step 4: Click Extract all button to extract all the files before setup.

Step 5: Click Extract button as shown below.

Step 6: After it is extracted, open the folder and double click on SaraSetup.exe to start installing.

Step 7: Click Install button to start installation process as shown below.

Step 8: After installing, this will start verifying system requirements.
Step 9: Then, Click Agree button in the Terms and Conditions window.

Step 10: Then, in the next window, select the appropriate option that suits your problem for diagnosis.
Step 11: Perform On-screen instructions and do the needful.
I hope this solved your issue.
That’s all!
Hope this article was helpful and let us know which fix helped you in the comments section.
Thank you.