Are you trying to install apps on you windows OS, but it throws back an error code: X80080008 every time? Well, that’s a very common error when you are trying to install apps after you have upgrade your OS to Windows 10 or maybe you simply purchased new computer with Windows 10 installed in it.
Worst still, you may not even see the error code at times, and the app that you are trying to install may simly get stuck. You would then need to shut down the process to get rid of it. The reason behind this is usually a registry error in your Windows 10 system.
It can be annoying when you want the apps to be installed so that you can start working on your system right away . But, the good news is, this can fixed pretty easily using the below three methods. Let’s see how.
Method 1: By Deleting The Windows Store Cache
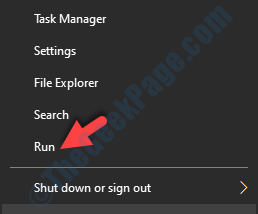
Step 1: Go to the Start button on your desktop and right-click on it. Now, select Run from the context menu to open the Run command.

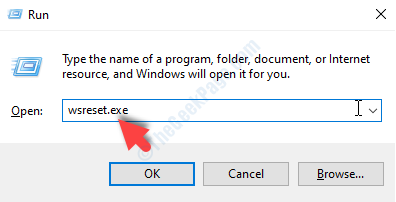
Step 2: In the Run box, type WSReset.exe and press OK.

This will start the reset process of the Windows Store. Once completed, the Windows Store will be automatically launched.
Now, reboot your PC, and try to download and install apps on your system to check if it’s working fine. If the problem persists, try the 2nd method.
Method 2: By Creating and Running App.Bat File
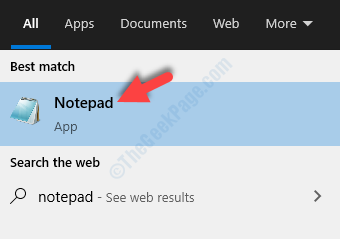
Step 1: Go to the Start button on your desktop and type notepad in the search box. Left click on the result to open the Notepad.

Step 2: In the Notepad, type or copy paste the below commands:
REGSVR32 WUPS2.DLL /S
REGSVR32 WUPS.DLL /S
REGSVR32 WUAUENG.DLL /S
REGSVR32 WUAPI.DLL /S
REGSVR32 WUCLTUX.DLL /S
REGSVR32 WUWEBV.DLL /S
REGSVR32 JSCRIPT.DLL /S
REGSVR32 MSXML3.DLL /S

Step 3: Now, go to the File tab on the upper left of the Notepad document, and click on Save As.

Step 4: Now, select the Desktop location on the left (make sure to save the file to Desktop location only). Go to the File Name field and name the file as app.bat, and set the Save as type field as All Files.
Press the Save button.

Step 5: Now, go to your desktop and right-click on the app.bat file, and select Run as administrator from the right-click menu.

Once the process is complete, restart your Windows 10 PC and check if you can now download and install apps. If you are still not able to, try the 3rd method.
Method 3: Through Windows Services
Step 1: Go to the Start button on your desktop and type Services in the search field. Left-click on the result to open the Services window.

Step 2: In the Services window, go to the Name column. Find and select Windows Update, right-click on it and click on Properties in the right-click menu.

Step 3: In the Windows Update Properties, under the General tab, go to the Startup type field and set it to Manual.
Press Apply and then OK to save the changes and exit.

Now, go back to Windows Store and try downloading and installing the app. It should be smooth and no error should show up again.