The corruption in a Word document may manifest weird bugs and issues. One such issue is opening up a Word file and getting nothing but a blank, white-slate page instead of the actual items. Whatever is the problem, you can fix it using these sets of instructions. Follow these steps minutely and enact them at your end, and everything will be fine in a few moments.
Initial Workarounds –
1. Just like any other tool on your machine, Word may malfunction once in a while. So, closing and relaunching the Word app may help.
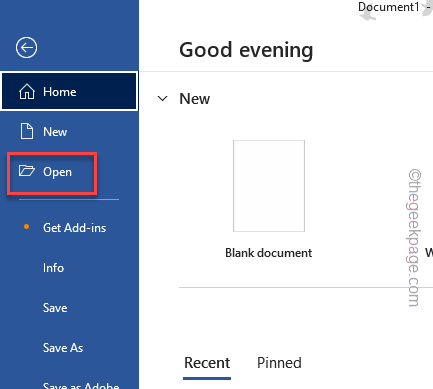
2. If you launch the MS Word app directly, it will show you just a blank page. From that default page, you may use the “File>” and “Open” options to open up a new file.
Fix 1 – Unhide the contents
The Word document may show up completely blank if the entire content of the document is hidden.
Step 1 – While you are in Microsoft Word, press the Ctrl+A keys to select all the contents at once.
Step 2 – Next, hit the Ctrl+D keys together to open the Font settings.
Or,
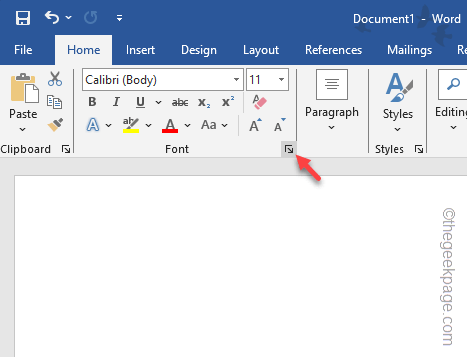
You can click the small arrow dot in the Font section to open the Font Settings.
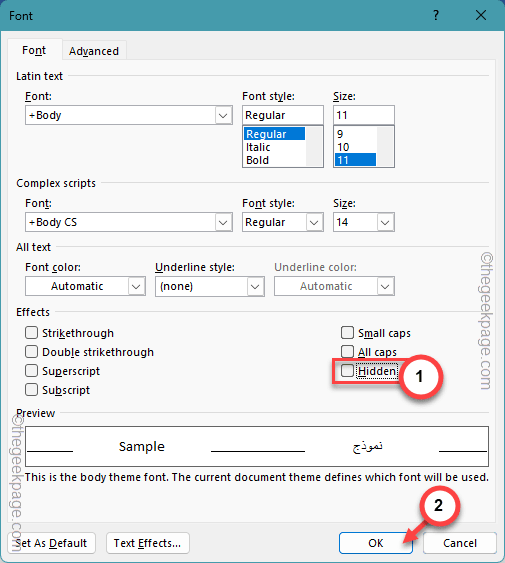
Step 3 – In the Font Settings tab, uncheck the “Hidden” box.
Step 4 – Next, click “OK“.
This will unhide the entire text present in the Word document. Check if this works!
Fix 2 – Repair the file
The possible corruption in the Word file might present the Word file as blank. So, repairing the file before opening may help.
Step 1 – You must close the blank instance of the Word file, first.
Step 2 – Run Microsoft Word on your system.
Step 3 – Next, open the “File” tab. Use the “Open” slab, there.
Step 4 – Finally, click “Browse“.
Step 5 – The next part is very easy. Just head to the location of the Word document.
Step 6 – Select the document from there and set the drop-down type to “Open & Repair“.
Step 7 – Click the same “Open & Repair” this time to open and repair the file.
When you have repaired the file and it loads up in Word, it will show you the correct contents.
Check if this works.
Fix 3 – Try several view modes
There are different view modes available in the Word that can provide you with different perspective to the document.
Step 1 – Go to the “View” bar.
Step 2 – There are several modes like –
Read Mode
Print Layout
Web Layout
Step 3 – Choose the preferred view mode and test.
Look whether you can read or modify the contents of the document.
NOTE – If you are working with a document that you have received online, you can do this –
When the document loads up in Word, hit the “Enable editing” option in the yellow ribbon.
As this lets you edit the document, you may be able to take a look at the contents of the document
Fix 4 – Recover the text from a file
In some situations, the corruption of the Word may not be able to load the texts of the file completely. You can recover the text from the file and check.
Step 1 – The process is as same as the repair process we have mentioned before. So, quit any open instances of the Word file.
Step 2 – Load up the Microsoft Word.
Step 3 – This time, use the Ctrl+O hotkeys to get access to the Open panel.
Step 4 – Select the Word file that you want to recover and set the option to “Recover Text from Any file” list.
Step 5 – Finally, tap “Open” to start the recovery process.
When Word loads up the recovered text file, check again.
Fix 5 – Run the Version History check
When you save and edit a document in Word, Word keeps track of the version of the document. You can use the Version History option to recover the document.
[NOTE – This applies to Microsoft Office 365 applications as well. You can try the same thing in Word from a web browser.]
Step 1 – Open the document. Wait until it loads up in Word.
Step 2 – Now, if you click the name of the document, it will show the location of the file. So, tap the “Version history” to load the entire version history of the file.
Now, you will see all the versions of the document on your computer.
Step 3 – Restore the correct version of the document that contains all the contents.
Check if this helps.
Fix 6 – Recover unsaved documents
Whenever you forget to save a document in Word, it keeps a record of those unsaved documents. Restore the document from there.
Step 1 – To do this, open the MS Word.
Step 2 – Next, go to the “File” menu.
Step 3 – Later, you must click the “Open” section.
Step 4 – On the right-hand pane, tap the “Recover Unsaved Documents” option to open that up.
Word keeps a copy of the unsaved work in the local system storage.
Step 5 – Now, select the file that you want to recover. You can have a better understanding of the files from their name that contains the date of creation.
Step 6 – Further, click “Open“.
The moment you have opened the file, you must name the file and save the file, properly.
No more of seeing the blank page.


