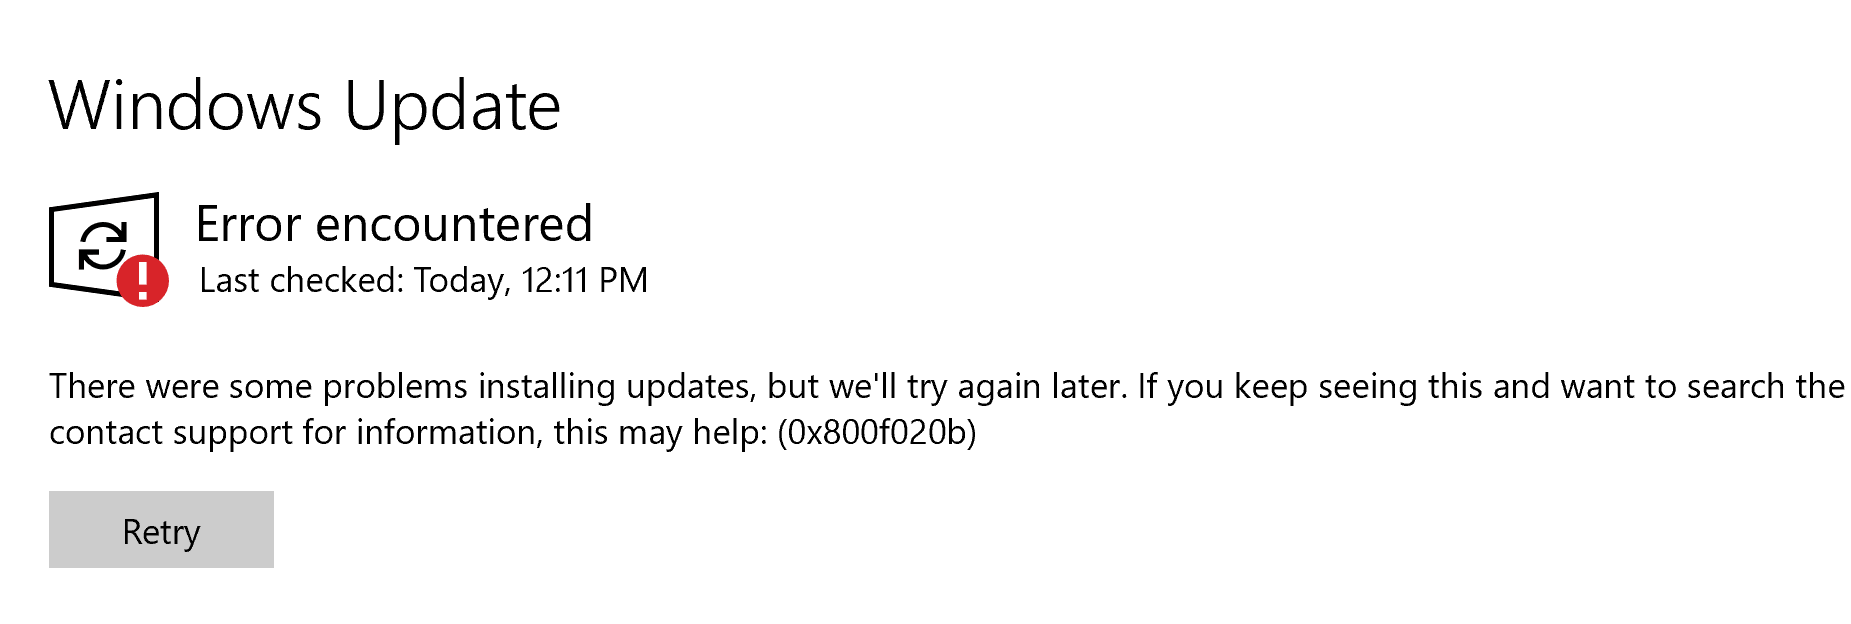
Many Windows 10 users have reported that when they are trying to update Windows, they see an error with an error code 0x800f020b. For more details, refer to the below screenshot.

This error is seen when :
- An update is to be installed for a device (like a printer). But the device is not currently connected to the system
- The device for which the update is to be installed is connected to the system over WiFi ( Like a network printer)
If you have encountered this error, read along. In this article, we will be discussing some fixes that might help get rid of this error.
Fix 1: Use Show or Hide Updates Troubleshooter
Step 1: Download the below Show or Hide Updates Troubleshooter
Step 2: Once downloaded, run the troubleshooter by double-clicking on it
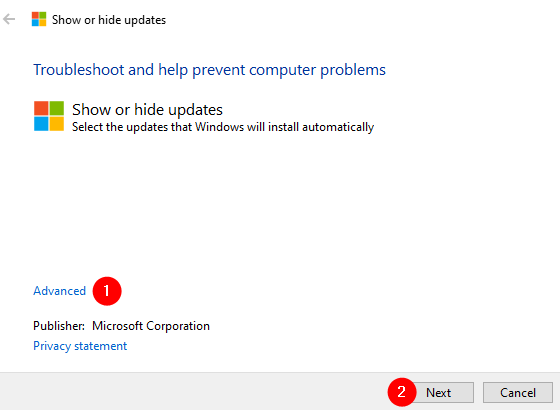
Step 3: In the Show or hide updates window, click on Advanced and then click on the Next button

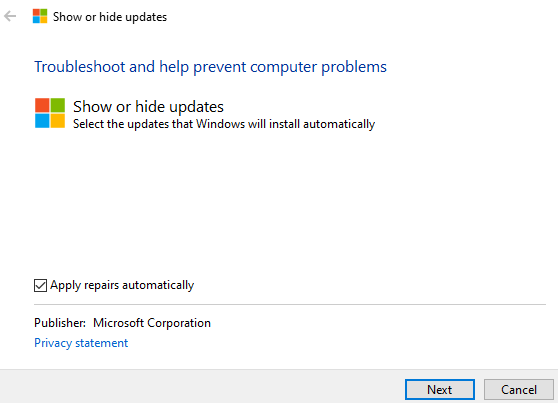
Step 4: Check the Apply repairs automatically option and click on the Next button

Step 5: Click on the Hide updates option

Step 6: In the upcoming, tick the updates that you want to hide and click on the Next button.

Step 7: The troubleshooter will make some changes to the system so that the selected update will not be installed in the system again.
Fix 2: Run the Windows Update Troubleshooter
Step 1: Open the Run Utility holding the keys Windows and R together
Step 2: Type the command ms-settings:troubleshoot and click on OK

Step 3: In the Settings–> Update & Security –> Troubleshoot window that appears, Click on Additional troubleshooters

Step 4: In the appearing window, Under the Getup and running section, Click on Windows Update
Step 5: Click on the Run the troubleshooter button

Step 6: You can notice that the Window Update troubleshooter starts running and detects the problems

Step 7: Now, follow the onscreen instructions to solve the issues
Note: – For Windows 11 Users
In step 3 Click on Other troubleshooters. Now, Click on Run located to the right of Windows Update to run the troubleshooter.

Check if this helps, if not try the next fix.
Fix 3: Using Registry Tweak
NOTE: You will need Administrator privileges to perform this fix.
Step 1: Open the Run Dialog using Windows+R
Step 2: Type services.msc and hit Enter
Step 3: In the services windows that open, scroll down and locate the Print Spooler service
Step 4: Click on the Print Spooler service and then click on Stop the service

Step 5: Now, open Run Dialog again
Step 6: Type regedit and hit Enter

Step 7: You will see a UAC prompt asking for permission, click on Yes
NOTE: Registry editing can have an adverse effect on the system even with the slightest mistake. It is advised to take the backup of the registry before proceeding. To take a backup, In the Registry Editor–> Go to File –> Export –> Save your Backup file.
Step 8: In the Registry Editor window, in the search bar at the top, copy-paste the following location
HKEY_LOCAL_MACHINE\SYSTEM\CurrentControlSet\Control\Print\Environments\Windows x64\Print Processors\winprint
If copy-pasting does not work, navigate to the above location from the left side panel.
Step 9: If you see the problematic driver here, just rename it to something else. To rename the Driver, right-click on the driver and select rename. Alternatively, click on the driver and press the F2 key.
For example, in this case, there was an issue installing the driver update for Xerox Printer. So, renaming XeroxDriver to XeroxDriver.old

Step 4: Open the services window and Restart the Print Spooler service. Refer to steps 1,2,3.

Step 5: Open the Run Dialog again
Step 6: Type control admintools and hit Enter

Step 7: From the opening window, scroll down and double-click on Print Management
Step 8: In the Print Management window that opens, Under Custom Filters, double-click on All Printers.
Step 9: You will see the list of printers, Right-click on the problematic printer and choose Delete from the context menu.

Step 10: Now, try updating and check if this helps you solve the problem
Fix 4: Ensure that the device is connected to the Computer
If you are seeing this error code, check which device update is failing and then make sure the device is connected to the system
Step 1: Open Run Dialog holding Win Key and R together
Step 2: Type ms-settings:windowsupdate-history and hit Enter

Step 3: Under the Update history section, expand the Driver Updates section
Step 4: Check which update corresponding to which device is failing
Step 5: Check the Physical connectivity to that device. Ensure it is connected and is working properly.
Now, try installing updates and see if the error is seen.
That’s All
We hope this has been informative. Thank you for Reading.
It would be great if you could comment and let us know which of the above fix worked in your case.