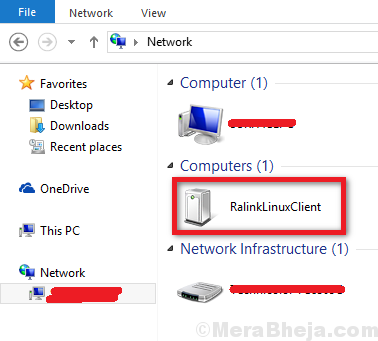
It has been reported by many users that the find an extra network device upon opening This PC. The network device is named RalinkLinuxClient and nobody knows what it is doing there since no extra network device was connected. One possibility is that the system might be hacked, but that is a rare chance.
What is RalinkLinuxClient?
Ralink is a company that manufacturers a few critical chipsets which are used in devices like your television, home security system, etc. It holds the largest share in the market, thus usually, the chip would be present in some or the other electronic device in every household.
We cannot figure out which device uses the Ralink chip directly since the brand of the electronic device is different from the chipset. Eg. A Samsung TV might be using a Ralink chipset.
Why does the RalinkLinuxClient appear in the list of Network devices?
Now the question is that why would this client appear in the list of network devices when no other random device would? The reason is that the Ralink chipset uses the same IP address as the router. Eg. 192.168.0.* range. Now the system confuses between these 2 and shows the RalinkLinuxClient as a part of the network even if the device was never specifically connected. However, many cyber criminals are aware of this bug, so they might be using the same name to intrude into your system.
Check if it is a security issue or not?
If a hacker was to hack your system by changing the name of the link network to RalinkLinuxClient, the link would pass through your router. So we would check accordingly:
1] Switch OFF your router and check if the RalinkLinuxClient still shows in the system. Most probably, it won’t. Proceed to the next step.
2] After switching ON the router, it will auto connect to the devices it was initially connected to (eg. your phone, laptop, TV, etc). Switch OFF these devices one by one to isolate which one is problematic.
3] If we are unable to find the device by the above method, we could check the IP addresses of the devices connected to the router and compare them with the IP address of the RalinkLinuxClient. However, we need to know how to use the GUI for the same.
4] If we find the device, we could isolate the issue accordingly, else change both the username and the password for your router. This would disconnect all devices connected to it and then we could reconnect the ones which are trusted. In case it was an attempt by a hacker, the connection would break.
To enter your system again, the hacker would need to know the new username and password.
How to change the username and password of a router?
The process to change the username and password of a router depends on the brand of the router, but a generic procedure could be followed for most major brands. Try the following steps:
1] Press Win + R to open the Run window. Type the command cmd and press Enter to open the Command Prompt window.
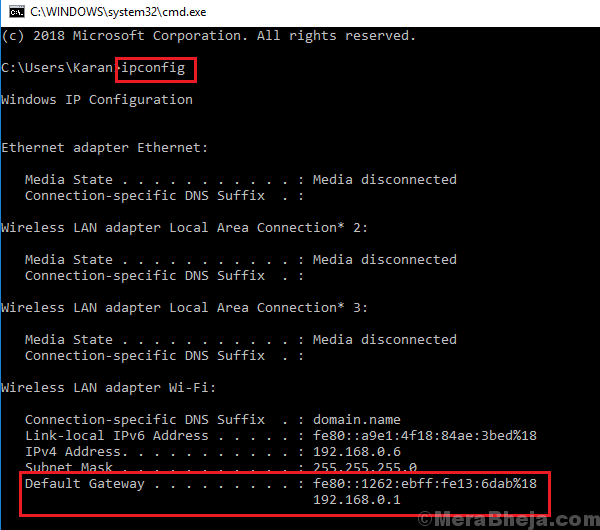
2] Type the command ipconfig and press Enter. It would display a list of data.
3] Note down the value of the default gateway. For my system it is 192.168.0.1. It may vary depending on the brand of the router.
4] Open the Edge browser. Type the value of the Default Gateway we noted (192.168.0.1 in my case) in the address bar and press Enter.
5] It would prompt for a username and password. You could find the details for the same on your router itself (unless you changed it).
6] After entering the credentials, you would be logged in to the GUI.
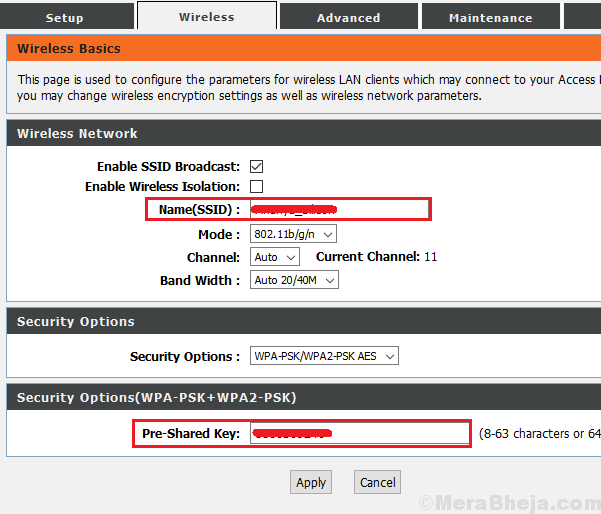
7] Among the Tabs, find the option to change the SSID and password. It is usually on the Security tab. Change it accordingly and save the options.
8] Unless your computer was connected to the router using a LAN cable, it would get disconnected from the WiFi. You could reconnect using the new credentials. Same for all other devices.
After isolating the possibility of your system being hacked and confirming that the RalinkLinuxClient is one of your own devices, we could remove the same even though it is harmless.
Disable the Windows Connect Now services
1] Press Win + R to open the Run window and type the command services.msc. Press Enter to open the Service manager window.
2] In the list of services which is arranged in alphabetical order, scroll to Windows Connect Now services.
3] Double-click on the Windows Connect Now services to open its Properties.
4] Change the Startup type to disabled. Thereafter, click on Apply and then on OK.
We hope this extensive guide would help a lot with this issue.


