Task Scheduler is the tool that comes with the windows on your system, allowing users to create a task that can be scheduled to execute automatically upon triggering an event.
For example, when there is any update available, the software gets updated automatically because it is triggered.
If you want to know how many times or when this task has been executed, you need to first enable the task history for a particular task in the task scheduler app on the system. It helps you analyse more about the task that you had scheduled.
In this article, you will learn how you can enable the task history, and view and clear the task history in the windows 11 system.
How to Enable and View Tasks History in Task Scheduler in Windows 11
Step 1: First let us see how to enable the task history feature in the task scheduler.
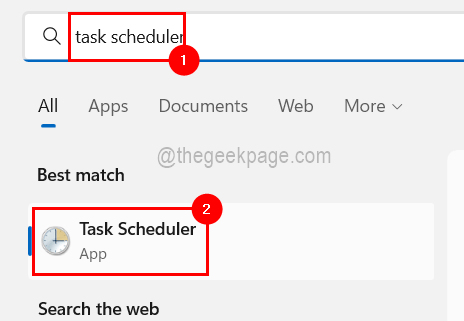
To do so, you need to open the task scheduler on your system by pressing the Windows key and typing task scheduler and pressing Enter key.

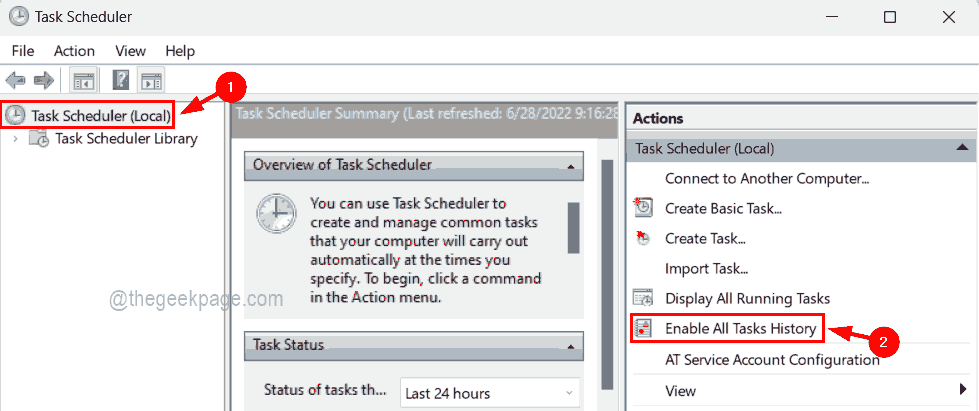
Step 2: Once the task scheduler window opens, make sure you click Task Scheduler (Local) on the left side and click Enable All Tasks History on the right side in order to enable the task’s history as shown in the below image.

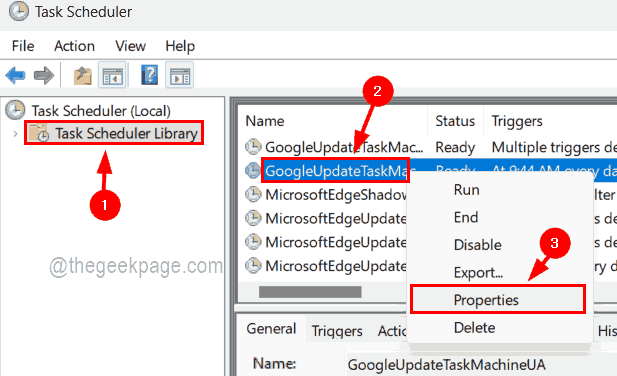
Step 3: Now that it is enabled, you can go to Task Scheduler Library just below Task Scheduler (Local) by clicking on it.
Step 4: Then you will get to see all the tasks listed in the middle of the window as shown below.
Step 5: Select the task you want and right-click on it.
Step 6: Then click Properties from the context menu as shown below.

Step 7: In the task’s properties window, click the History tab at the end to view the history of the tasks and close it by clicking on OK as shown below.

Step 8: Now if any user wants to clear the history of a particular task, then
How to Delete / Clear task history using Event Viewer in Windows 11
Step 1: Open the Event Viewer app on the system by pressing the Windows key and typing event viewer.
Step 2: Hit the Enter key which opens up the event viewer app.

Step 3: Then navigate to the Operational log file through the path given below.
Event Viewer (Local)/Applications and Services Logs/Microsoft/Windows/TaskScheduler/Operational
Step 4: After reaching the Operational log file, right-click on it and select Clear Log from its context menu as shown in the below picture.

Step 5: After you are done, you can close the event viewer app on the system.