Videos have always been a pleasure to watch and most of us make use of VLC media player for this purpose.There are various updates which are available for this, and the new features and enhancements added into it have proved it to be more powerful. They are very comprehensible and allow us to make editing on the video we watch, along with the various other options like play, volume controls, screen personalizations, sound enhancements and pause. However, most of us would have used it just for the purpose of playing videos without the knowledge of its tricks which are hidden deep inside. We are here to make a dig into it and bring out the features that might prove useful and fun to use it from now on.
There is a feature in it whereby you can record the desktop videos directly using VLC media player. It is a very rare feature and many of us wouldn’t have heard much of it before. It is a unique feature of this particular player. You have a prerequisite of having the VLC media player preinstalled on your system for this purpose.
Let us take you through the steps of recording.
Ways to Record Videos In Desktop Using VLC Media Player
Step 1:
Open up the VLC media player application that resides on your system. You can access it directly either by double clicking on its icon in your desktop or searching for it in the Start menu.
Step 2:
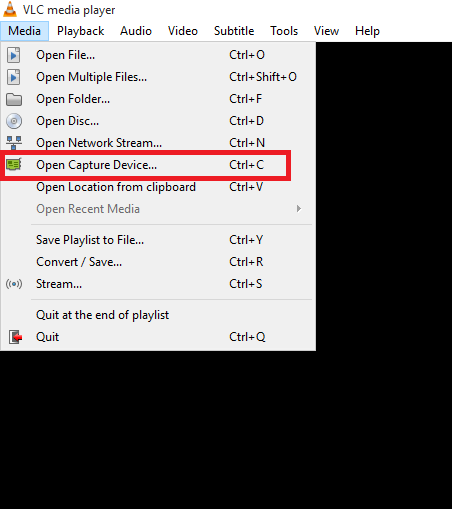
Once the media player opens up, click on the title named Media on the top left corner menu.Out of the options available in it, you will have to choose the one named Open Capture Device. You can also access it by clicking on Ctrl+ C.
Step 3:
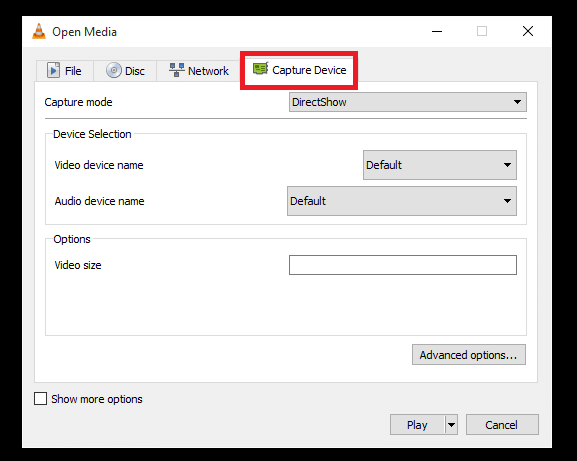
Once you open up the box named Open media, on the top you will find four different options., File,Disk, Network and Capture Device. Choose the option Capture Device.
Step 4:
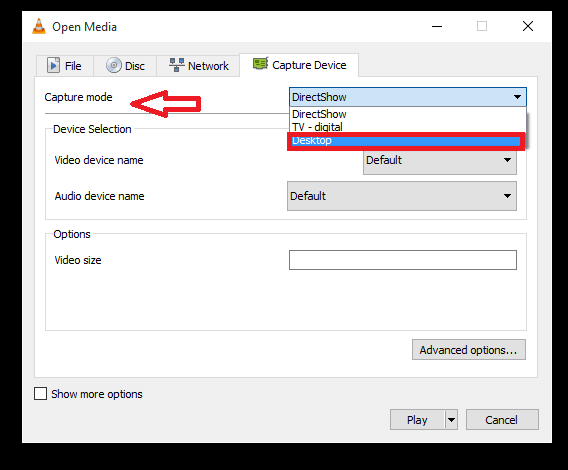
On to the right of Capture mode, you will find a drop down menu. Choose the option called Desktop from it.
Step 5:
You will find an option to change the desired frame rate value.This determines the smoothness of the recorded video.Change the value there to 15 or 30 depending on your recording smoothness.
Step 6:
You will find the option called Play towards the bottom of that box.Click on the arrow beside it and choose the option Convert.
Step 7:
In the window that appears, confirm that the Profile option is set to Video H.264+MP3(MP4). Select the path next to Destination file to choose the location where you have to save the recorded file.
Step 8:
Click on the Start button to start recording the video.
Start recording right now!


