How To Capture Screen Videos On Your Android Device Without Rooting:- Have you always wanted to capture screen videos in your Android devices just like how you capture screenshots? Here is an easy shortcut. Capturing screen videos using Rec (Screen Recorder) is a very simple process in Android and the good thing is it doesn’t require your phone to be rooted.
Note: If your Android device is running on Android 4.4, then Rec (Screen Recorder) needs root access. But it works like magic for Android versions 5.0 and above.
STEP 1
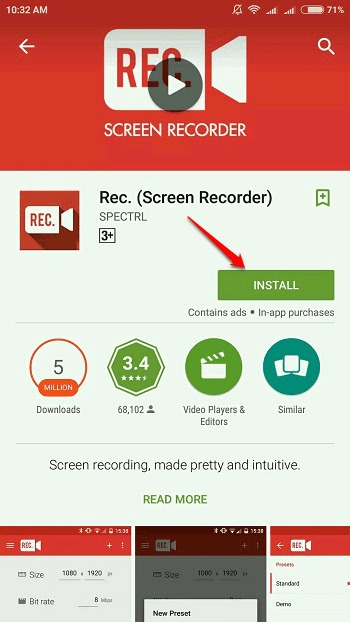
- You can find and install the Rec (Screen Recorder) application from Play Store by clicking here.
STEP 2
- Once installed in your Android device, launch the application by clicking on its icon.
STEP 3
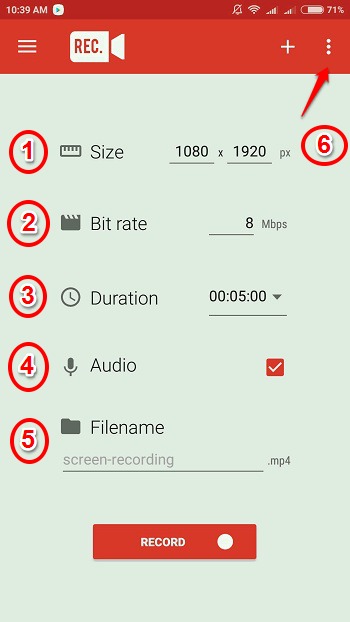
In the home screen of the app, you can set the following:
- 1. Size – Size of your video in pixels.
- 2. Bit Rate – Set the Bit Rate by using the Bit Rate option.
- 3. Duration – Here you get to set the maximum duration of your video.
- 4. Audio – If you check the checkbox corresponding to the option Audio, then audio (via mic) will also be captured when the video records.
- 5. Filename – You can also specify a file name for your screen video.
- 6. Once you have set up everything, click on the 3 dots icon at the top right corner of the screen.
STEP 4
- From the options that get expanded out, click on the Settings option.
STEP 5
- Under the section Defaults, you can specify the location at which you want your recorded screen videos to be stored.
STEP 6
- If you scroll down through the settings, you will be able to find a check box corresponding to the option Screen Off. If you check this checkbox, you can stop the recording by just pressing the power button.
STEP 7
- Once you are all set, hit the back button and get back to the home screen. Now you can press the Record button to start the recording.
STEP 8
- When asked for confirmation, click on the Start now button.
STEP 9
- You will now be able to see a countdown timer. Once the countdown timer expires, the recording starts.
STEP 10
- When you want to stop the recording, simply press the power button and the recording will stop. The file will be saved at the location that you have specified. If you haven’t specified any location, the file gets saved at the default location storage/emulated/movies/rec.
STEP 11
- If you go to the storage location of the saved videos, you will be able to find them there, all good and ready.
Hope you had fun reading the article. Please leave out comments in the comments section if you have any doubts or suggestions. Thank you for reading.


