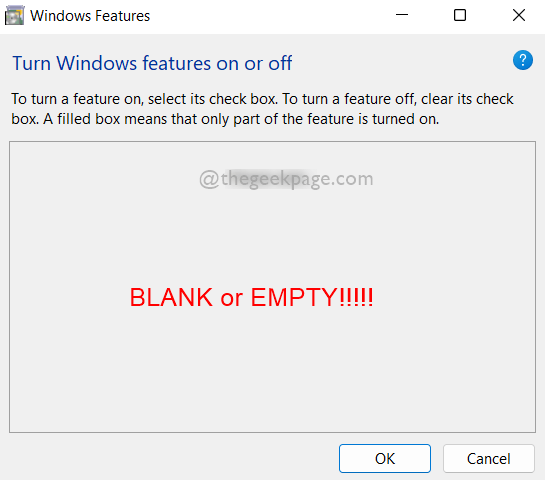
Many windows users have reported that when they launched the Turn Windows Features on or off window on their system, even after several minutes the features list did not appear and it is still blank or empty and they are unable to do anything about it. If you are wondering what is this windows features all about, we will explain it briefly.
Windows has many features within its OS and it improves system performance as well as user experience. This windows features lists all the installed features on your system, which you can enable or disable it using the Turn Windows features on or off wizard. Enabling or disabling will not install or uninstall the features but it will remain on your system.
If you are also facing this same issue on your system, then we have compiled below a few soutions that might help you in solving this issue.

Fix 1: Perform SFC Scan on your system
Some corrupted files on any system can be the cause for interruption in loading the windows features list in the turn windows features on or off window. Therefore, running the System File Checker scan will help in detecting the corrupt files so that the user can replace or delete that file and can solve this issue. Please follow some simple steps given below.
Step 1: Press Windows + R keys together on your keyboard to open Run box.
Step 2: Type cmd in the run command box and press CTRL + SHIFT + ENTER keys together to open Command Prompt as admin.
Step 3: Accept the UAC prompt by clicking Yes to continue.

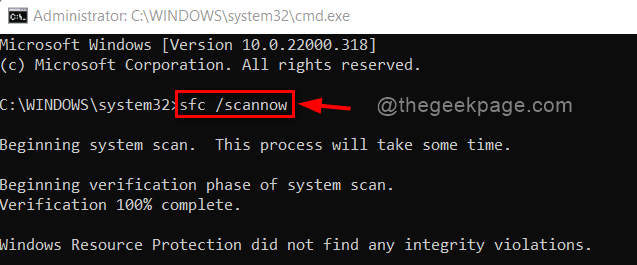
Step 4: In the Command Prompt, Type sfc /scannow and hit the Enter key to execute it as shown below.
NOTE: This scan process takes a bit time so please wait patiently till it completes.

Step 5: If there are no corrupted system files, then it will display Windows resource protection did not find any integrity voilations.
Step 6: Replace or delete any corrupted files listed in the results if any.
Step 7: Close the command prompt.
This fix must resolve this problem. If it did not, then go through other fixes mentioned below.
Fix 2: Run DISM Restore Health
Step 1: Press Windows + R keys together on your keyboard to open Run box.
Step 2: Type cmd in the run command box and press CTRL + SHIFT + ENTER keys together to open Command Prompt as admin.
Step 3: Accept the UAC prompt by clicking Yes to continue.

Step 4: Copy and paste the command given below in the command prompt and tap on Enter key.
DISM /Online /Cleanup-Image /RestoreHealth

Step 5: Once the operation is completed and if there are any issues, rectify it.
Step 6: Close the Command Prompt.
That’s it!
Hope this fix solved your issue.
Fix 3: Delete the StoreDirty Registry key using Command Prompt
Step 1: Press Windows + R keys together on your keyboard to open Run box.
Step 2: Type cmd in the run command box and press CTRL + SHIFT + ENTER keys together to open Command Prompt as admin.
Step 3: Accept the UAC prompt by clicking Yes to continue.

Step 4: Execute the command given below.
reg delete HKLM\COMPONENTS /v StoreDirty
Step 5: If there is no registry key named StoreDirty on your Registry file, then it will display ERROR: The system was unable to find the specified registry key or value. Please ignore this message. Nothing to worry.
Step 6: If it executes the command without any error, it means it has cleared / deleted the StoreDirty registry key.

Step 7: Close the command prompt.
Hope this solves your issue.
Fix 4: Change Windows Modules Installer’s startup to Automatic
Step 1: Press Windows + R keys together on your keyboard to open Run box.
Step 2: Type services.msc in the run box and hit the Enter key to open the Windows Service.

Step 3: Scroll down the services list and locate Windows Modules Installer service.
Step 4: Double click on Windows Modules Installer service to open its Properties window.

Step 5: In the Properties window, Click on Stop button to stop the service.

Step 6: Then, click on Manual to see the dropdown list of Startup type.
Step 7: Select Automatic from the list.
Step 8: After selecting, Click Start button to start the Windows Modules Installer service.
Step 9: Once done, Click Apply and OK to make changes and close the window.

Step 10: Once restart your system and check if the problem is solved.
Hope this solves your issue.
Fix 5: Restore your System
If none of the above fixes worked for you, then this is the ultimate solution which will definitely going to help you. Restoring your system will get your system to the last stored point where it was working perfectly fine. Please Click Here to read the article on system restore.
That’s it.
Hope this post was informative and helpful.
Please leave us comments below to let us know which fix worked for you and if there are any queries to be answered.
Thank you!