System Restore has become pretty well-versed among Windows 10 users. It turns to be a lifesaver whenever the system faces any fatal crashes. Windows 11 also has this incredible feature inbuilt. So, if you want to know how to recover your PC using the system restore, you are just in the right place. In this article, we are going to discuss how to recover your computer simply by putting it in a previously saved restore point.
How to recover your computer using the system restore in Windows 11
You can restore your computer to a previous restore point, following these steps.
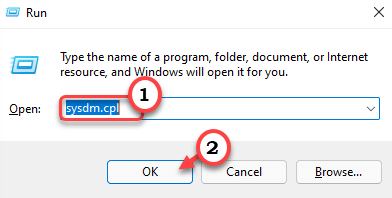
1. Press Windows key+R to open the Run window.
2. In the Run window, copy-paste the following Run command and hit Enter.
sysdm.cpl

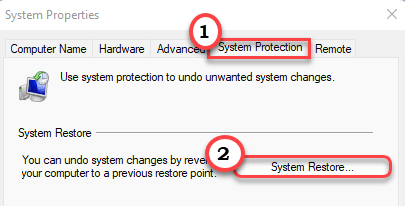
The System Properties window will open.
3. In the System Properties window, go to the “System Protection” tab.
4. Now, click on “System Restore“.

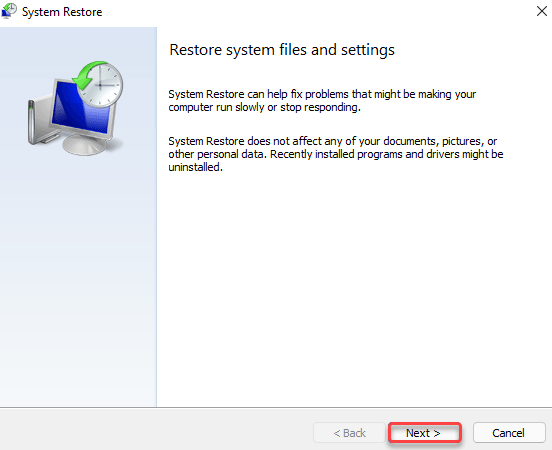
5. In the System Restore window, click on “Next“.

6. Now, check the option “Show more restore points“.
[You may see an option ‘Scan for affected programs‘ on the same screen. You can click on it to check which programs will be rolled back.]
7. Now, choose the latest restore point from the list of restore points.
8. Then, click on “Next“.

9. Finally, click on “Finish” to initiate the restoring process.

This will start the system restore process. Your computer may be restarted a few times. This whole process may take some time.