Whenever you try to access the Set up microphone in Windows 10, you see this error message, “The wizard could not start microphone“. This is a common error, especially when you are trying to set up your Windows microphone and it prevents you to do so.
Fortunately, there are a couple of solutions available for this “The wizard could not start microphone” error in Windows 10. Let’s see how to fix this issue.
Method 1: By Running The Troubleshooter
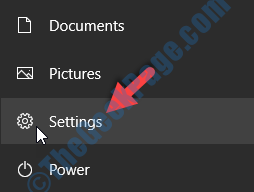
Step 1: Go to the Start button on your desktop and click on Settings (gear icon) in the context menu, located above the Power option.

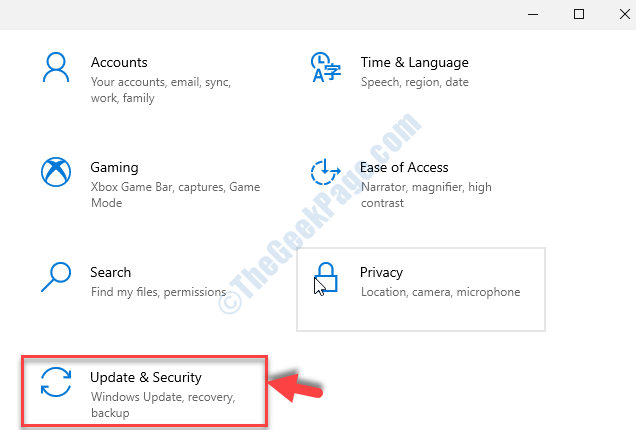
Step 2: In the Settings window, click on Update & Security.

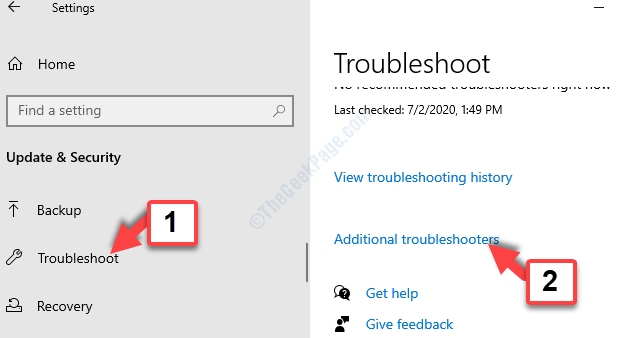
Step 3: In the next window, click on the Troubleshoot option on the left, and then on the right side of the pane, scroll down and click on Additional troubleshooters.

Step 4: In the Additional troubleshooters window, scroll down and under Find and fix other problems, select Recording Audio.
Then click on the Run the troubleshooter button below it.

Step 5: Wait for some time till it detects the device/s that you want to troubleshoot. Select the appropriate device from the list and click Next.

Now, wait till the troubleshooter provides a solution. Click on Apply fix to resolve the issue.
This should take care of the error and it should not show up again, but if it still does, try the 2nd method.
Method 2: By Enabling Allow Apps To Access Your Microphone Settings
Step 1: Open the Settings window, as illustrated in Step 1 in Method 1 above. Now, in the Settings window, click on System.

Step 2: In the next window, click on the Sound option on the left side. Now, on the right side of the pane, scroll down to the Related Settings section. Click Microphone privacy settings under it.

Step 3: On the right side of the pane, scroll down till the Allow apps to access your microphone section and move the slider to turn it on.

Now, restart your PC and the error should be gone. But, if problem persists, try the 3rd method.
Method 3: By Checking If the Microphone is Turned On
Step 1: Go to the speaker icon on the bottom right of your Taskbar. Right-click on it and click on Sounds.

Step 2: In the Sound dialogue box, select the Recording tab, select the Microphone and right-click on it. Click on Enable in the right-click menu.

Step 3: Now, click on the Set Default button below to change the current microphone to be the default one. Click on Apply and then OK to save the changes and exit.
That’s all. You can now access the Set up microphone in your Windows 10 PC hassle-free, without any errors.