If you have faced a BSOD issue on your device and upon accessing the Event Viewer log on your computer you have seen a peculiar error message stating ‘The driver \Driver\WudfRd failed to load for the device WpdBusEnumRoot\UMB\’, don’t worry. This actually is an issue of the external drive connected to the system by a USB port on your computer. There are some easy resolutions to fix the issue on your computer.
Workaround–
1. At first you can remove all the external devices connected to your computer. Restart your system and check if this works.
Fix 1 – Check for Windows Update
Case 1 – For Windows 10 users
Windows delivers essential patches for your system to solve these types of issues.
1. You need to press Windows key+I to access the Settings.
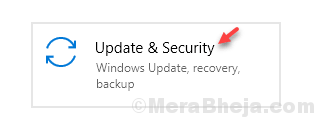
2. After that, click on the “Update & Security“.

4. On the left-hand side you will notice the “Windows Update“.
5. After that, click on “Check for updates“.

If any updates are pending on your system, let Windows install it on your computer.
Case 2 – For Windows 11 users
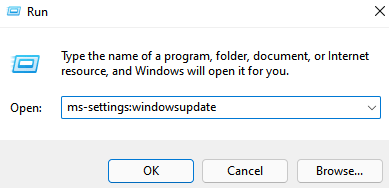
1- Press Windows key + R key together to open run.
2 – Copy and paste the following code given below in run command box and click OK.
ms-settings:windowsupdate

3 – Now, click on Check for updates and Update your computer.
4 – If it is updated then click on Advanced options.

5 -Click on Optional updates and try to update any optional driver updates if there are any pending driver updates being shown.

Fix 2 – Automate the WDF service
Automating the Windows Driver Foundation service will help you to solve this issue on your computer.
1. Press the Windows key+R to open up the Run window.
2. After typing this command in the terminal, click on “OK” and Services will appear.
services.msc

3. Go down through the list of services on your device to find the “Windows Driver Foundation – User-mode Driver Framework” service.
4. Double click on it.
5. After opening the service, set the ‘Startup type:’ to “Automatic“.
6. In case the service is not yet started, click on the “Start“.

7. Don’t forget to click on the “Apply” and “OK” to save the changes on your computer.

After closing the Services, restart your PC.
Upon rebooting try to plug in the USB device in any port of your computer. You won’t see the error message again.
Fix 3 – Uninstall and reinstall all USB controllers
Uninstalling and reinstalling the USB controller will solve this issue on your computer.
1. Press Windows key+X. Then, click on the “Device Manager” to access it.

2. When you have opened the Device Manager on your computer, expand the “Universal Serial Bus controllers” section.
3. After that, right-click on the first driver in that section and then click on the “Uninstall device“.

4. Simply, click on “Uninstall” to finally uninstall the driver.

5. Then, you have to uninstall the remaining USB drivers in the ‘Universal Serial Bus controllers’ section.

The moment you have uninstalled all the USB drivers from your computer, restart your system.
Steps to reinstall the USB drivers
Now you have to install the driver on your computer.
1. After restarting your device, right-click on the “Windows icon” and then click on “Device Manager“.

2. When you have opened the Device Manager, click on the “Action“.
3. After that click on the “Scan for hardware changes“.

This will automatically install the driver or, you may see the installation wizard on your computer. If you see the installation wizard has opened up, follow the on-screen instructions to manually install the USB drivers.
This will fix your problem for sure.
Fix 4 – Turn off HDD hibernation
Some users have claimed that the automated hibernation of HDD on their device is causing this issue.
1. Press Windows key+R keys together.
2. Once the Run window appears, type or paste this code and press Enter.
control.exe powercfg.cpl,,3

3. Once you are in the ‘Power Options’ window, expand the section “Hard disk” and then expand “Turn off hard disk after“.
4. Set the ‘Settings(Minutes):” to “0“.*

[*NOTE– If you are doing this on a laptop, you will notice two variable settings. One is the “Plugged in:” and the other is the “On battery:“. Simply set both the settings to “0“.]
5. Finally, click on “Apply” and then click on “OK” to save this.

Close the Power Options window. Check if the fix works.