When booting your Windows 10, you must have noticed that there are certain apps that start automatically. While this can be useful for those apps that you are using regularly, some apps may not be required. One such app is Skype which is by default set to start automatically when your computer boots up.
It starts by default on startup and then you can log in to your Skype account. Why does this happen? Because it instantly notifies you of any missed calls or messages that came through when your system was shut down. However, not everyone may need it that way. So, how do you change Skype’s auto-start settings? Let’s find out.
Stop Skype from Auto start via Task manager
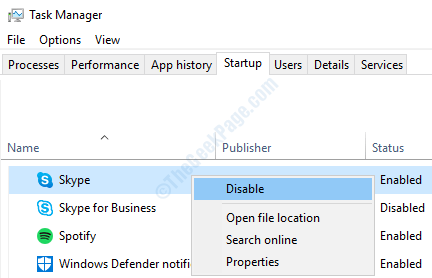
1. Press CTRL + Shift + Esc together from the keyboard to open task manager.
2. Click on startup Tab.
3. Right click on skype from the list and choose disable.

Stop Skype from Starting Automatically in Windows 10 Via Settings App
Step 1: Right-click on the Windows icon (Start) on your desktop and click on Settings in the context menu.
![]()
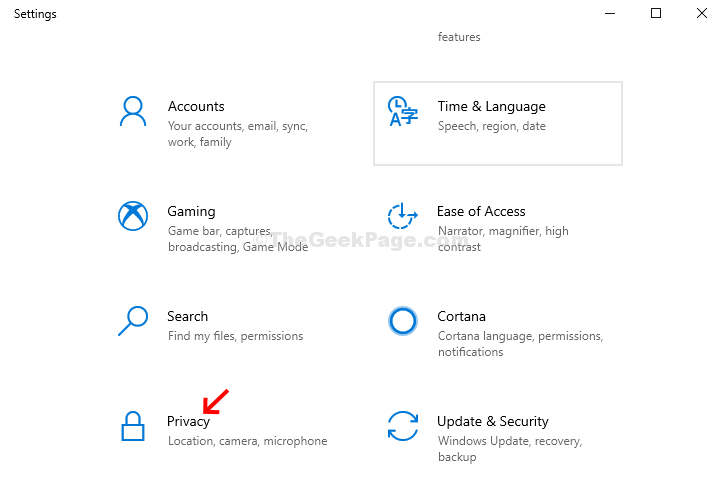
Step 2: In the Settings window, click on Privacy.

Step 3: In the Privacy screen, on the left side of the pane, scroll down till you find the App permissions section. Under this section, click on Background apps. On the right side of the pane, scroll down till you find Skype. Here, turn off the toggle next to Skype.

Now, restart your computer and Skype will not start automatically anymore.