Recently some Windows 10 users are complaining about a weird problem on Skype they are witnessing after receiving the recent update on their computers. According to these users, Skype is not opening on these user’s computers. If you are witnessing a similar kind of phenomenon opening Skype, simply follow these fixes. But before going to the main solutions, don’t forget to go through these workarounds first.
Initial Workarounds–
1. Reboot your computer and after rebooting try to launch Skype.
2. If you are using any McAfee software or ArcSoft Webcam Suite or Trustee Rapport software, uninstall these softwares from your computer.
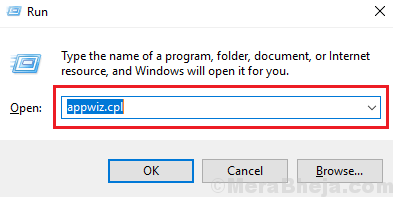
a. Press Windows Key+R to launch Run window. Type “appwiz.cpl” and then hit Enter. Program and Features window will prevail.

b. Now, scroll down and double click on “McAfee“, “ArcSoft Webcam” and “Trustee Rapport” one-by-one to uninstall them sequentially from your computer.
After uninstalling these softwares, reboot your computer.
3. Check if any Windows Update is pending or not.
If any of these workarounds didn’t work, try these fixes-
Fix-1 Launch Skype from Microsoft Store-
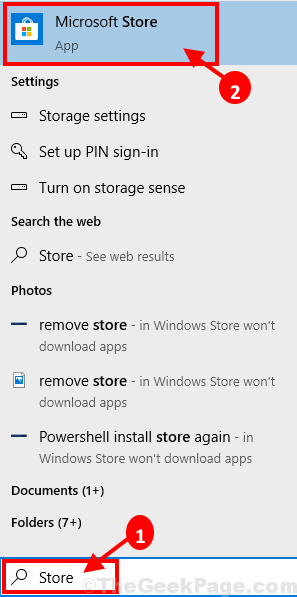
1. Click on the Search box and then type “Store“.
2. Click on “Microsoft Store” to open Store it on your computer.

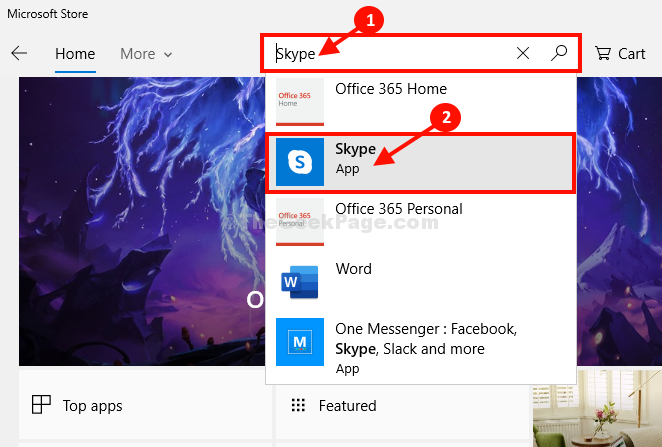
3. In Microsoft Store window, click on the Search box at the top, and then type “Skype“.
4. Click on “Skype” from the drop-down search result.

5. You will notice a message stating “This product is installed.”
6. Click on “Launch” to launch Skype on your computer.

Skype should be launched on your computer. If it doesn’t, go for the next fixes.
Fix 2 – Allow Skype access to Microphone and camera
1 – Open settings by pressing Windows key and I key together.
2 – Now, Click on Privacy & Security from left menu and Camera from the right side.

3 – Make Sure , Camera access is turned On and also, camera access for skype is alos turned ON individually in the list given below.

4 – Again , Click on Privacy & Security from left menu and Microphone from the right side.

5 – Make Sure , Microphone access is turned On and also, Microphone access for skype is alos turned ON individually in the list given below.

Fix-3 Uninstall and Re-install Skype-
Uninstalling and re-installing Skype from your computer will surely solve the problem with Skype.
1. Simply by pressing Ctrl+Shift+Esc together you can access the Task Manager window.
2. Now, scroll down and right-click on “Skype” from the running processes, and then click on “End Task” to end the process.

Close Task Manager window.
3. Now, press Windows key+I to open the Settings window.
4. Now, click on “Apps” to open Apps settings.

5. In the Apps settings window, on the left-hand side, click on “Apps & features“.
6. Now, on the right-hand side of the Settings window, scroll down and then type “Skype” in the Search box.
7. Now, click on “Skype” which will appear in the search result, and then click on “Uninstall“.
8. When a tab with ‘This app and its related info will be uninstalled.‘ message will appear, click on “Uninstall” to initialize the uninstallation process.

Close Settings window.
Note: – For Windows 11 Users
For Windows 11 users, Just press Windows key + I to open settings. Then, Go to Apps -> Installed Apps and then search skype and Uninstall it.
9. By pressing Windows key along with the ‘R‘ key you can launch Run window. Type or copy-paste “%appdata%” in Run window and hit Enter.

10. In the Appdata folder, scroll down and try to find the “Skype” folder.
11. Right-click on the “Skype” folder and then click on “Delete” to delete the folder.

12. Now, navigate to this location in File Explorer.
C:\Program Files (x86)
13. Look for the “Skype” folder.
14. Right-click on the “Skype” folder and then click on “Delete” to delete the folder from your computer.

Once you have deleted the folder, close the File Explorer window.
15. At first, click on the Search box and then type “regedit“. Then, click on “Registry Editor” in the elevated search result.

16. When the Registry Editor window opens up, click on “File” on the menu bar and then click on “Export” to make a backup of your registry.

17. Then, In the Registry Editor window, click on “Edit” on the menu bar and then click on “Find“.

18. In Find panel, type “Skype” in the search box of ‘Find what:‘, and then click on “Find Next“.

19. Now, right-click on the key which will appear as the search result, and then click on “Delete” to delete the key from your computer.

20. Repeat Step-16, Step -17, and Step-18 to find and delete all the registry keys associated with Skype application.
Once done, close Registry Editor.
21. Now, you have to download and install the latest version of Skype.
When you have finished downloading Skype, simply open the setup file and then follow the on-screen instructions to install Skype.
Once you have installed Skype, reboot your computer. After rebooting, try to launch Skype. It should work just fine.
Fix-4 Run Skype in compatibility mode-
Running Skype in compatibility mode may solve your issue.
1. Right-click on the “Skype” icon on the desktop and then click on “Properties“.

2. In the Properties window, go to the “Compatibility” tab.
3. Now, in the Compatibility tab, first check the option “Run this program in compatibility mode for:” and then, select “Windows 8” from the drop-down list just below.
4. Then finally, click on “Apply” and “OK” to save these changes.

Try to launch Skype on your computer. Check if the error is happening or not.
Fix-5 Install Media Feature Pack for Windows 10 N-
NOTE–
This fix is for the Windows 10 N series users only.
If you are facing this error on a system running Windows 10 N series, you need to install this media feature pack.
1. Download the latest Media Feature Pack. on your computer.
2. Under the Downloads section, select the latest media feature pack from the drop-down list.
3. Click on “Confirm” to confirm the package selection.

4. Finally, choose the package version according to your CPU-architecture to begin the downloading process.

Once you have downloaded the package, install it on your computer.
Reboot your computer to let the changes take effect.
Skype should launch without any further issues.
Fix 6 – Reset Network commands
1 – Go to Windows taskbar search and then search cmd in the search box.
2 -Right click and choose run as admin from the options.

3 -Now, run the commands given below One by One.
ipconfig /release

ipconfig /renew

netsh winsock reset

netsh int ip reset

ipconfig /flushdns

 ipconfig /registerdns
4 -Close the cmd window and try again.