Outlook is the first choice to track and manage office emails for millions of professionals around the world. The simplicity and efficiency of this mail processing client are top-notch. But, like other email management utilities, this is not completely bug-free. One of those error messages is this – “Outlook cannot log on. Verify you are connected to the network and are using the proper server and mailbox name.” This won’t let you in Outlook and literally, you can’t do anything unless you fix this issue.
Fix 1 – Run the Microsoft Support and Recovery Assistant
The first thing you should do is to use the Microsoft Support and Recovery Assitant tool.
1. Go to the Microsoft Support page.
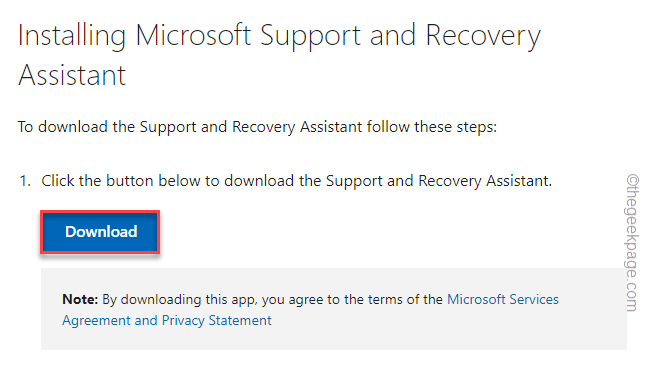
2. Scroll down to find the Microsoft Support and Recovery Assistant section. Tap “Download” to download the tool.
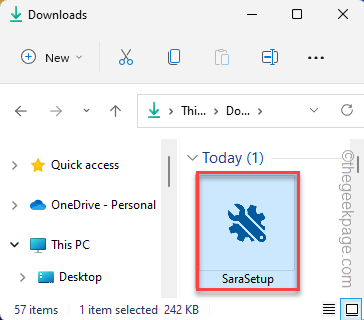
3. Now, just double-click the “SaraSetup” file to access it.
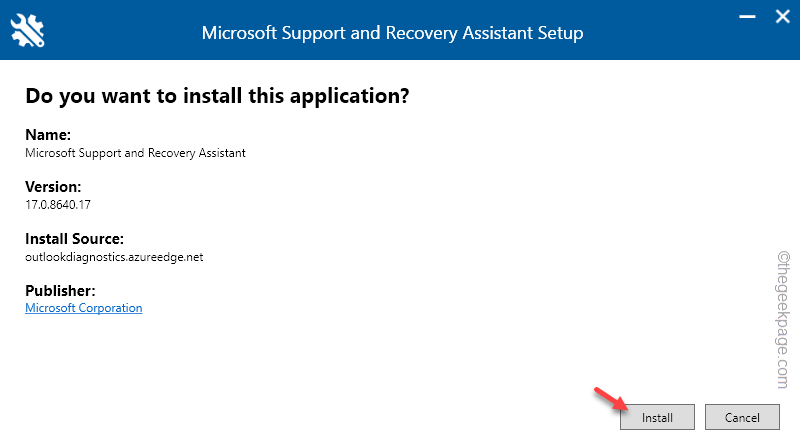
4. Now, tap “Install” to install the tool on your system.
This will just download and install the latest version of the Support and Recovery Assistant tool on your system. Just wait for a few minutes.
5. On the User Agreement page, click “I agree” to proceed further.
6. Now, on the next page, you will see the complete list of Microsoft softwares to select from. Select “Outlook” from that list.
7. Now, click “Next” to proceed.
8. Now you will be asked what issue you are currently facing. You can choose the issue from the options given on the tool like “I’m having problems with shared mailboxes.“.
9. Just tap “Next” to go to the next step.
10. Now, select “Yes” to run this tool on your device.
11. Then, choose “Next” to go to the next step.
12. You have to sign in using your Microsoft credentials. Use your email ID and password or use your account again.
13. Once you have logged in, this tool will scan Outlook for any issues and fix them.
After running this tool, launch Outlook and check if this works or not.
Fix 2 – Delete the mail account
You can delete the mail account from your system and re-connect it again.
Step 1 – Remove the account
1. Pressing the Windows key+R keys should bring the Run terminal.
2. Now, type “control” in the box and hit click “OK“.

3. You will notice the ‘View by:’ on the top-left corner.
4. Just set it to the “Small icons” option.
5. Among all the options, tap “Mail (Microsoft Outlook) (32-bit)” to open it.

6. On the Mail Setup-Outlook page, tap “Email Accounts…“.
7. In the Account Settings window, go to the “E-mail” section.
8. After that, select the account and click “Remove” to remove the account from there.
9. You will be asked to create an offline cached file. So, tap “Yes” to create a backup file.
Once the backup file it created, the mail account will be removed.
Step 2 – Add the account
Now, you can easily add your email account once again.
1. On the Account Settings page, head on to the “E-mail” tab.
2. You have to create a new account. So, tap “New…” to add your email account again.
3. Now, on the next page, you have to input your mail credentials in the particular boxes.
4. Next, tap “Next” to proceed to the next step.
Now, Outlook will just run some tests to confirm the completion of the process.
Optional Steps –
If you face any difficulty adding your IMAP or POP account, follow these steps.
1. Choose the “IMAP or POP” option. If you use the Exchange ActiveSync, you can choose the “Exchange ActiveSync” option.
2. Then, tap “Next“.
3. Now, write your email address, and passwords in the correct boxes.
4. After that, choose the “Existing Outlook Data File” option. Further, click on “Browse“.
5. Now, this is very important. Just, select the most current outlook data file that you have created while deleting the email account. Choose that file.
6. After that, tap “OK” to go forward.
This way, you can complete this process of re-adding the email account.
This will fix the issue you are facing with Outlook.
Fix 3 – Remove the profile
If removing the account doesn’t work, remove the profile.
1. Press the Win key and the R key.
2. Then, type “control” in the box and hit Enter.
3. Among all the options, click “Mail (Microsoft Outlook) (32-bit)” to open it.

4. Now, this time, tap “Profiles” to access it.
5. On the Mail page, tap “Add…” to add a new profile.
6. Write any profile name you want and click “OK“.
7. Just write your mail credentials in their designated boxes.
8. Next, tap “Next” to proceed to the next step.
This way, you can easily re-configure the outlook settings again.
Fix 4 – Run the Outlook in Safe Mode
1. Press Windows key+R to access the Run terminal.
2. To start Outlook in Safe mode, copy-paste this code and click on “OK“.
outlook.exe /safe
This will start the MS Outlook in safe mode, excluding any foreign add-ins.
Fix 5 – Repair Outlook
You can repair the Outlook.
1. You have to press the Win key and the X keys at once.
2. Then, tap “Apps and Features” to access it.
3. Once you are there, scroll down and look for your Office app.
4. Now, tap the three-dot menu and tap “Modify“.
5. In the Office page, opt for the “Quick Repair” to find a quick resolution of this issue.
6. Then, tap “Repair” to start the repair quickly.
After this, close the Settings page. Then, try launching Outlook once again. Test if this works.


