Driver Verifier Manager helps in monitoring the kernel mode drivers in Windows systems. The Driver Verifier Manger is also responsible to identify inappropriate calling of different functions that may harm the system.
Driver Verifier Manager helps to detect the improper working of various Windows drivers as it includes variety of stress tasks. Driver Verifier was launched as a command line utility application in the earlier version of Windows. However, Windows modified this application to a Graphical User Interface called the “Driver Verifier Manager” in which a user has the option to perform custom set of settings for testing and verifying drivers.
Whenever the Driver Verifier Manager detects a violation in its drivers, it initiates a bug check to stop the computer. It also provides different options for code developers as they use to test and verify various system drivers for proper working of their applications. So, it is versatile in nature.
Windows 10 possess different options to access Driver Verifier Manager; some of them are discussed below:
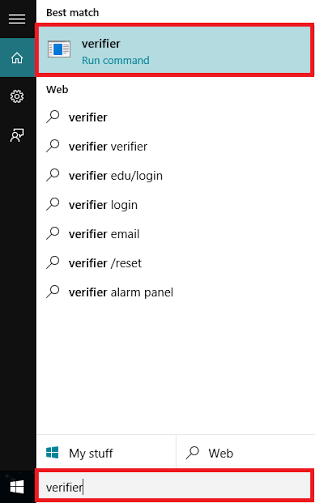
Option 1: Through Windows Search Bar
Type “verifier” in Windows Search Bar located on the lower left corner of your screen. Click on the first option provided.

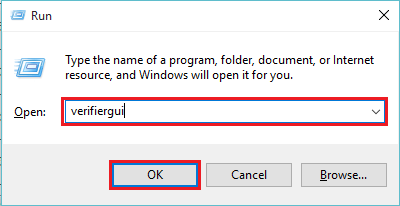
Option 2: Through Run Dialog Box
Press “Windows Key+R” to open the Run Command Dialog Box. Type “verifiergui” in the command line and Press Enter or hit “OK” button.

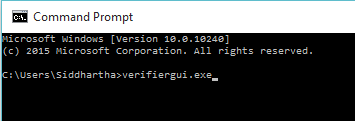
Option 3: Through Command Prompt
Enter “cmd” in the Search bar and press Enter key. This will open “Command Prompt” Window.
Type “verifiergui.exe” and Press Enter Key.

Option 4: Through Windows PowerShell
Type “powershell” in the Search box and press Enter key. Click on the first option provided.
Type “verifier.exe” in the Windows PowerShell Window and press Enter Key.
