Your PC desktop is the place where you can save anything from files, folders, apps to shortcuts. The desktop displays all of that, covering your entire PC screen which you see as soon as you login to your Windows 11 & Windows 10 OS. You can then organize the desktop as per your requirement.
While all the files, folders, and shortcuts on your PC are saved in a special location in your user profile, the latest Windows 10 version stores them in two different locations. The first one is stored under C:\Users\Public\Desktop, and the other one is stored in a unique location under your current user profile – %userprofile%\Desktop. You can see a single view of the contents of both these folders on your Windows screen as Desktop.
So, yes, if you want to move your personal desktop folder location to another folder, you can easily do that. Let’s see how.
Solution: Using Desktop Properties
Step 1: Press the Windows key + R together on your keyboard to open the Run box. Simply add a (.) in the search box and hit Enter.

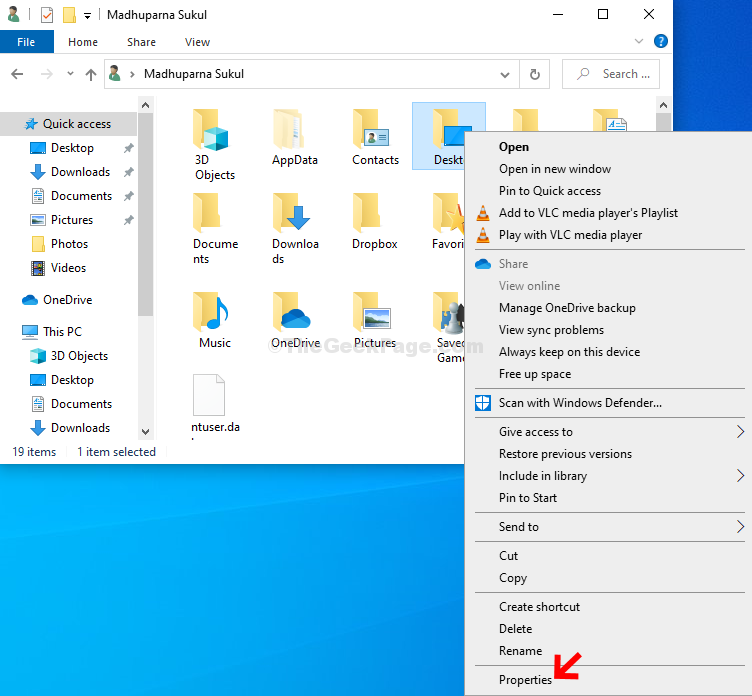
Step 2: It will open the default folders location of your PC. Now, right click on the Desktop folder and select Properties from the context menu.

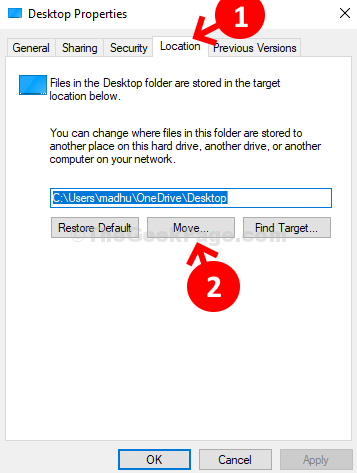
Step 3: In the Desktop Properties window, select the Location tab, and then under the space where you see the current location, click on the Move button.

Step 4: It opens up the File Explorer from where you can select the desired location where you want to move the Desktop folder to. You can create a new folder and move the Desktop to this new folder.

That’s it and now your Desktop folder location is moved to your desired location on your Windows 10 PC.