Windows 10 updates can change a lot of settings and one of them is the Power Plan. Many users find the Selected Plan as Balanced only after they go through a Windows update. There should be three default power plans – Power Saver, Balanced, and High Performance. But, most often after the update, you will find the other two default options missing. So, how do you bring them back? Here’s how.
Method 1: Restore Missing Power Plans using Command Prompt
Step 1: Click on Windows key and type Command Prompt in the search box. Right-click on the result and click on Run as Administrator to open the Command Prompt with administrator rights.

Step 2: In the Command Prompt window enter the commands below to restore the missing power plans and hit Enter.
powercfg -restoredefaultschemes
Step 3 – Close the command prompt window
Method 2 – Restore missing default Power plans
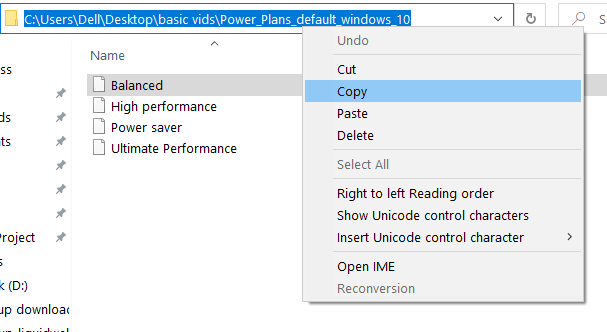
1. Download Default power plans in zip format from the link given below.
Power_Plans_default_windows_10_Download
2. Now, Extract the file to any location on your PC.
3. Now, search cmd in windows 10 search box and right click and choose run as administrator for search result.

4. Now, Run the command given below in command prompt.
I will run four codes namely
powercfg -import  "path of the folder\Ultimate Performance.pow"

powercfg -import "path of the folder\Power saver.pow"

powercfg -import "path of the folder\High performance.pow"

powercfg -import "path of the folder\Balanced.pow"
Where path of the folder will the path of the folder which you have just extracted in which these four files are there.

Method 3: Restore Missing Power Plans in Windows 10 using Command Prompt
Step 1: Click on Windows key and type Command Prompt in the search box. Right-click on the result and click on Run as Administrator to open the Command Prompt with administrator rights.

Step 2: In the Command Prompt window enter the commands below to restore the missing power plans and hit Enter.
Power saver:
powercfg -duplicatescheme a1841308-3541-4fab-bc81-f71556f20b4a
Balanced:
powercfg -duplicatescheme 381b4222-f694-41f0-9685-ff5bb260df2e
High Performance:
powercfg -duplicatescheme 8c5e7fda-e8bf-4a96-9a85-a6e23a8c635c
Ultimate Performance
powercfg -duplicatescheme e9a42b02-d5df-448d-aa00-03f14749eb61
Now that you are done, you can see the default power plans as the changes are effective immediately.
Method 4: Restore Missing Power Plans using Connected Standby in Regedit
Step 1: Press Windows key + R to open the Run box. Type Regedit in the search box to open the Registry Editor.

Step 2: In the Registry Editor window, navigate to the below path:
HKEY_LOCAL_MACHINE\SYSTEM\CurrentControlSet\Control\Power
On the right-hand side pane, double click to open the DWORD value CsEnabled to make changes.

Step 3: Modify the Value Data field to 0 to enable the default power plan options from 1 (disabled), and press OK to save the changes.

Step 4: Exit from the Registry Editor and reboot your computer for the changes to be effective. You will now find the three default power plans.

Hope your issue has been resolved
Method 5 – Create a Power plan
1. Press Windows key + R together to open run.
2. Write powercfg.cpl in it and click OK.

3. Click on Create power Plan at the top left menu.

4. Now, choose a power plan type and click on next

5. Now, choose settings for this custom created power plan.

6. Click on Create